Managing Spaces
Create a Space Wizard
Click the Create Space button to display a dialog to configure the selected space.

Important
This function can only be performed by a Hub Administrator
Navigating the Wizard

|
Click the close button to exit the wizard. Changes are not saved. |

|
Click the Next button to advance to the next page of the wizard. The Next button is disabled until all required page elements are completed. |

|
Click the Go Back button to return to the previous wizard page. |

|
Click the Finish & Create button to apply the changes displayed on the wizard summary page. |
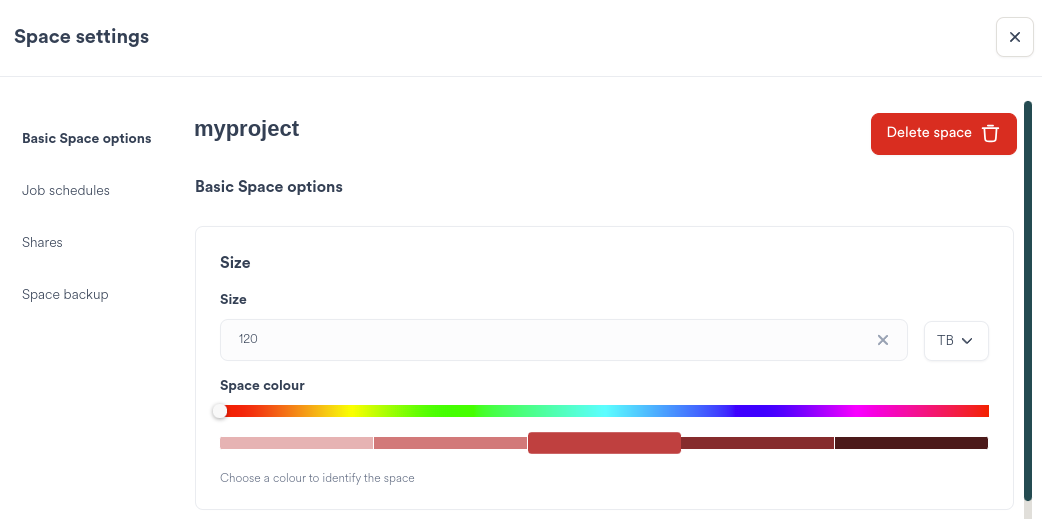
Basic Space Options
Spaces are created on pixstor file systems at /mmfs1/data/[Space] or at an alternative custom location.
Spaces can be restricted to a limited amount of data.
Spaces are defined to a specific file system.
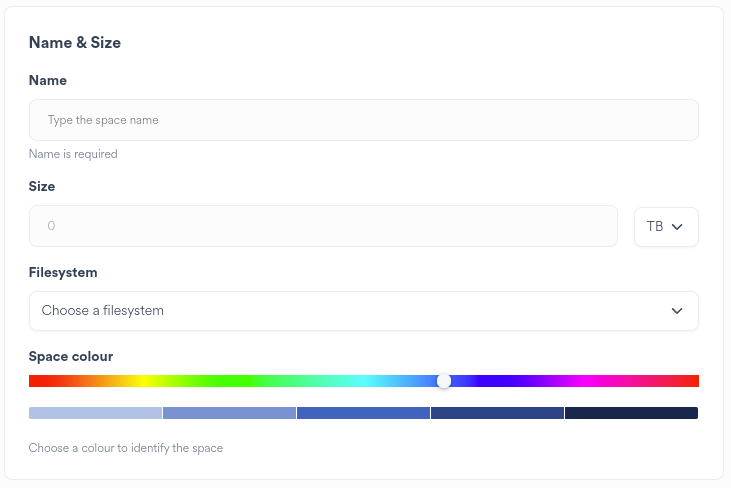
Enter a name of the Space. The name is case-sensitive.
Choose the data limit for the Space or unrestricted (Size = 0)
Select the file system the Space will reside on across all pixstors
Select a colour for the Space Card
Snapshots create safety copies of data on the pixstor file system.
Snapshots are not backups and should not be used as protection against media failures
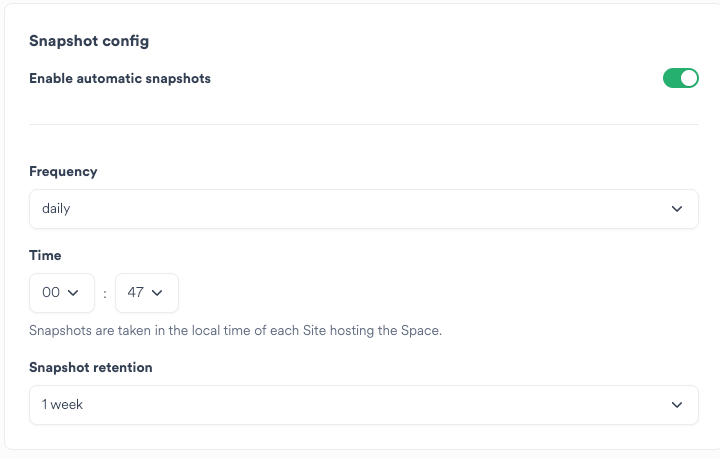
Choose whether snapshots are required for the Space
Choose the frequency of the snapshot
If the frequency is daily or longer, select the time of day on the Site to snapshot the Space
Snapshots are scheduled and taken based on the local timezone of each Site where the Space is hosted
Choose how long to retain the snapshots
Select the Sites to create this Space on
A Space can exist across multiple Sites.
By default data does not move across multiple Sites. Scheduled workflows must be set up to enable cross-site data movement.
Hub provides the ability to synchronise a Space with two Sites - a bi-directional sync.
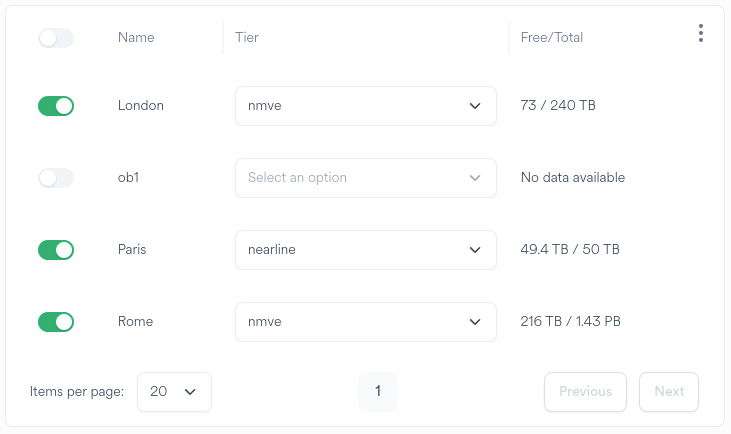
Select the Sites on which to create the Space
Select the pixstor file system tier on which to host the files for the Space. The tier is limited to those available for the file system selected in the prior wizard screen.
If two Sites are selected the Wizard will prompt to setup a bi-directional sync.
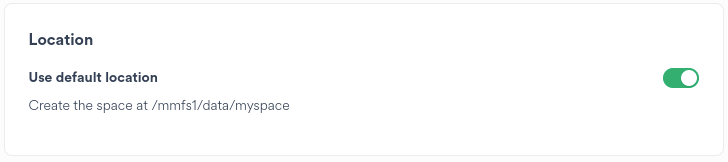
To select an alternative custom location, deactivate the Use default location slider
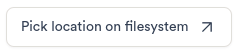
|
Click the Pick location on filesystem button to open the location selector |
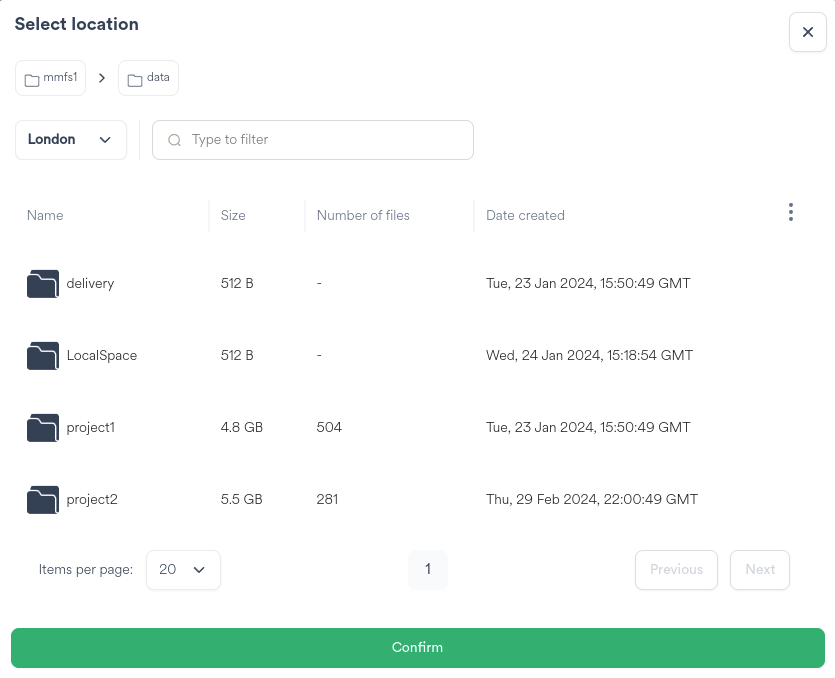
Select a Site to browse. Parent directories not present on another Site will be added when a Space is created.
Navigate to the directory under which to create the Space
Click the Confirm button to return to the Space creation wizard
The chosen location is displayed and will be used for all Sites on which the Space is created.
Set up bi-directional sync
If two Sites are selected on the prior wizard page, Hub prompts to setup a bi-directional sync.
Only one bi-directional sync can run at a time.
This page can be skipped if no synchronisation is required.
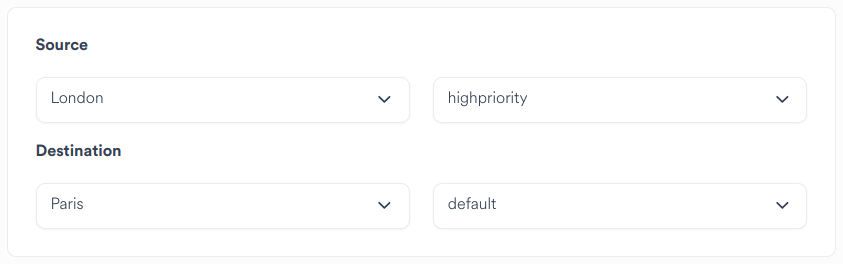
Select the source Site to launch the first sync from
Select the other Site as the destination site
Select the Queue(s) to assign bi-directional sync to
Schedule
Determine the required frequency of the synchronisation.
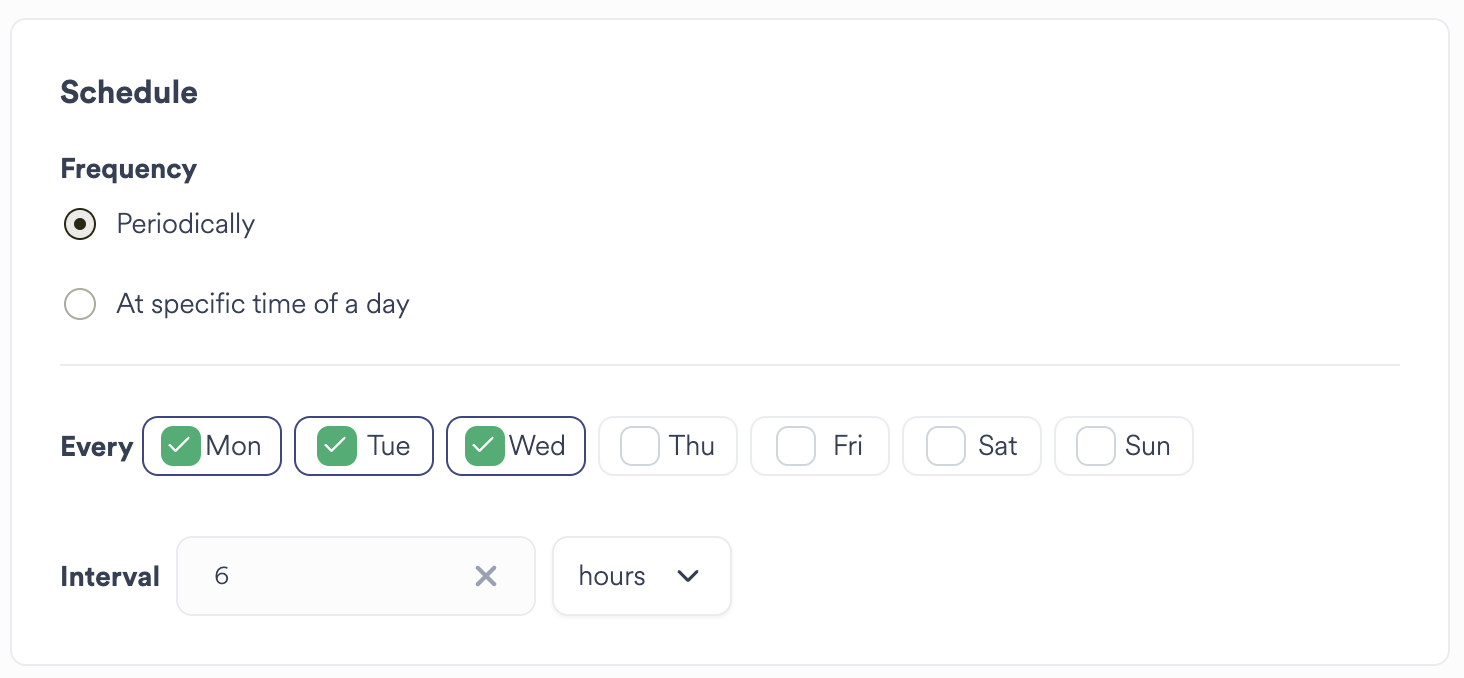
Choosing Periodically will ensure that the schedule will run on the next interval set.
E.G:
1 hour: The synchronisation will run on the next hour (12.00, 13.00)
15 mins: The synchronisation will run on the next 15 minute interval past the hour (15, 30, 45, 00)
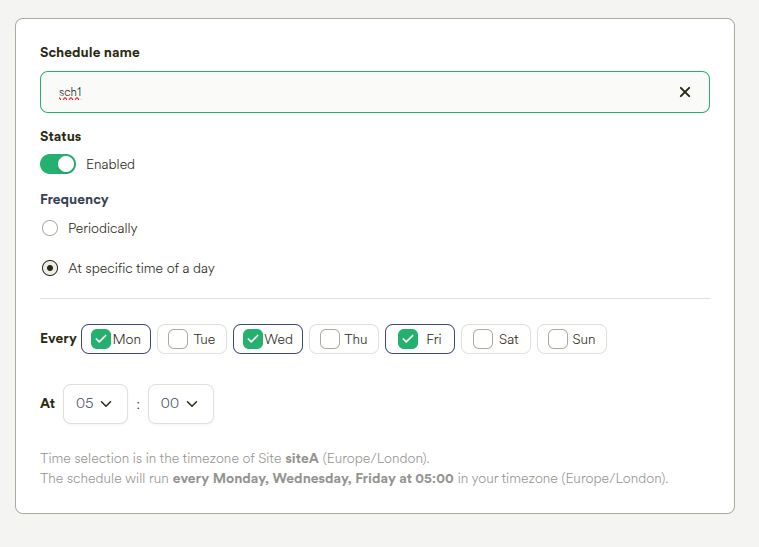
Choosing At Specific Time of A Day allows the Policy to be scheduled once per chosen day at a specific time of day.
Hint
The schedule time is set in the Site’s local timezone, but will be stored in the UTC timezone.
Ngenea bucket
Select a pre-defined Bucket or choose to Add a new Bucket to associate with the Space.
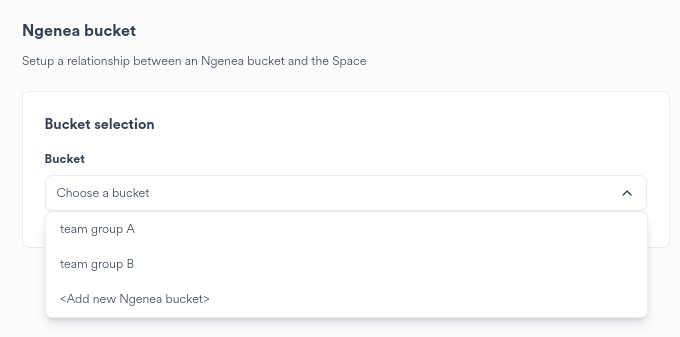
Select a pre-defined bucket for this Space
Choose to add a new bucket for the Space
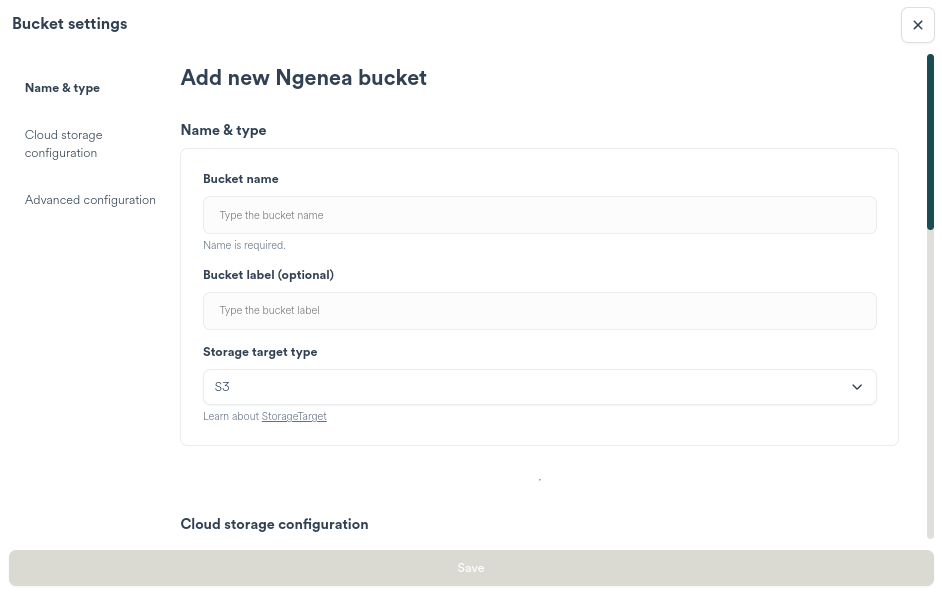
Adding a New Bucket
Adding a new Bucket raises the Add new Ngenea Bucket dialog.
See Ngenea for more details.
Selecting a Pre-defined Bucket
Selecting a pre-defined Bucket displays the chosen Bucket in the Bucket drop down.

External target details
After either adding a new Bucket, or selecting a pre-defined Bucket the External target details are generated for the Space to review and configure as required.
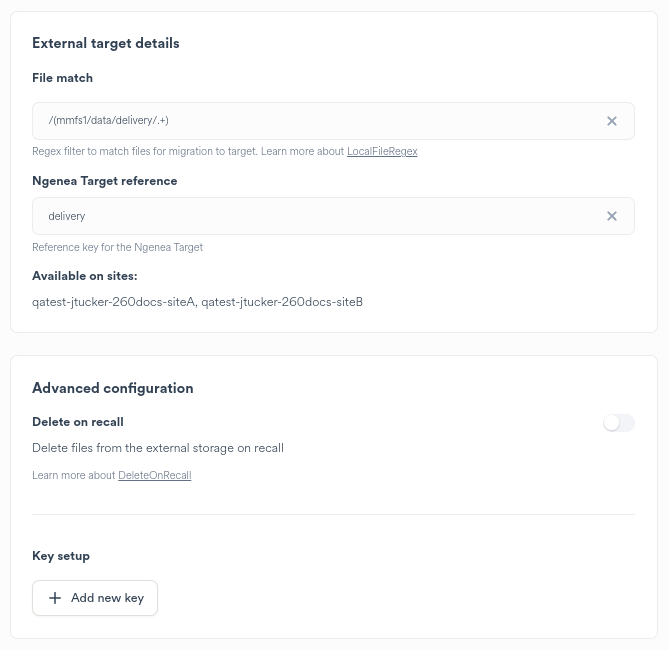
Review the external target details and configure as required
See Ngenea for more details
Spaces backup
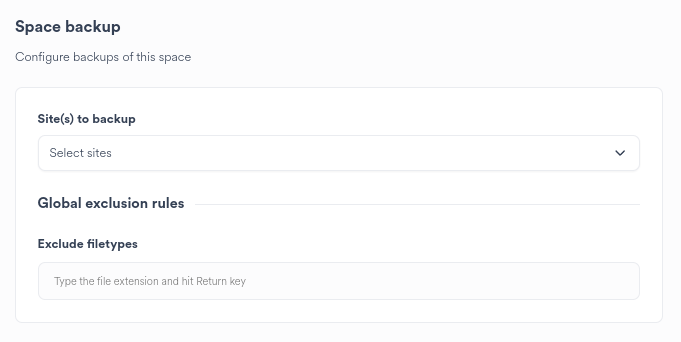
Select the Sites which will perform backups for this space
Define file extensions which must be excluded from backups across all Sites. E.G.
*.tmp
Choosing Site(s) to backup presents further backup options.
For more information refer to Backups.
Important
Multiple Sites are not permitted to backup to the same Ngenea Target.
Updating a Space
Settings can be modified as required.

|
Clicking the Settings button on the Space card raises the Settings dialog for the Space. |
Important
Adding or Configuring a Space can only be performed by a Hub Administrator or User with Space Administration rights granted through group management.
Schedules
Click the Job Schedules menu item on the Space settings dialog.
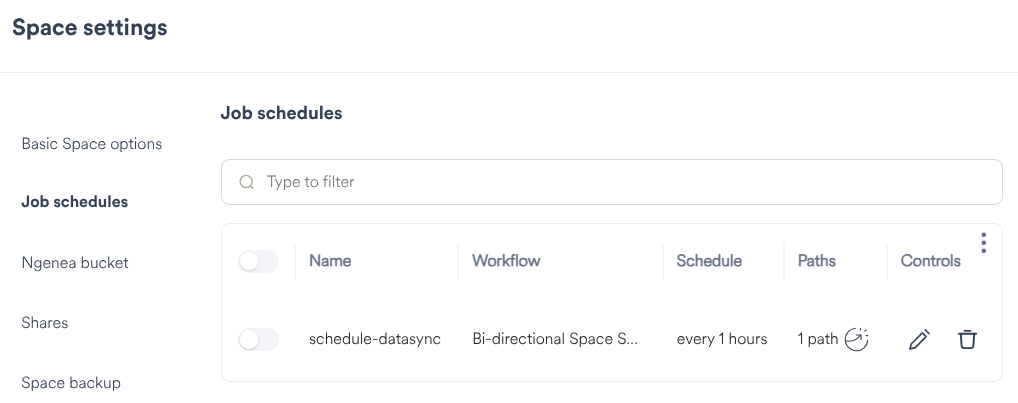
The Schedules for the Space are viewable.
Editing a Schedule

|
Click the Edit button for the Schedule to be modified |
Clicking the Edit button raises the Update job schedule dialog.
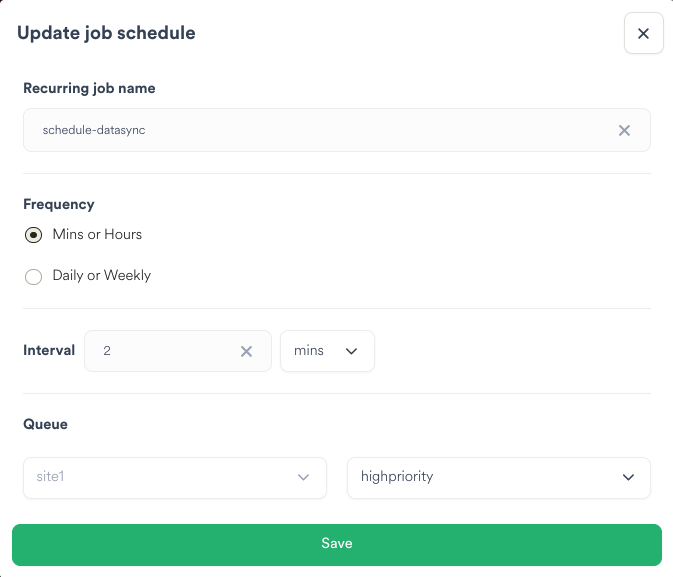
Modify the desired Schedule settings
Click the Save button to store the modified Schedule settings
Clicking the Save button at the bottom of the Space settings dialog saves any changes made.
Deleting a Schedule

|
Click the Delete button for the Schedule to be deleted |
Tip
Deleted Schedules are non-recoverable. If a Schedule has been inadvertently removed, do not press the Save button, instead click off the Space settings dialog to the main area of the screen.
Clicking the Save button at the bottom of the Space settings dialog saves any changes made.
Deleting a Space
|
|
Clicking the Settings button on the Space card raises the Settings dialog for the Space. |

|
Clicking the Delete Space button raises a confirmation dialog |
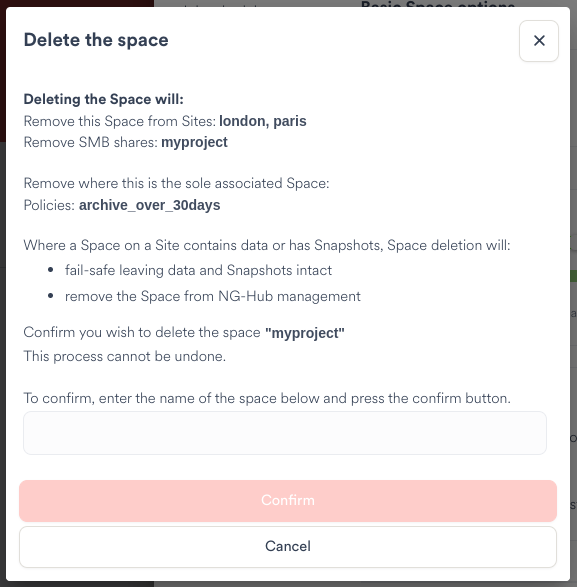
The delete confirmation dialog describes what will happen when the space is deleted, including what associated objects will also be removed.
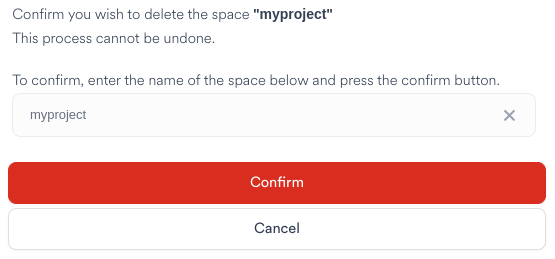
Type the name of the space into the text input to activate the Confirm button.

|
Click the Cancel button to close the confirmation dialog. The space will not be deleted. |

|
Click the Confirm button to delete the space. |