Sites
A site is a physical or cloud based pixstor server managed by Hub.
Filtering Sites
To filter for a site within the list of sites enter a keyword in the Search for…
The displayed sites is limited to the sites which match the keyword(s).
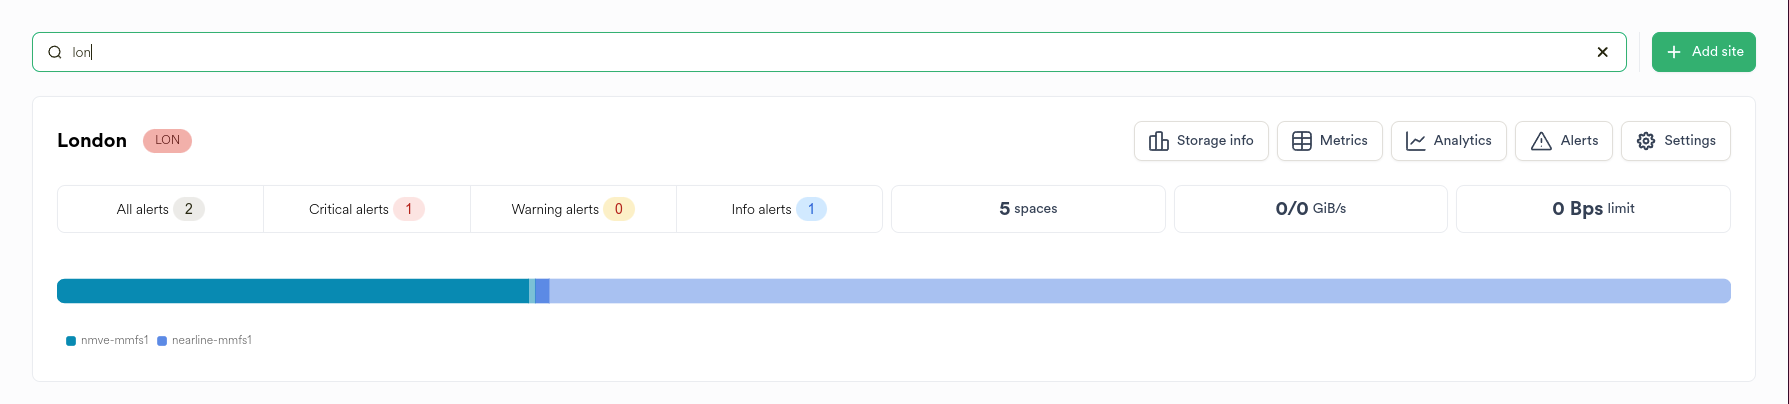
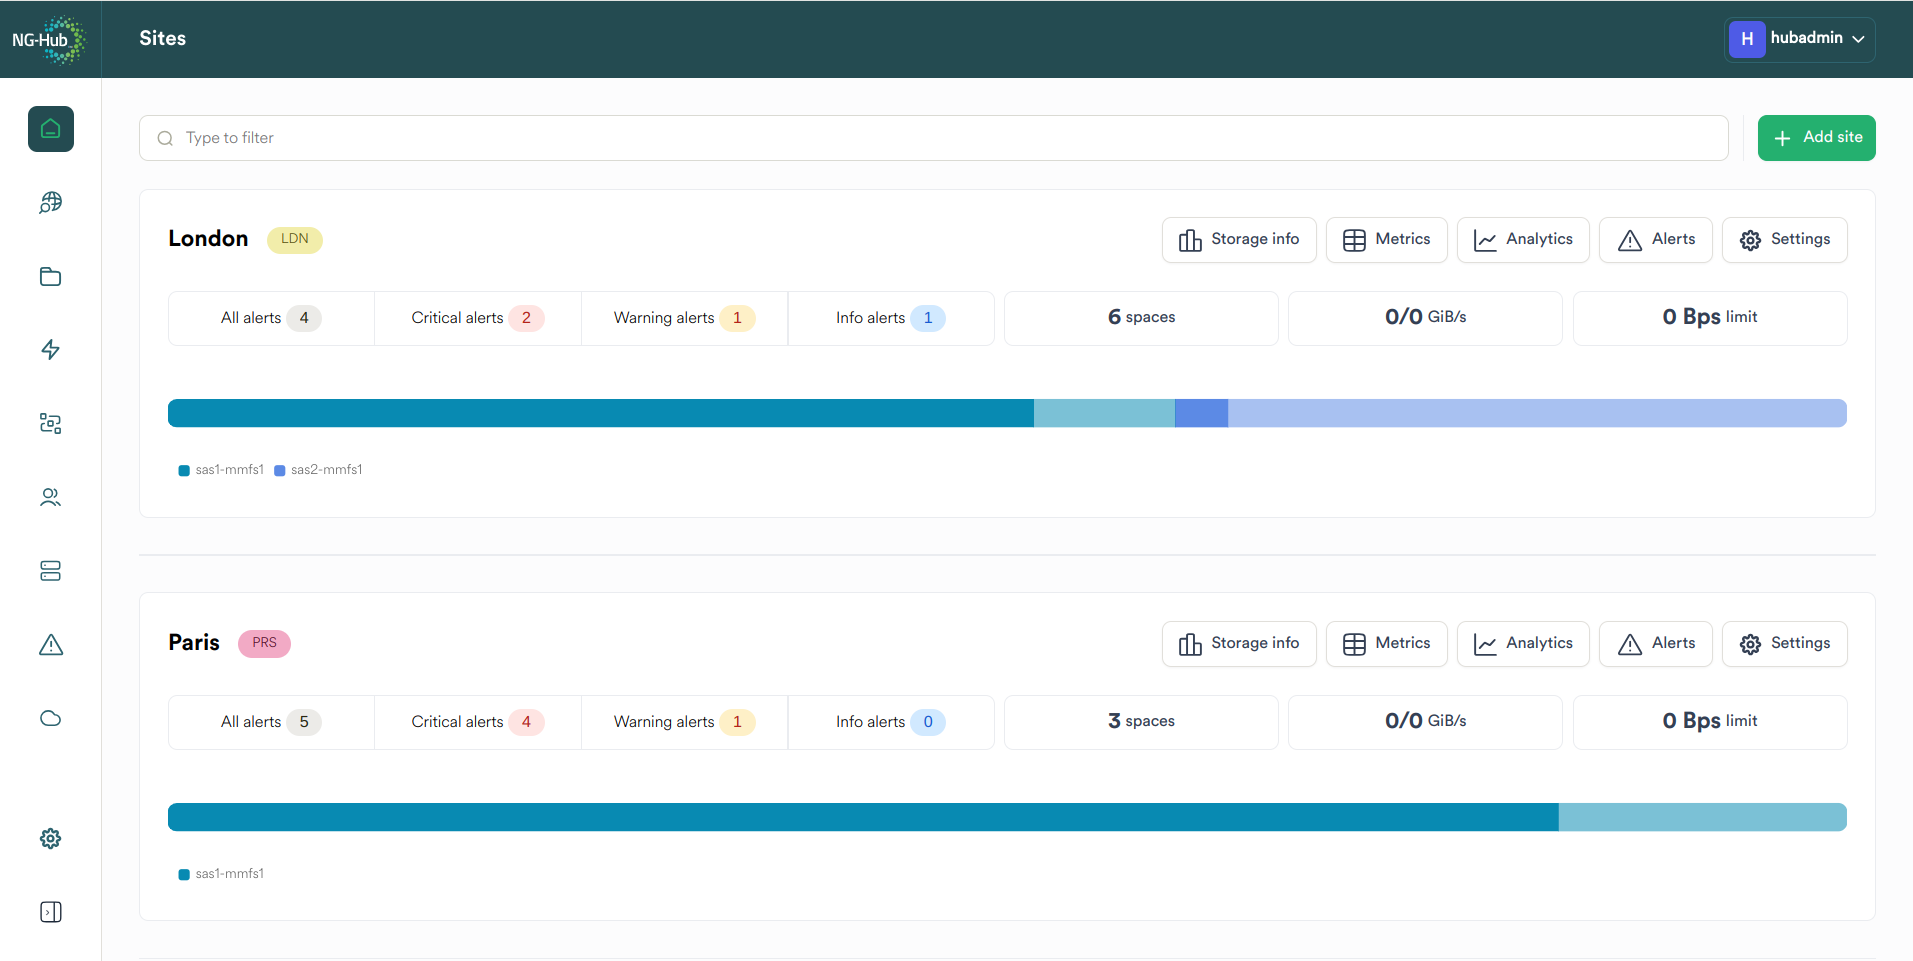
The Site Card
Each site is displayed as a site card.
A Site is displayed as a card in the Sites view.

A Site Card comprises:
Site Name

|
Displays the designated friendly name of the site with the Ngenea site chip |
Site Summary
The site summary displays high level totals for the number of files and folders present, the Ngenea hydrated and dehydrated states and the number of Spaces the site hosts.

Alert Types
Numbered filter buttons display the count of each type of Alert for the Site.
Select a button to open the Alerts for the Site, filtered for the specific Alert type.

|
Click the All alerts button to view all alerts |

|
Click the Critical alerts button to filter for all Critical alerts |
|
Click the Warning alerts button to filter for all Warning alerts |
|
Click the Info alerts button to filter for all Info alerts |
Storage Info

|
Click the Storage info button to open the Storage Info browser for the Site. |
Site Metrics

|
Click the Metrics button to open the pixstor nexus site metrics in a new browser tab. |
Site Analytics

|
Click the Analytics button to open the pixstor nexus site analytics in a new browser tab. |
Site Alerts

|
Click the Alerts button to open the Alerts for the Site. |
Bandwidth Control
The bandwidth of a site can be limited to a defined value via the UI. The current value is observed on the bandwidth limit button.

|
Click the bandwidth limit button to display the bandwidth control dialog. |
The bandwidth control dialog allows limiting the bandwidth of a site to a defined value. Enter the limit in Megabits per second (Mbps) and press Save to apply the limit.

Hint
If the bandwith for a site has been inadvertently set do not press the Save button, instead click off the Bandwith limit dialog to the main area of the screen.
Important
This function can only be performed by a Hub Administrator.
Settings
Important
This function can only be performed by a Hub Administrator.

|
Click the site’s Settings button to display a dialog to configure the selected site. |
Modify the Site settings as required. Refer to Adding a Site for settings guidance.
Pool Space
One or more pixstor storage pools which comprise the pixstor file system are represented.
Hovering over the pool percentage bar provides the remaining capacity for the pool.

Adding a Site
Add Site Wizard
Hub allows remote configuration of all participating pixstor sites.
New sites are automatically joined to Hub awaiting optional configuration via the Site Wizard.
Navigating the Wizard

|
Click the close button to exit the wizard. Changes are not saved. |

|
Click the Next button to advance to the next page of the wizard. The Next button is disabled until all required page elements are completed. |

|
Click the Go Back button to return to the previous wizard page. |

|
Click the Finish & Create button to apply the changes displayed on the wizard summary page. |
Add Site

|
Click the Add site button to display a dialog to configure the selected site. |
Important
This function can only be performed by a Hub Administrator.
Pick site to configure
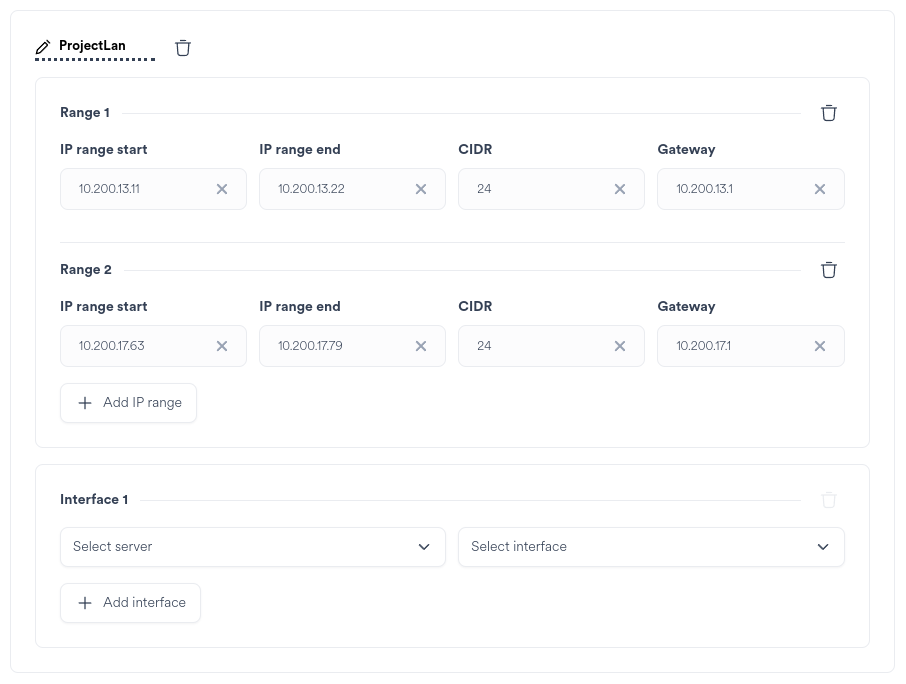
Sites which have been automatically registered to Hub but not yet configured are shown:

Select a site to configure
|
Click the Configure this new site button to proceed |
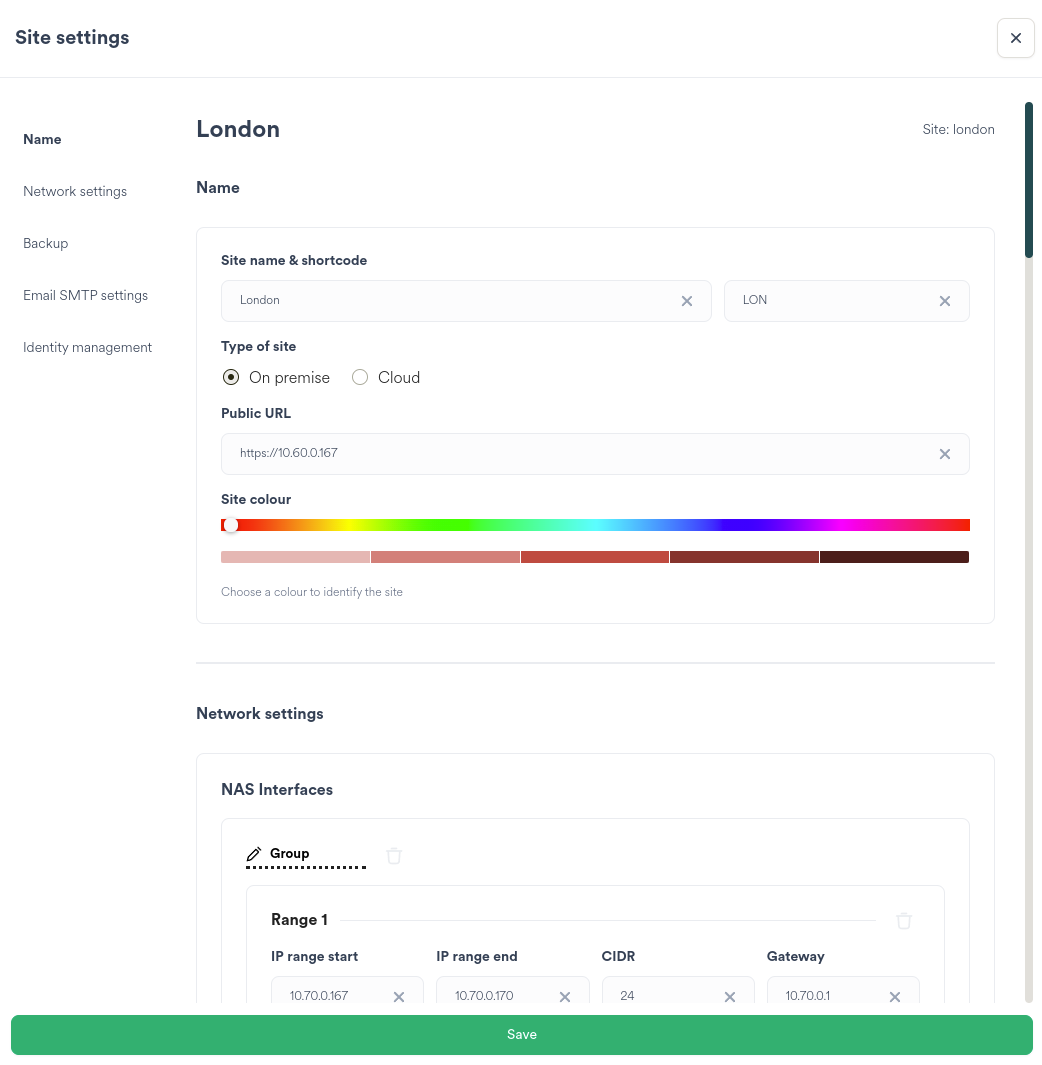
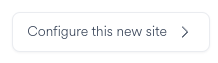
Site Name
Provide a friendly name for the Site
Provide a 3 character short code for the site. The shortcode is displayed as the label on the Site’s chip. E.G. LDN for London
Specify whether the site is on-premise or a pixstor cloud deployment. Each site type provides different Network Setting options.
Provide the URL IP or FQDN which refers to the pixstor management node of the Site
Select a colour for the Site chip
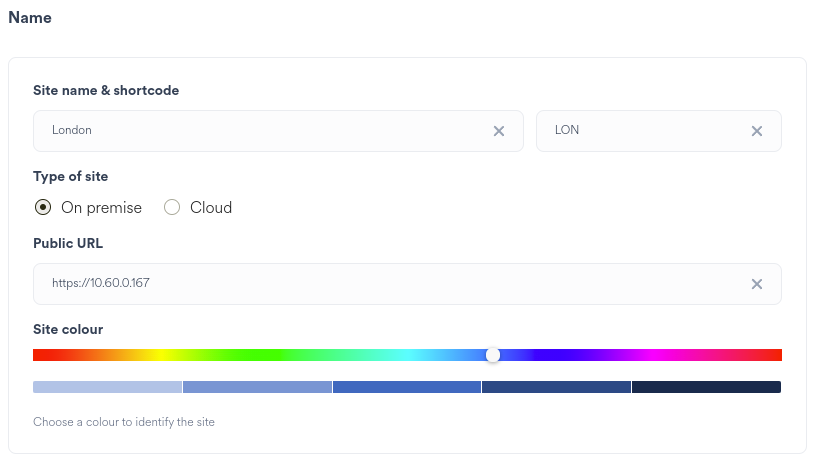
Network Settings (On premise)
Add the required IP address or network range and specify a valid CIDR mask to apply the restriction
Specify a gateway, if required
Select the server(s) and interface(s) of the server where the IP range will be configured
|
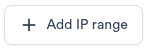
Click the Add IP range button to add additional restrictions |
|
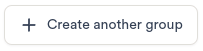
Click Create another group to add additional IP range to interface mapping groups |

|
Click the delete button to remove an IP range or Interface group |
Network Settings (Cloud & General)
pixstor cloud systems use predefined network architectures.
Unlike on-premise pixstor systems there is no requirement to create IP ranges or interface groups. IP addressing is externally managed by the cloud / virtual environment.
Both on-premise and cloud systems share common network configuration for DNS, Timezone and NTP.
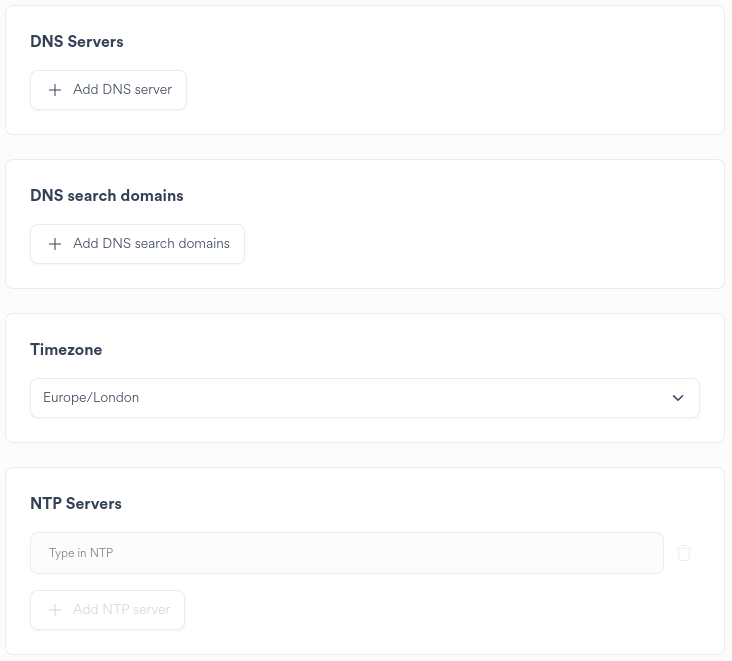
Specify the IP address or FQDN hostname of one or more DNS servers
Specify one or more DNS search domains
Specify the Timezone in which the server resides, or will participate in
Specify the IP address or FQDN hostname of one or more DNS servers
Hint
If the pixstor site will be joined to an external Identify Mapping service such as Active Directory or LDAP, best practice is to ensure that the DNS and NTP servers match those of the service, or point at the service hosted DNS and NTP if it provides such capabilities. Should the pixstor become out of time sync with the Identify Mapping service login failures can occur.
Backup
pixstor provides the capability to backup data within a Space on a per-Site basis to specific Ngenea Targets.
Hub enables configuration to be set for the Ngenea Backup service running on pixstor sites.
If the Site is enabled to participate in backups, each Space requires additional configuration to enable the per-Space backup.
For more information refer to Backups.
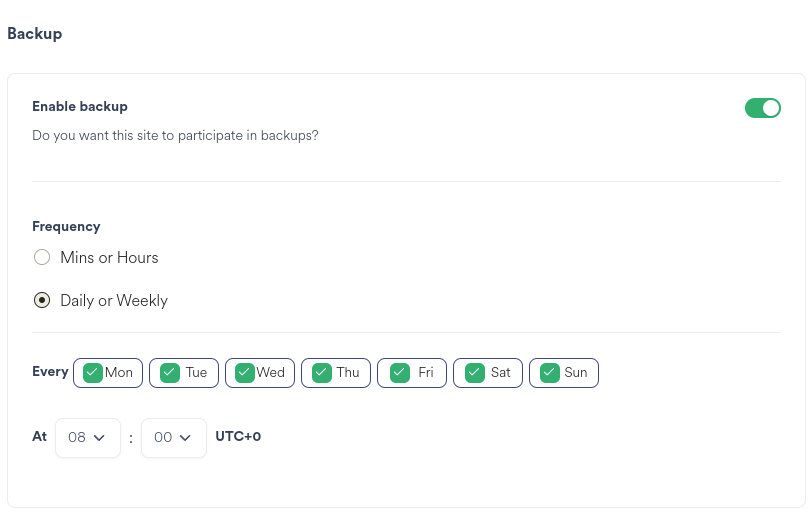
Determine the required frequency of the backup.
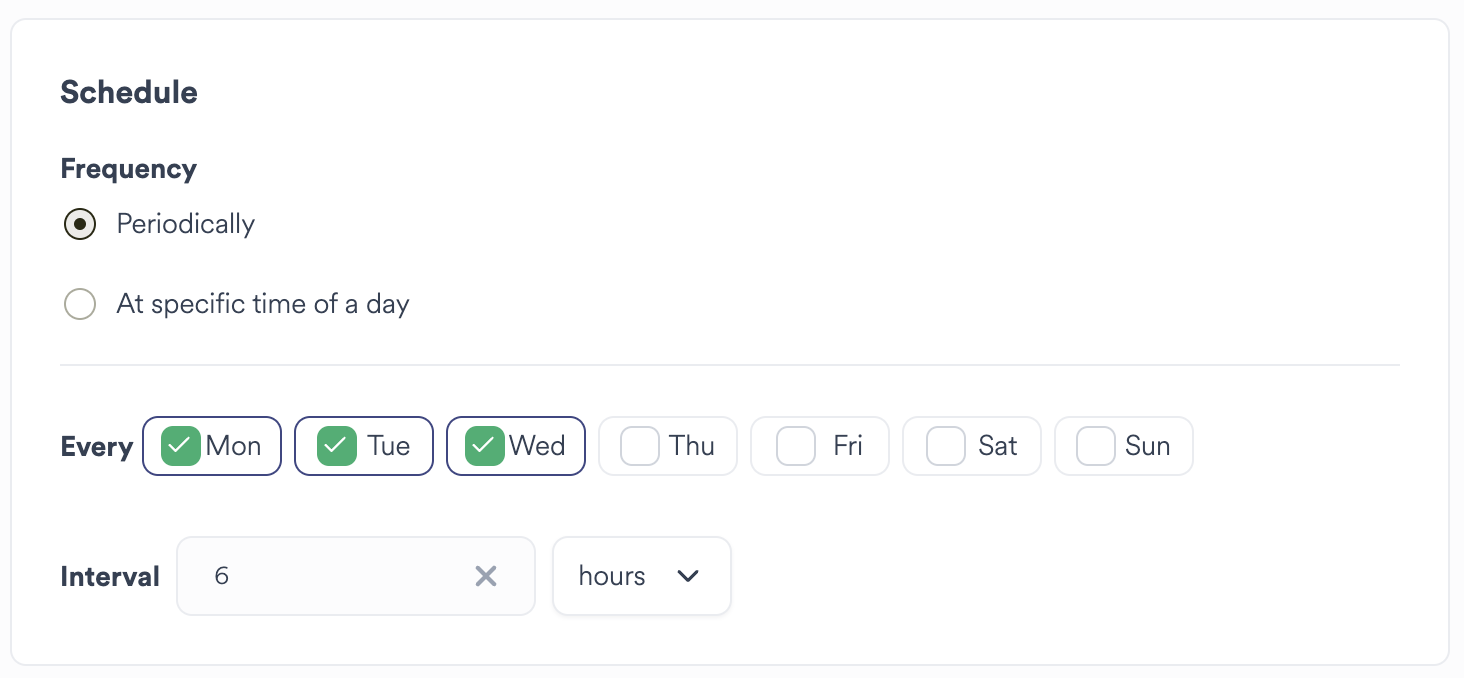
Choosing Periodically will ensure that the schedule will run on the next interval set.
E.G:
1 hour: The backup will run on the next hour (12.00, 13.00)
15 mins: The backup will run on the next 15 minute interval past the hour (15, 30, 45, 00)
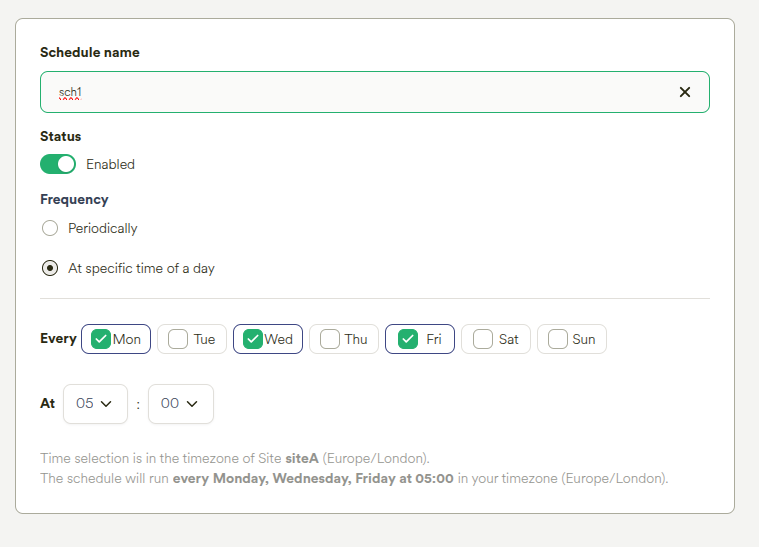
Choosing At Specific Time of A Day allows the Policy to be scheduled once per chosen day at a specific time of day.
Hint
The schedule time is set in the Site’s local timezone, but will be stored in the UTC timezone.
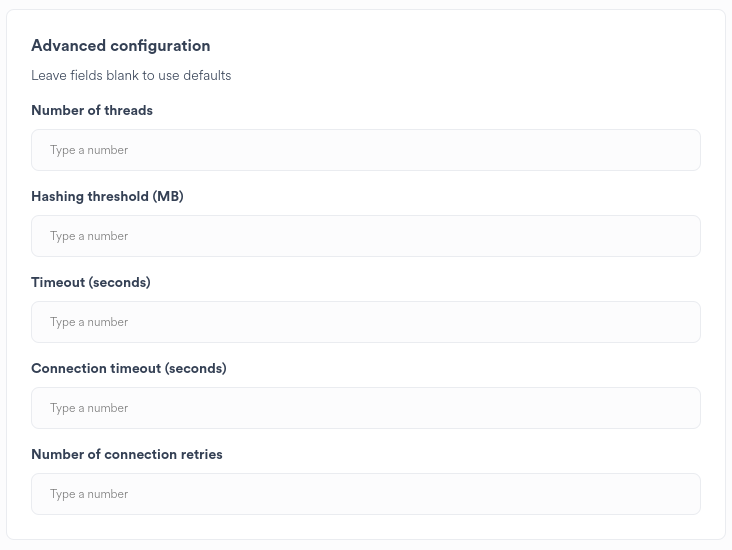
Optional tuning can be set for the backup operation in the Advanced Configuration.
Refer to the Ngenea Backup documention prior to applying any parameters.
Email SMTP Settings
pixstor provides the capability to notify an inbox if service issues arise.
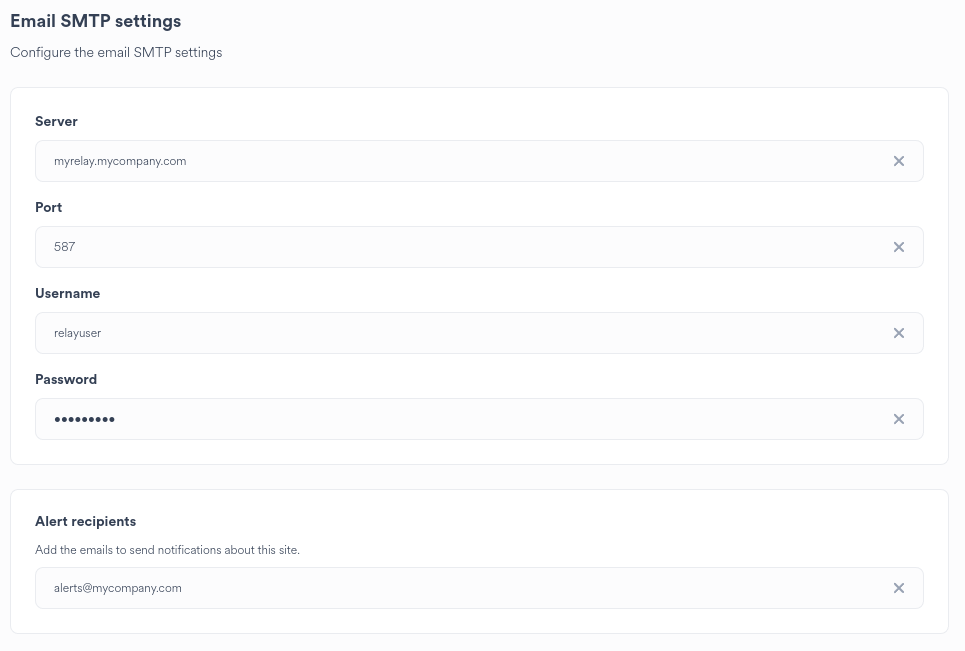
Specify the SMTP configuration of an email server to which to send notification emails
Specify one or more valid email addresses to receive the notification emails
Identity Management
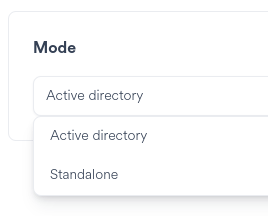
Specify the Identity Management mode as appropriate:
Mode |
Description |
|---|---|
Active Directory |
pixstor uses RFC2307 compliant identity mapping with Active Directory |
Standalone |
pixstor generates local UIDs and GIDs mapped to Active Directory SIDs |
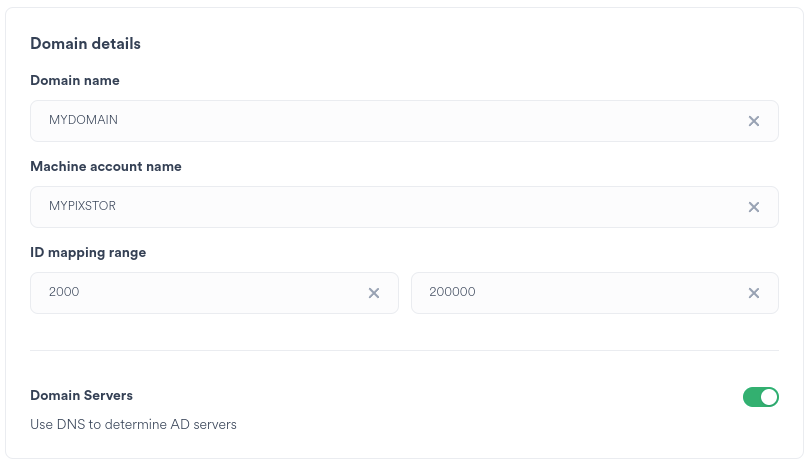
Specify the Domain to join
Specify the Machine account name
Specify the ID range to map to
Specify whether to use DNS to locate an Active Directory Domain Controller or alternatively specify an IP address or hostname
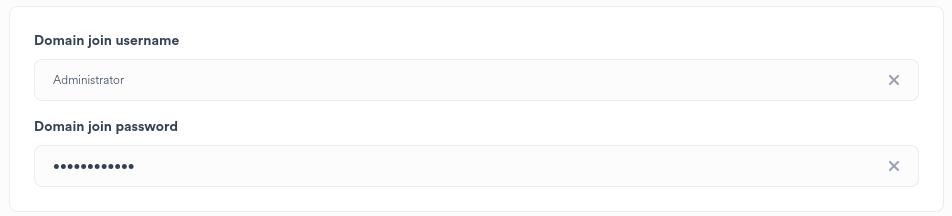
Specify a valid username and password with domain join capability
Workflow
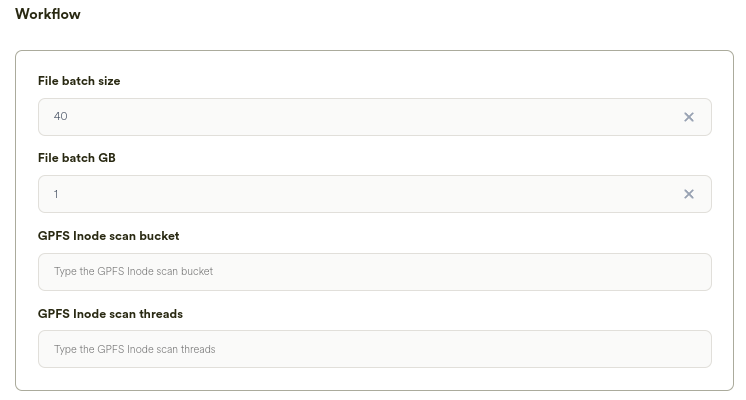
File Batching
Whichever limit results in a smaller batch size applied. For examples given 100 files of 500MB each, a File batch GB of 1 and a File Batch Size of 10 will result in 50 batches of 2 files each (1GB total per batch), because 1GB (2 files) is smaller than 10 files (5GB).
File batch settings apply to all workflows run on a Site.
Alternatively enable Dynamic File Batching.
For more information refer to the Administration Guide.
Specify the File batch size
Hint
Default = 40. Increasing this value reduces the number of tasks processed in a job. Reduction of tasks in a job, for the majority of workflows, reduces the total time for the job to run due to decreasing the total task processing overhead. It is extremely recommended to start with small values and increase based on observation of system load and resources and adding too many files to collate into a single task can cause the task payload to be rejected by Hub due to the size of the payload.
Specify the File batch GB
Hint
Default = 1. Increasing this value causes more files to be added to a task upto the total file size specified, after which subsequent files are added to the next task, and so on.
GPFS Inode Scanning
Specify the GPFS Inode Scan bucket
Hint
Default = auto-generated per scan. The number of bucketed groups of collated inodes to be processed by the parallel scanner. An optimal value is the total number of files to be scanned divided by one million so each bucketed inode group has approximately one million files.
Specify the GPFS Inode scan threads
Hint
Default = 2. The number of inode scan threads. Setting this value to the number of CPU cores can provide optimal performance with non-contending workloads. It is extremely recommended to start with small values and increase based on observation of system load and resources.
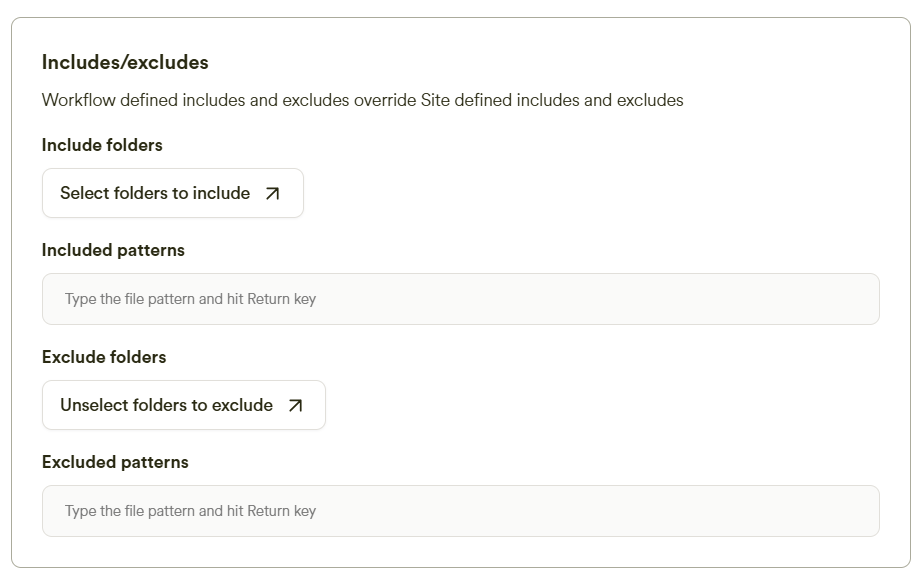
Select folders to include in the workflows run on the Site
Specify file pattern which should be included
Select folders to exclude in the workflows run on the Site
Specify file pattern which should be excluded
Summary
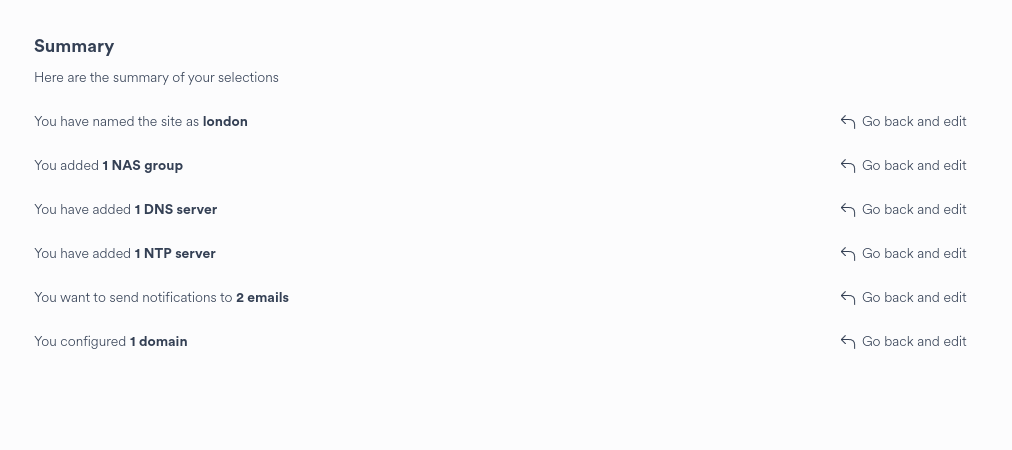
Upon completing the wizard steps a summary is presented:
|
|
Click the Finish & Create button to apply the changes displayed on the wizard summary page. |
Alternatively Go back and change the proposed configuration as required or close the wizard to cancel the creation of the Ngenea target.