Policies
Hub provides the capability to perform actions to data via Policies.
Policies comprise criteria, conditions and triggers which are applied to data within one or more Spaces residing on a Site.
Viewing Policies
To view available Policies, click the Policies menu button.

|
Navigates to the Policies screen |
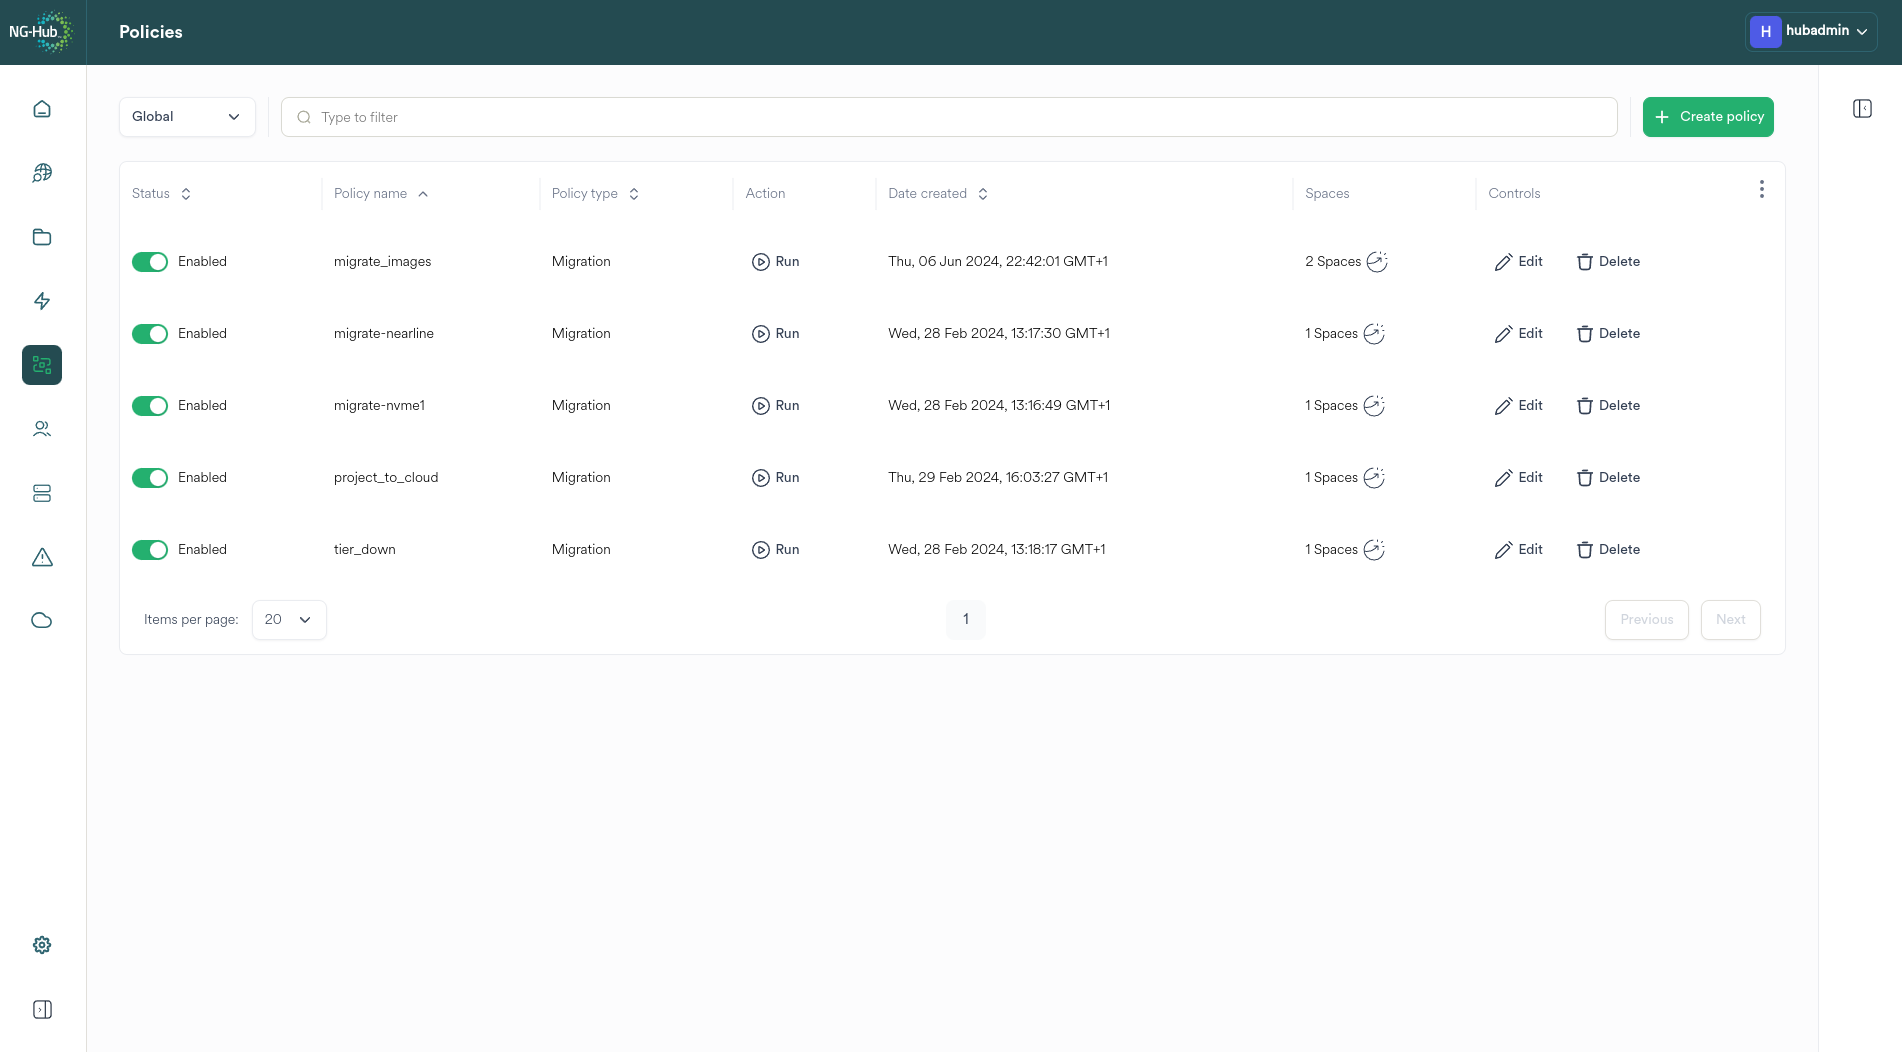
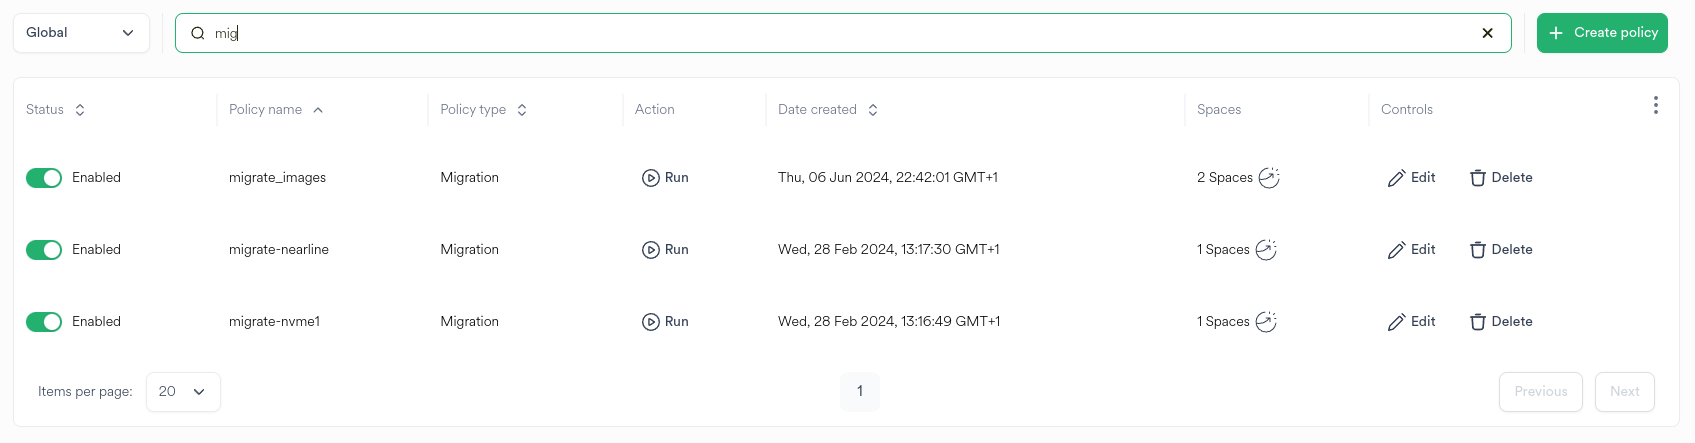
Filtering the Policies View
To filter the list of Policies, type the Policy name or part of a Policy name in the filter bar.
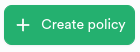
Adding a Policy
Click the Create Policy button to display a dialog to configure the Policy.
Important
This function can only be performed by a Hub Administrator
Creating a Policy Wizard
Navigating the Wizard

|
Click the close button to exit the wizard. Changes are not saved. |

|
Click the Next button to advance to the next page of the wizard. The Next button is disabled until all required page elements are completed. |

|
Click the Go Back button to return to the previous wizard page. |

|
Click the Finish & Create button to apply the changes displayed on the wizard summary page. |
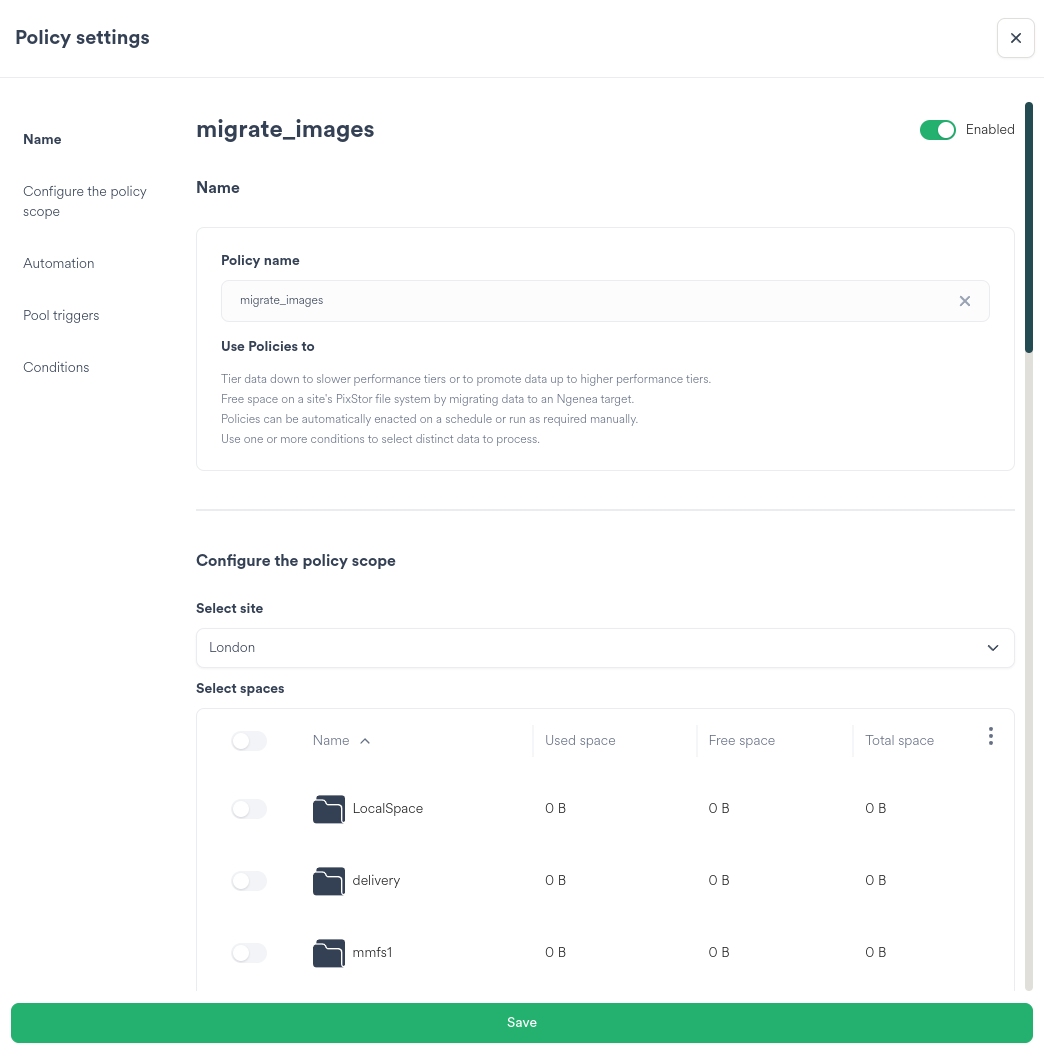
Name
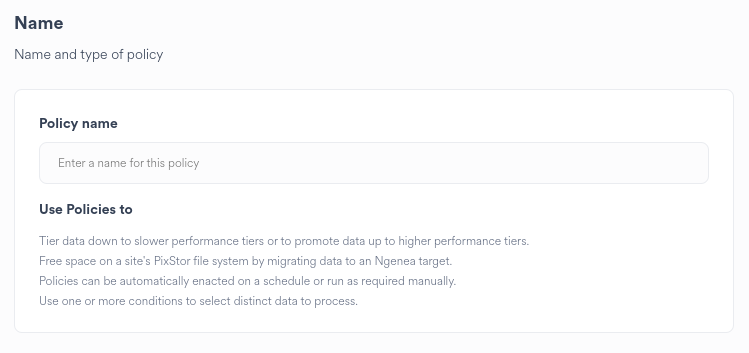
Provide a descriptive name for the Policy
Scope
The same Policy can run against one or more Spaces concurrently for a Site.
Policies are specific to a Site.
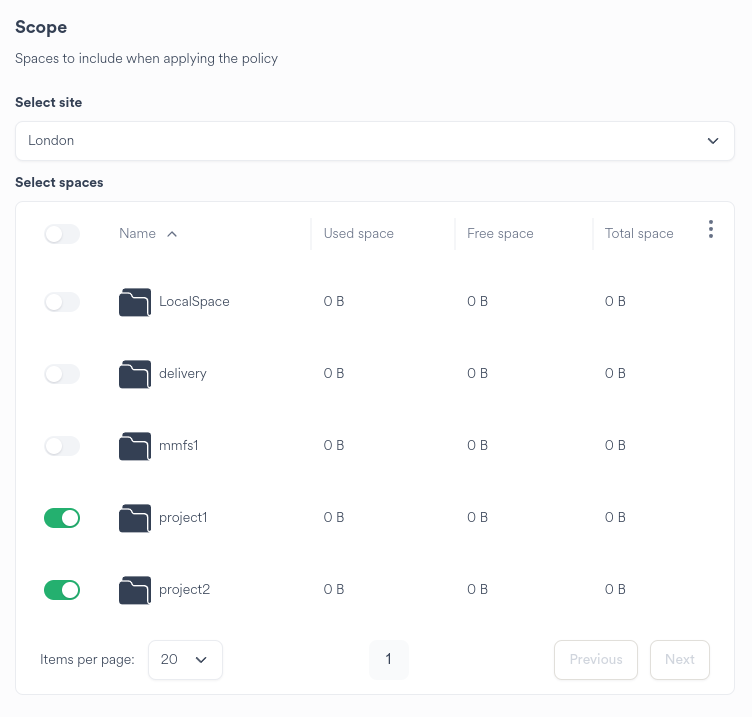
Select the Space or Spaces to run the Policy against on the Site.
Automation
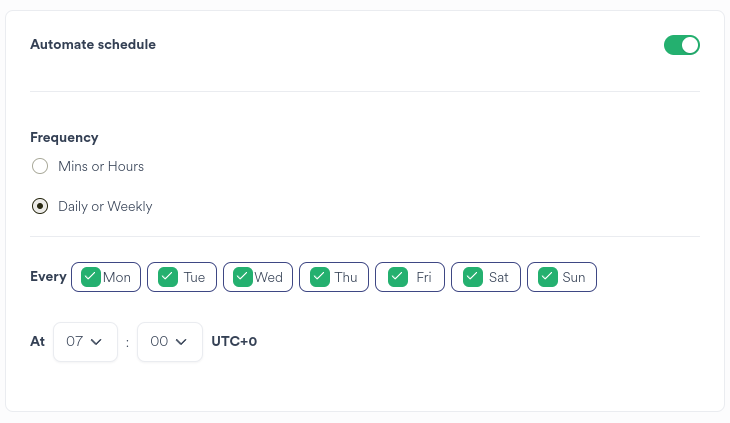
To setup a regular scheduled Policy run, enable the Automate Schedule slider.
Determine the required frequency of the Policy run.
Determine the required frequency of the Policy run.
Choosing Mins or Hours will ensure that the Policy will run on the next interval set.
E.G: * 1 hour: The Policy will run on the next hour (12.00, 13.00) * 15 mins: The Policy will run on the next 15 minute interval past the hour (15, 30, 45, 00)
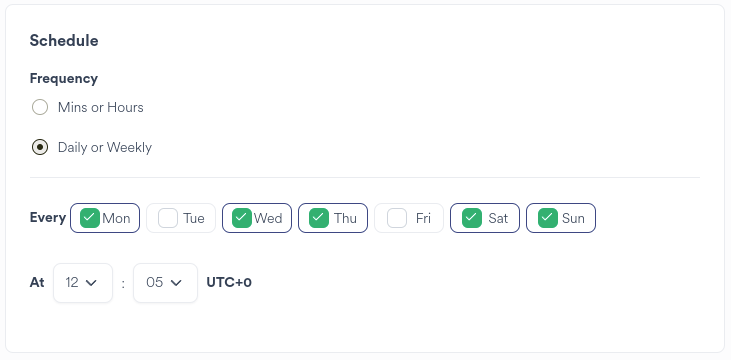
Choosing Daily or Weekly allows the Policy to be scheduled once per chosen day at a specific time of day.
Hint
The schedule time is in UTC+0. You may need to account for any timezone offset of the site when scheduling.
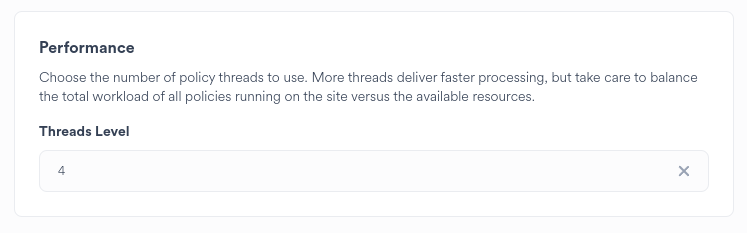
Choose the number of Threads to assign to the policy run.
Hint
Best practice is to start small and increase after assessing the impact of the policy to the Site.
Pool triggers
Setup a pool trigger to define the flow of data.
Examples of supported data flows are:
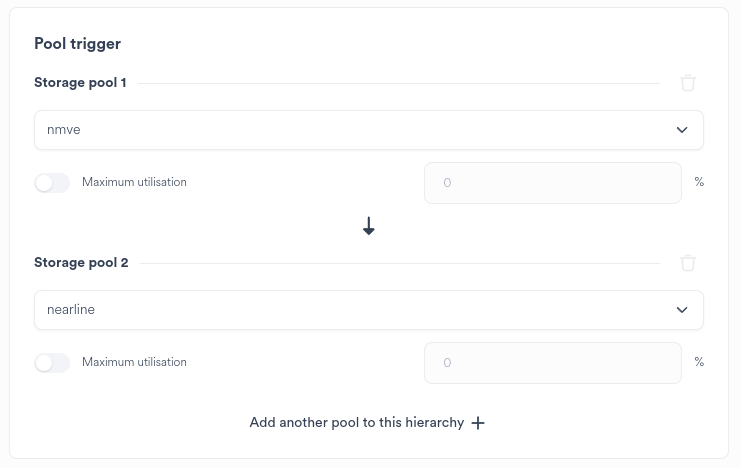
Pool to Pool
Data in pool nvme is tiered to pool nearline according to the Policy conditions.
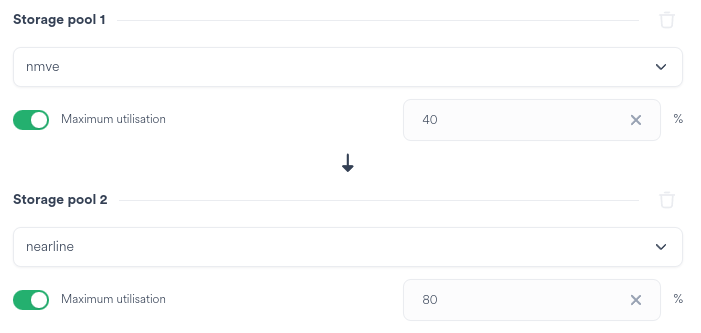
Pool with Utilisation Limit
Data in pool nvme is tiered to pool nearline according to the Policy conditions.
Assuming a full nvme pool, data over which matches Policy conditions and is filling the pool over the 40%
maximum utilisation is targeted for tiering to pool nearline. Data will be tiered until nearline
reaches 80% utilisation or the nvme reaches 40% utilisation. If neither can be achieved, a best fit results.
Hint
Ngenea source/destinations are only supported with one additional pool. Specifying more than two pools, including Ngenea will result in no data orchestation to/from Ngenea Targets.
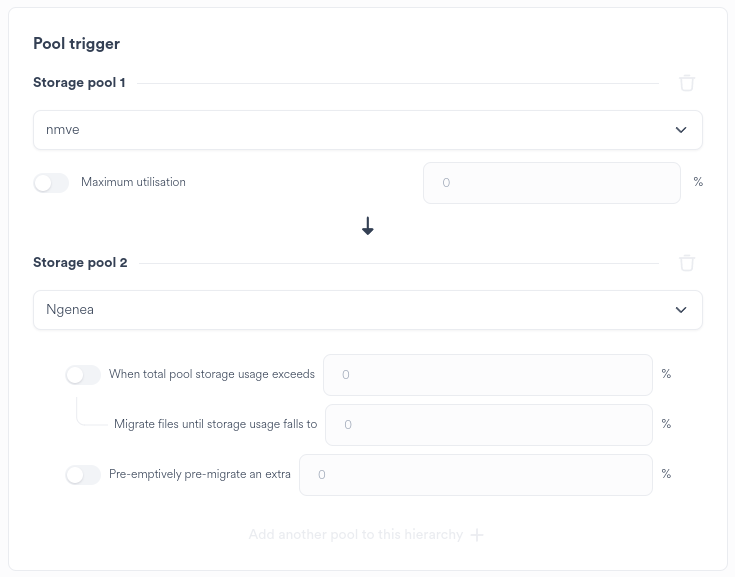
Pool to Ngenea
Data in pool nvme is dehydrated to an Ngenea Target according to the Policy conditions.
Ngenea to Pool
Data in an Ngenea Target is rehydrated to pool nvme according to the Policy conditions.

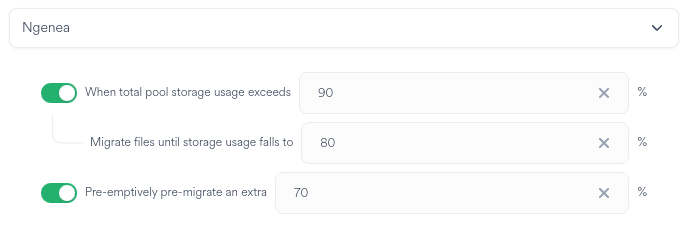
Ngenea Watermarks
Utilise Ngenea watermarks to provide finite control over data states during Policy processing.
The following example provides (assuming 93% utilisation):
Data will only be de-hydrated when the Storage Pool 1 (E.G.
nvmein the above example) is utilised over 90%13% of data residing on the pool will be de-hydrated, reducing utilisation to 80%
A further 10% of data residing on the pool will be Pre-Staged, ensuring that future de-hydrations process the first 10% of data faster as the data is already present in the Ngenea Target
Conditions
Select the processing order of the data.
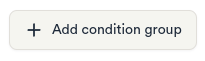
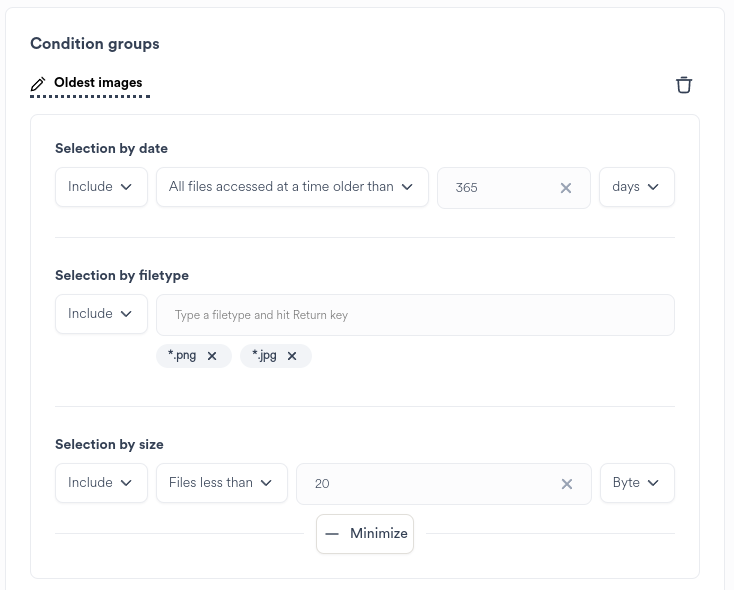
For more finite control of the data targeted, add a Condition group.
|
Click the |
Specify the criteria for the condition group as necessary
It is not required to specify all selections of the Condition group
Perform optional actions:
|
Click the Condition Group Edit button to name the Condition group |

|
Click the delete icon to remove the Condition group |
|
|
Click the |
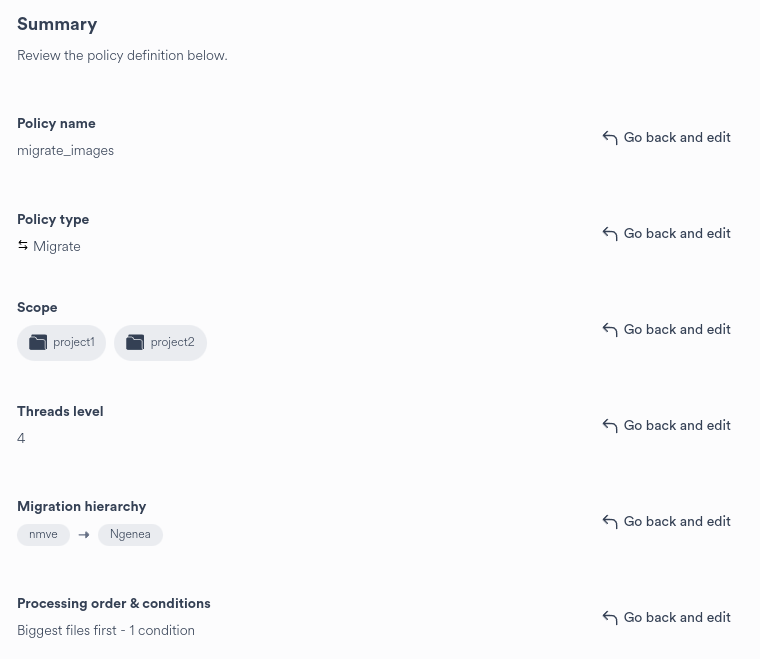
Summary
Upon completing the wizard steps a summary is presented:
|
|
Click the Finish & Create button to apply the changes displayed on the wizard summary page. |
Alternatively Go back and change the proposed configuration as required or close the wizard to cancel the creation of the Policy.
Editing a Policy
Important
This function can only be performed by a Hub Administrator.
Clicking the global settings button in the main menu bar displays the list of Ngenea targets:

|
Click the edit icon on the required Policy row to edit the Policy |
Modify the Policy settings as required. Refer to Adding a Policy for settings guidance.
Deleting a Policy
Important
This function can only be performed by a Hub Administrator.
Clicking the Policies button in the main menu bar displays the list of Policies:

|
Click the delete icon on the required Policy row to delete the Policy |
A confirmation dialog is raised:
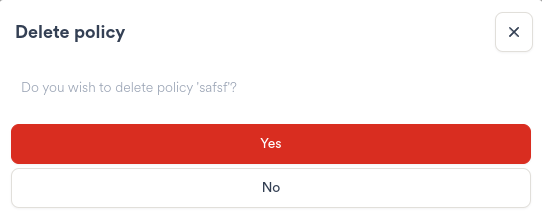
Click Yes to delete the Policy. This action is irreversable.
Alternately click no, or close the confirmation dialog.
Running a Policy
Policies are run either on a Schedule, as specified in the Wizard on creation or in the Policy settings.
Alternatively, policies can be run on demand by clicking the Run button in the relevant row of the Action column on the Policies page.
Important
Policies cannot be cancelled from the Hub UI once started
Progress feedback is not visible in the UI
Ensure the Policy is appropriate prior to running or scheduling

|
Click the Run button to manually start the Policy run |
A confirmation dialog is raised:
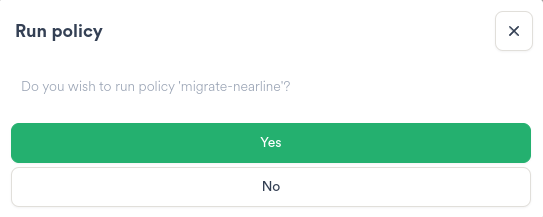
Click Yes to run the Policy.
Alternately click no, or close the confirmation dialog.
Running Policies are shown on the Jobs page, subject to the above constraints. I.E. no controls are available for Polices on the Jobs page.
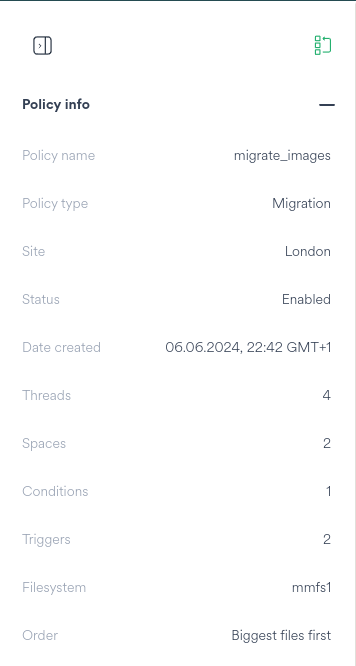
Policies provide specific Policy information when the Job is selected in the Jobs Page.
Refer to doc:jobs for further Jobs guidance.
Cancelling a Policy
Presently there is no capability to cancel a running Policy via the Hub UI.
Running policies can be terminated by issuing a kill -9 to the mmapplypolicy process running on the relevant Ngenea node on the Site.
Upon terminating the running policy via the CLI, the Hub job will also terminate. The resultant Job state is (correctly) Failure - as the running policy was forcibly terminated.