User Guide
Overview
Ngenea Hub2 provides a management and control interface for data and systems across a global pixstor estate.
Using Hub2 users can create Spaces for datasets across multiple pixstors, enable data synchronisation, perform data manipulation through workflows and control system settings for all pixstors from one administrative interface.
Accessing Hub
To login to Hub enter the URL of the hub into the browser address bar. E.G. https://myhub
On successful connection to the Hub a login page is presented.

Enter your Username and Password to authenticate with Hub and login.
Logging Out Of Hub
After successful login, from the User Profile control in the top right of the screen select the Log out option.
The Main Screen
The main Hub screen is comprised of several areas.
Menu Bar
The menu bar is positioned on the far left of the Hub screen.
Home

|
Navigates to the page first presented after Login |
Spaces

|
Navigates to the Spaces screen |
Jobs

|
Navigates to the Jobs screen |
Groups & Users

|
Navigates to the Groups & Users screen |
Sites

|
Navigates to the Sites screen |
Alerts

|
Navigates to the Global Alerts screen |
Global Settings

|
Navigates to the Global Settings screen |
Enlarge/Reduce

|
Clicking the toggle widens the menu bar to show: |
|
|
Clicking the toggle button again shrinks the menu bar.
Page Location
The page location is positioned to the top of the Hub screen.
Main page content
The main page content is positioned to the center of the Hub screen.
The User Profile control is positioned to the top right of the Hub screen.
The User Profile control displays the name of the user logged into Hub using the current browser session.

Use this control to Log out of Hub and update your User settings.
User Profile
Selecting the Profile option from the drop down menu presents the User settings dialog of the logged in user.
Clicking the Save button at the bottom of the User settings dialog saves any changes made.
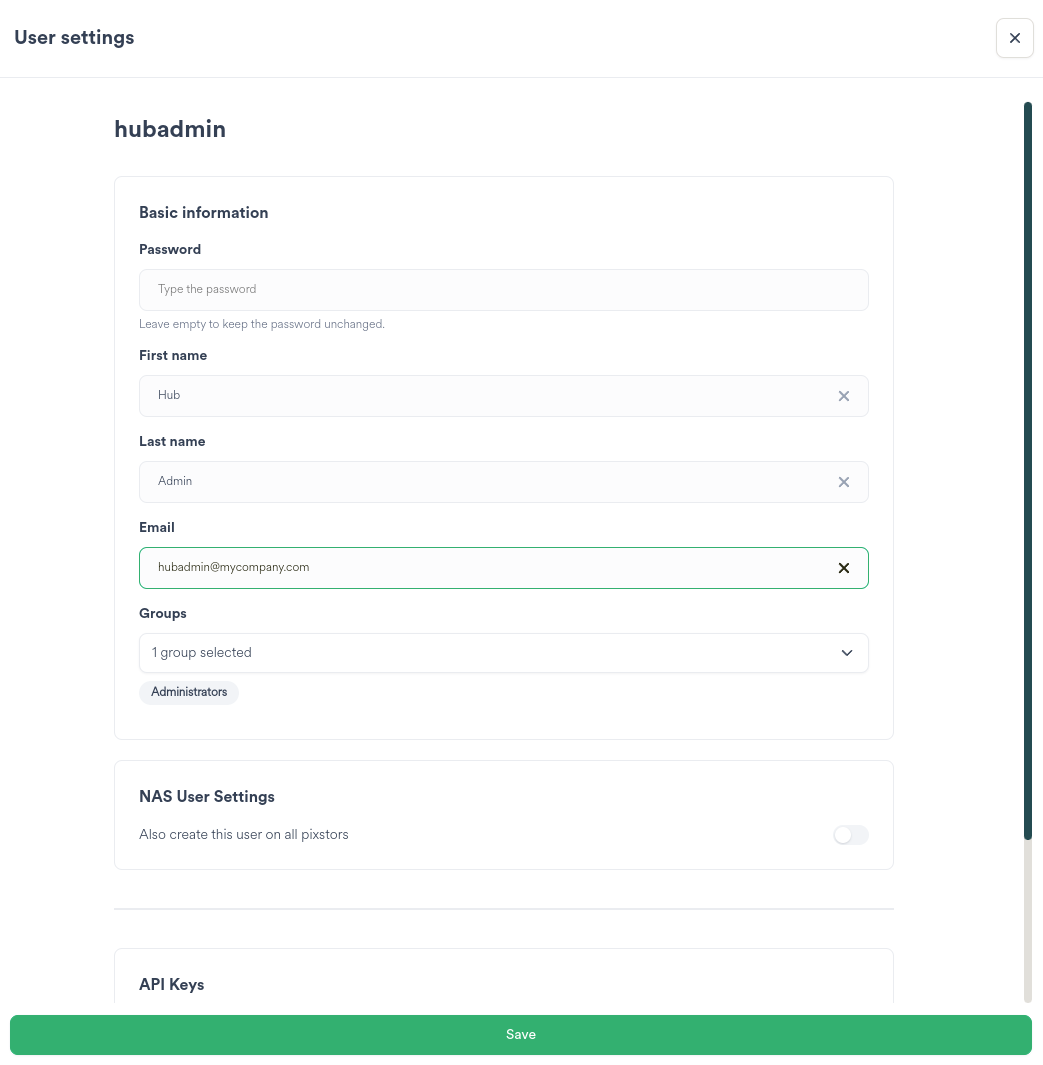
Password
Enter a new Password to change your Password.
First name
Enter a new first name to change your First name.
Last name
Enter a new Last name to change your Last name.
Email
Enter a new valid email address to change your email address.
Groups
A list of groups your user account belongs to is displayed.
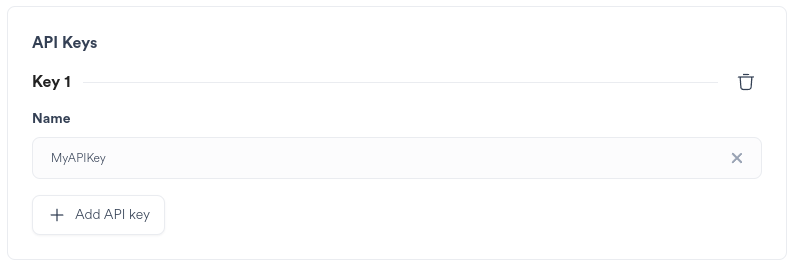
API Keys
Provides the capability to add and remove API keys.
An API key is typically used for by 3rd party software to connect to Hub to perform automation.
Adding an API Key
|
To add a new API key, click the Add API key button. |
Enter a name for the API Key .

Tip
It is not possible to change the name of an API key once the key has been created.
Add additional API keys as required.
Upon pressing Save the API Key dialog is raised displaying the API Keys created.
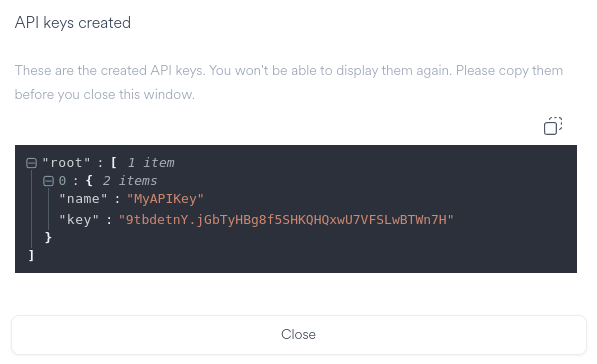
Ensure to save the generated keys safely as once the API Key dialog is closed the keys cannot be viewed again.
Removing an API key
Created API Keys are listed

|
To remove an API key, click the dustbin icon next to the API Key. |
Tip
Deleted API Keys are non-recoverable. If an API Key has been inadvertently removed, do not press the Save button, instead click off the User settings dialog to the main area of the screen.
Clicking the Save button at the bottom of the User settings dialog saves any changes made.
Search
Hub provides the ability to Search for assets across all Hub managed Sites.
Where proxies are enabled for Search supported asset types, thumbnails and proxies are displayed.
Asset locations, Spaces, metadata and Tags are searchable providing rich criteria to locate assets.
Located assets can be processed using the Jobs Panel to perform Workflow actions.
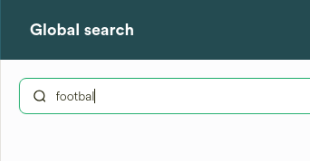
Searching
Enter a term in the Search bar to start a Search. E.G.: football.
Terms are automatically wildcarded to enable wide Searching. E.G.: *football*.
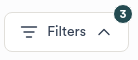
Filters
Search provides several high level filters each of which apply additional criteria to narrow the Search to return only the required assets.

|
Click the filter button to display the available filters. The number of applied filters is displayed on the filter button. |
Sidebar

|
Clicking the toggle displays the side bar to show: |
|
Clicking the toggle button again hides the side bar.
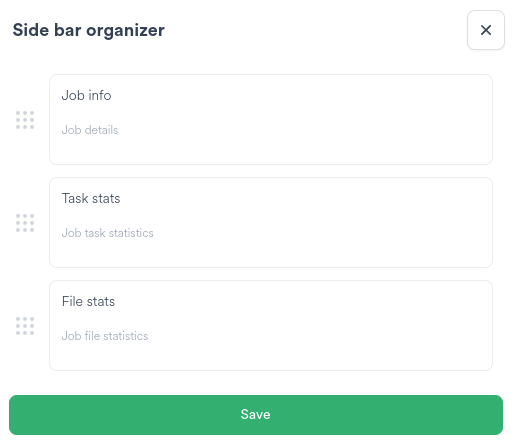
Reordering
Re-arrange items in top to bottom order by dragging vertically up or down.
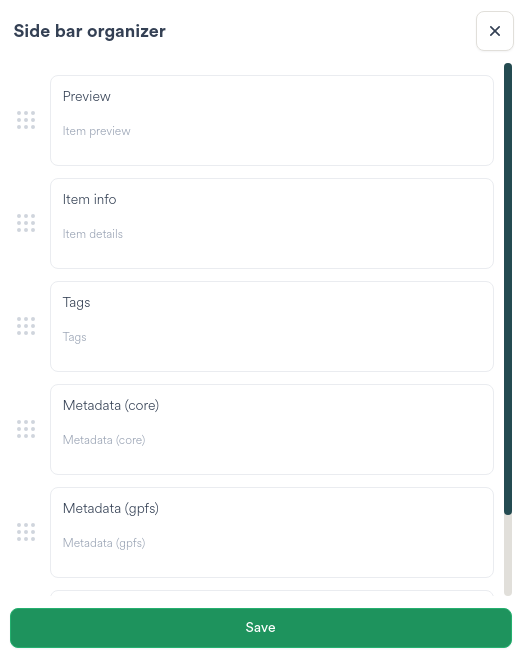
Click Save to store the sequence which is reflected in the Job side bar.
Results
Search matches assets to the Search input returning collated results to screen.
Searches are processed asynchronously, therefore some results may take longer to return to screen than others.
Where a Site is unavailable or takes too long to return results, information messages appear at the top of the screen allowing for deselection of the Site or Site(s).
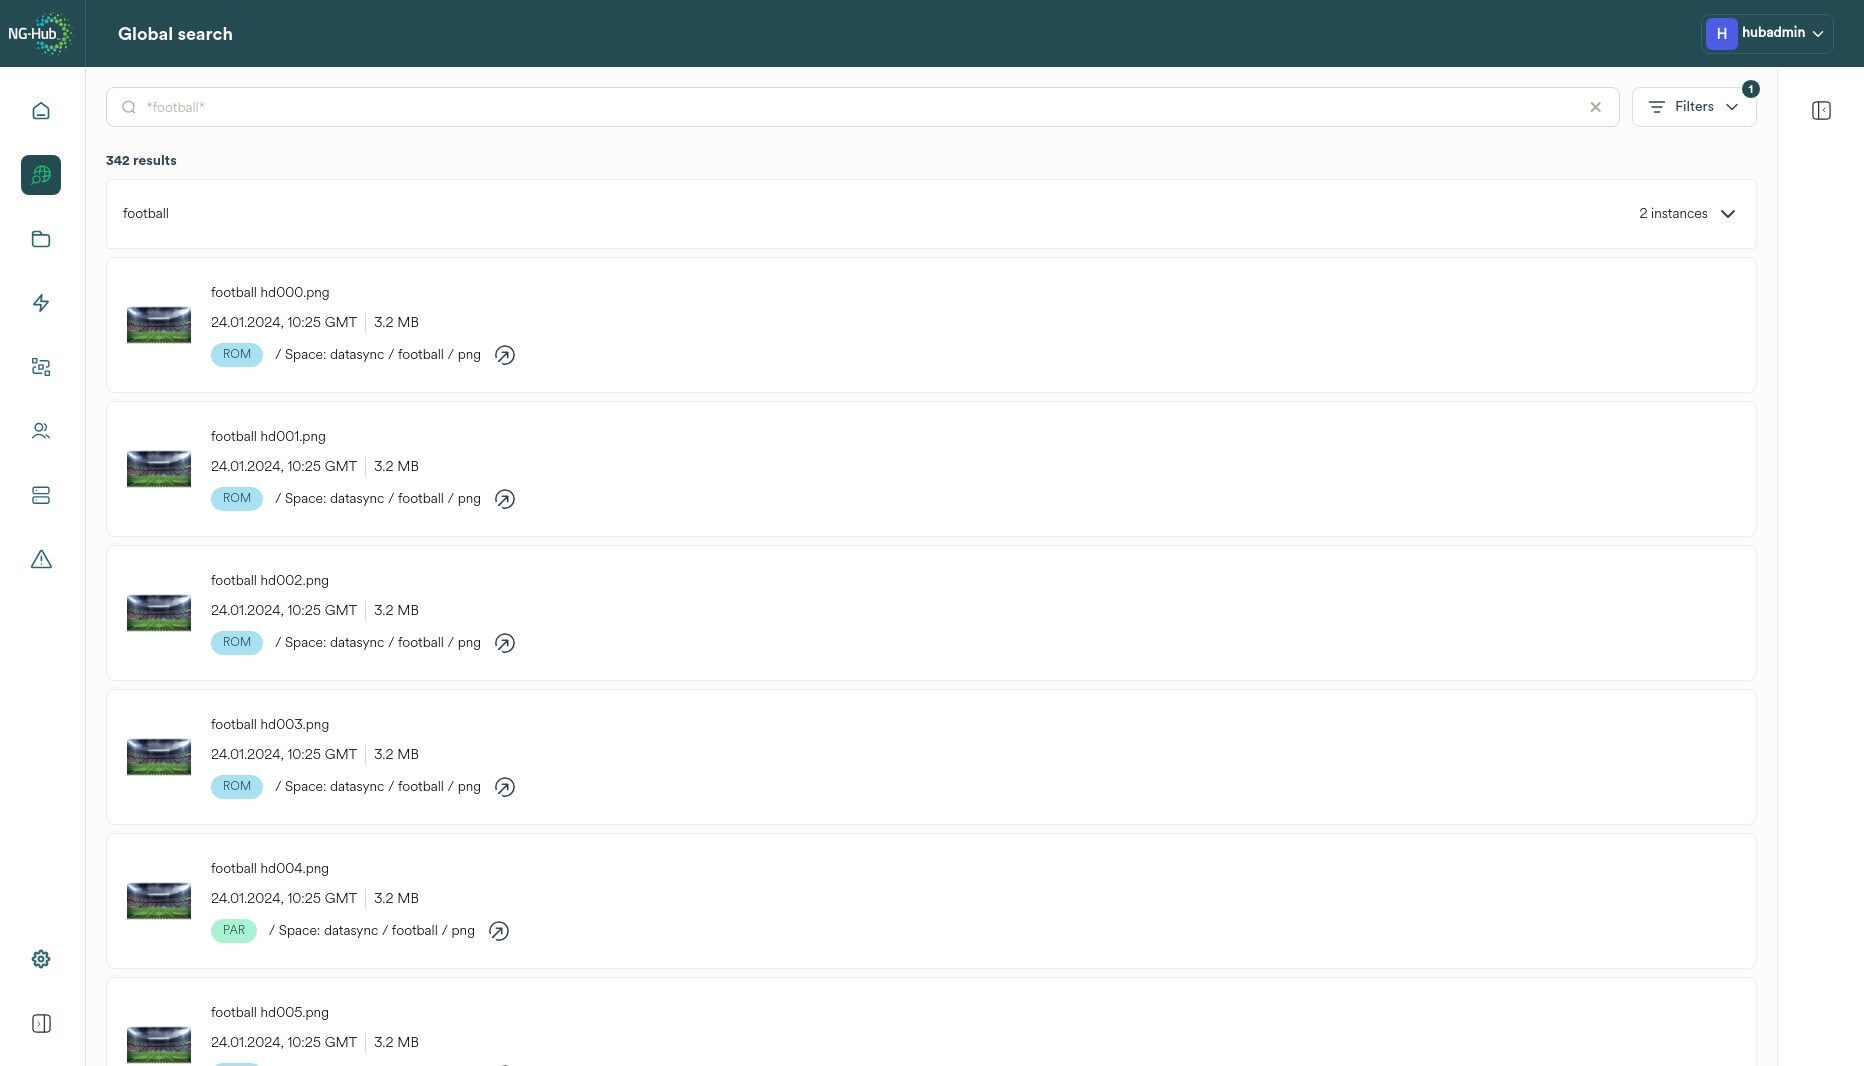
Result Card
Returned assets appear as a Result Card.
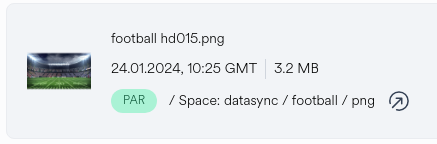
Where multiple instances of the same asset are present on more than one Site, the results are collated.
|
Open the instances drop down to display all the assets from all Sites |
The Result Card displays:
Item |
Description |
|---|---|
Thumbnail |
The generated thumbnail or a default icon where no thumbnail exists |
Name |
The name of the asset |
Date and Size |
The date and time of last modification, the size of the file on the pixstor file system |
Site chip |
The site on which the asset is found |
Space Location |
The location of the asset in the Space |

|
The filebrowser navigation button |
Tags
Search provides the ability to Tag assets.
Apply Search Tags to assets in order to collate assets into collections or curate as required.
Tip
Applied Tags are added to Site Search services asynchronously. Dependent on workload there may be a small delay between the addition of the Tag in the UI and the ability to Search for the asset by the Tag.
Searching By Tag
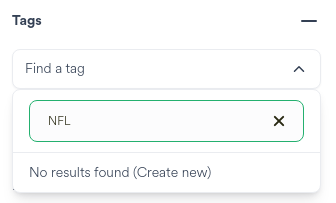
To Search for an asset by Tag, open the Search filter bar and select the Tag from the drop down menu
Entering text into the Tag filter matches available Tags to provide a shorter selection list
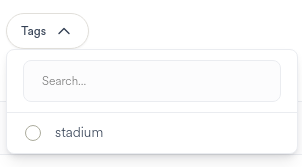
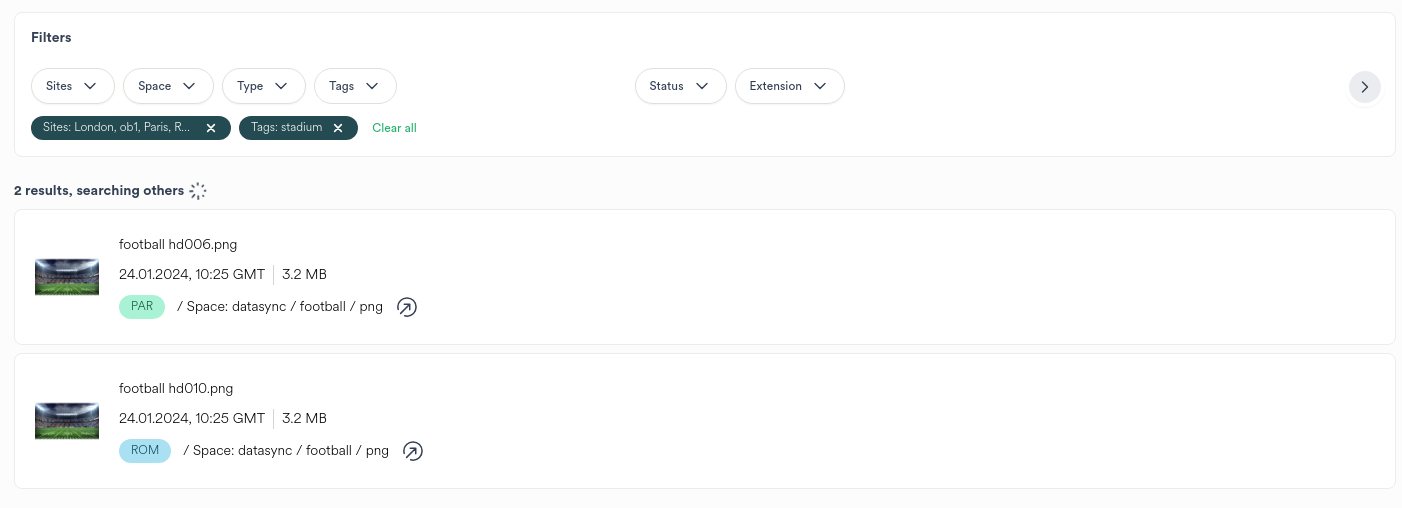
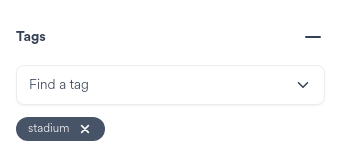
Applied Tags are denoted with a chip below the filter bar. Click the x to remove the Tag from the filter.

Example of Searching for assets where the Tag stadium is applied:
Tagging An Asset
To add a Tag to an asset, open the side bar and locate the Tags section in the bar.
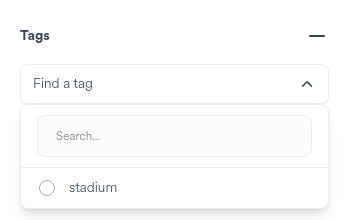
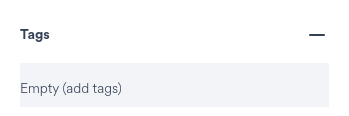
Where no Tags are set on the asset, a prompt to add Tags is shown. Click the entry box to start.
To apply an existing Tag to the asset, select the Tag.

Applied Tags are denoted with a chip below the filter bar. Click the x to remove the Tag from the filter.
If no Tags exist, enter a Tag (case sensitive) in the Tag entry box and press Enter to create and apply the new Tag.
Actions
Post Search, assets can be actioned by Workflows using the Job Panel.
To enable asset selection first select an individual Space from the Search filters.
Selecting an individual Space enables asset selection.
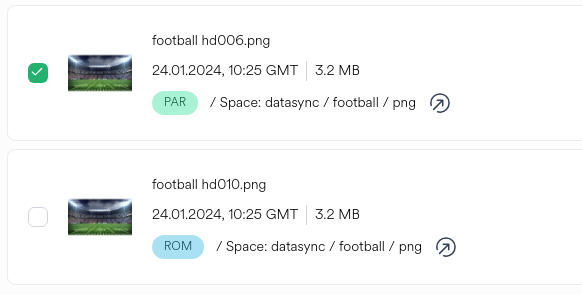
Click the checkbox to the left of an asset to add the asset to the Job Panel selection list
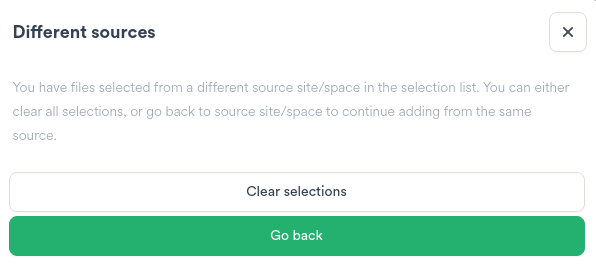
Assets in the Job Panel are processed per Space, per Site. Selecting assets from additional Sites raises a confirmation dialog.
Choose whether to retain the assets from the current Site or to clear all the current selections in order to add new selections from other Site(s)
When the Job Panel selection contains selected items, navigating to the Space on the selected Site retains the selections in the Job Panel selection list.
|
|
Click the filebrowser navigation button on the Space card to navigate to the selected Space, filtered by Site. Any assets already selected remain in the Job Panel selection list. |
Example of asset selections after navigating to the Space on the Site with assets selected from the Search results:
Spaces
A Space is an area of storage present on or across one or more pixstor which comprises the following capabilities:
name
location
size
data protection
performance
file share
Viewing Spaces
To view available spaces, click the Spaces menu button to display a dialog to configure the selected site.
|
|
Navigates to the Spaces screen |
The ability to view spaces is restricted by group membership.
Administrators can view and administrate all Spaces across all Sites
Users can view and use all Spaces across all Sites
Restricted users can view and use a defined subset of Spaces on associated Sites
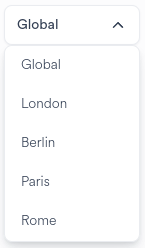
Hub provides two views of Spaces - Global and Local.
Global displays all Spaces on all Sites
Local displays the Spaces on a specific site
The default view of Spaces is Global.
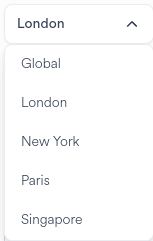
|
To switch to a site-centric view, select the specific site from the Spaces drop-down menu. |
|
To switch to Global view, select Global from the Spaces drop-down menu. |
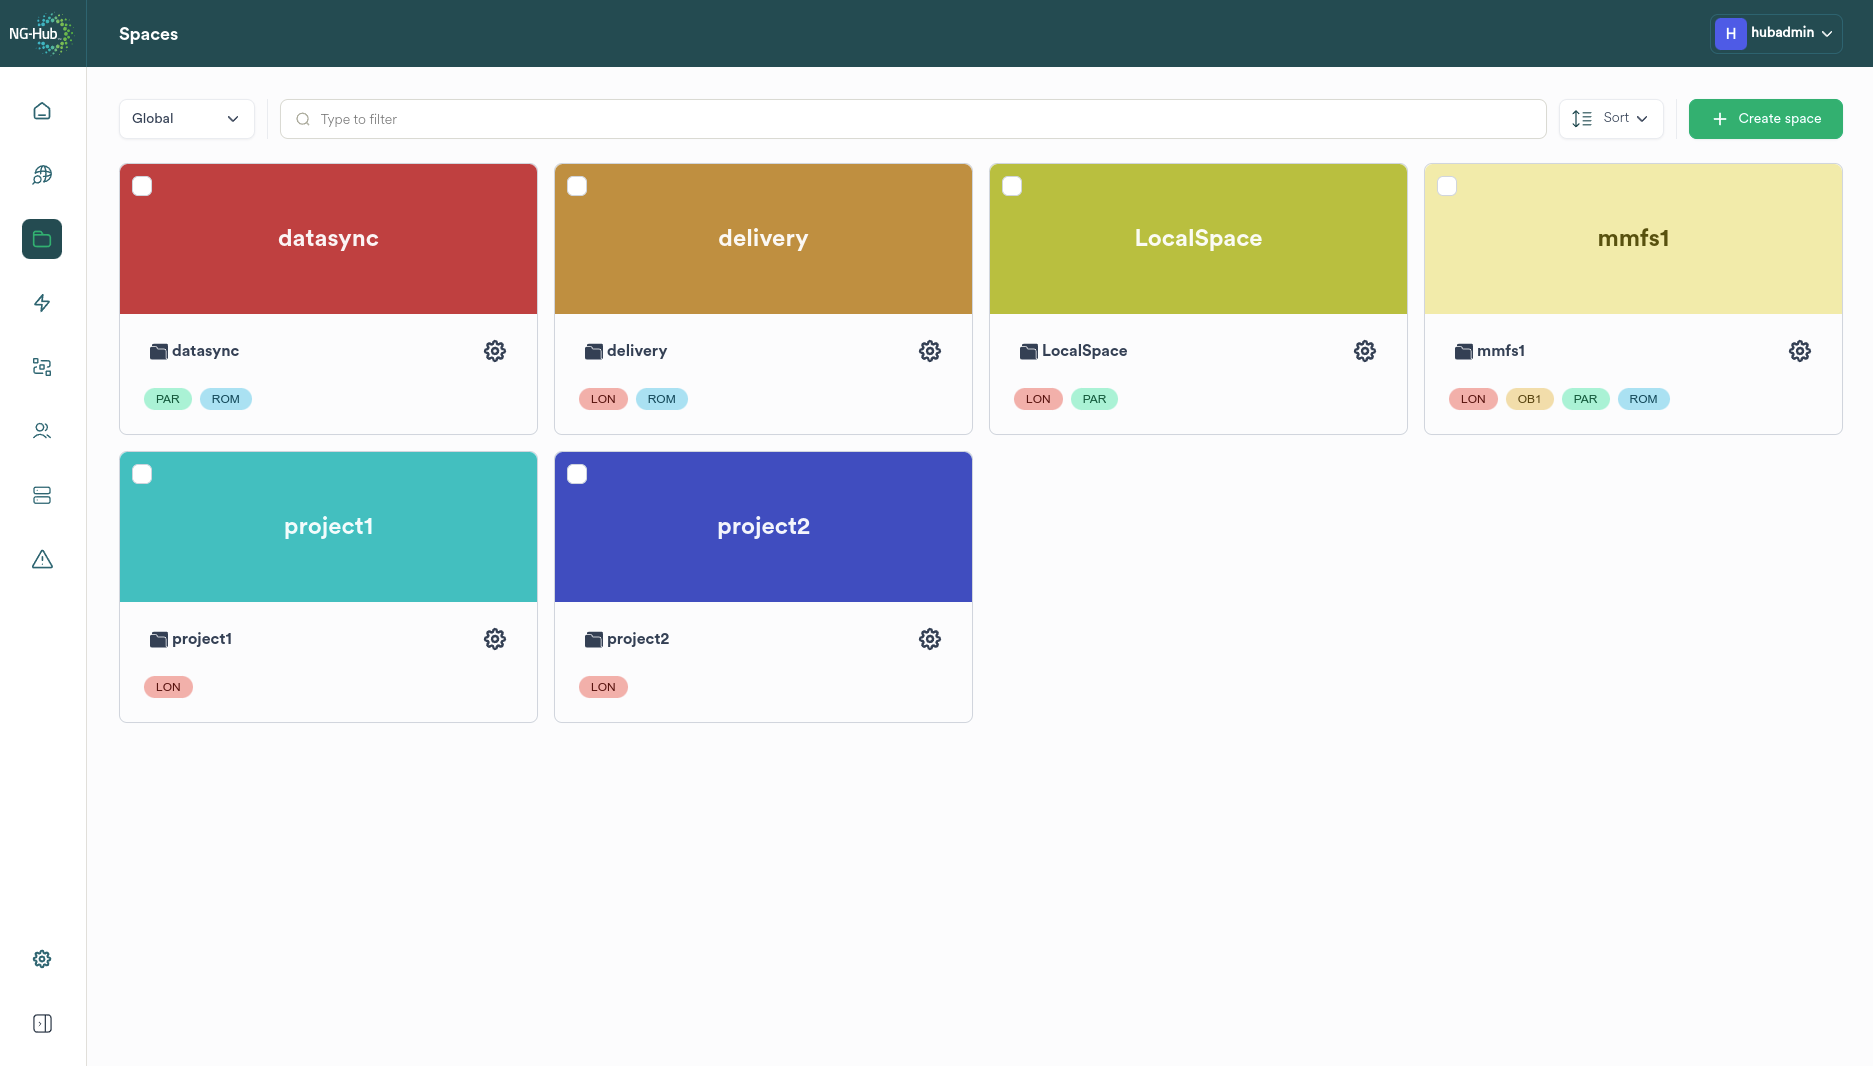
Global View
Global view displays all Spaces on all Sites.
The example below displays all the Spaces across all Sites.
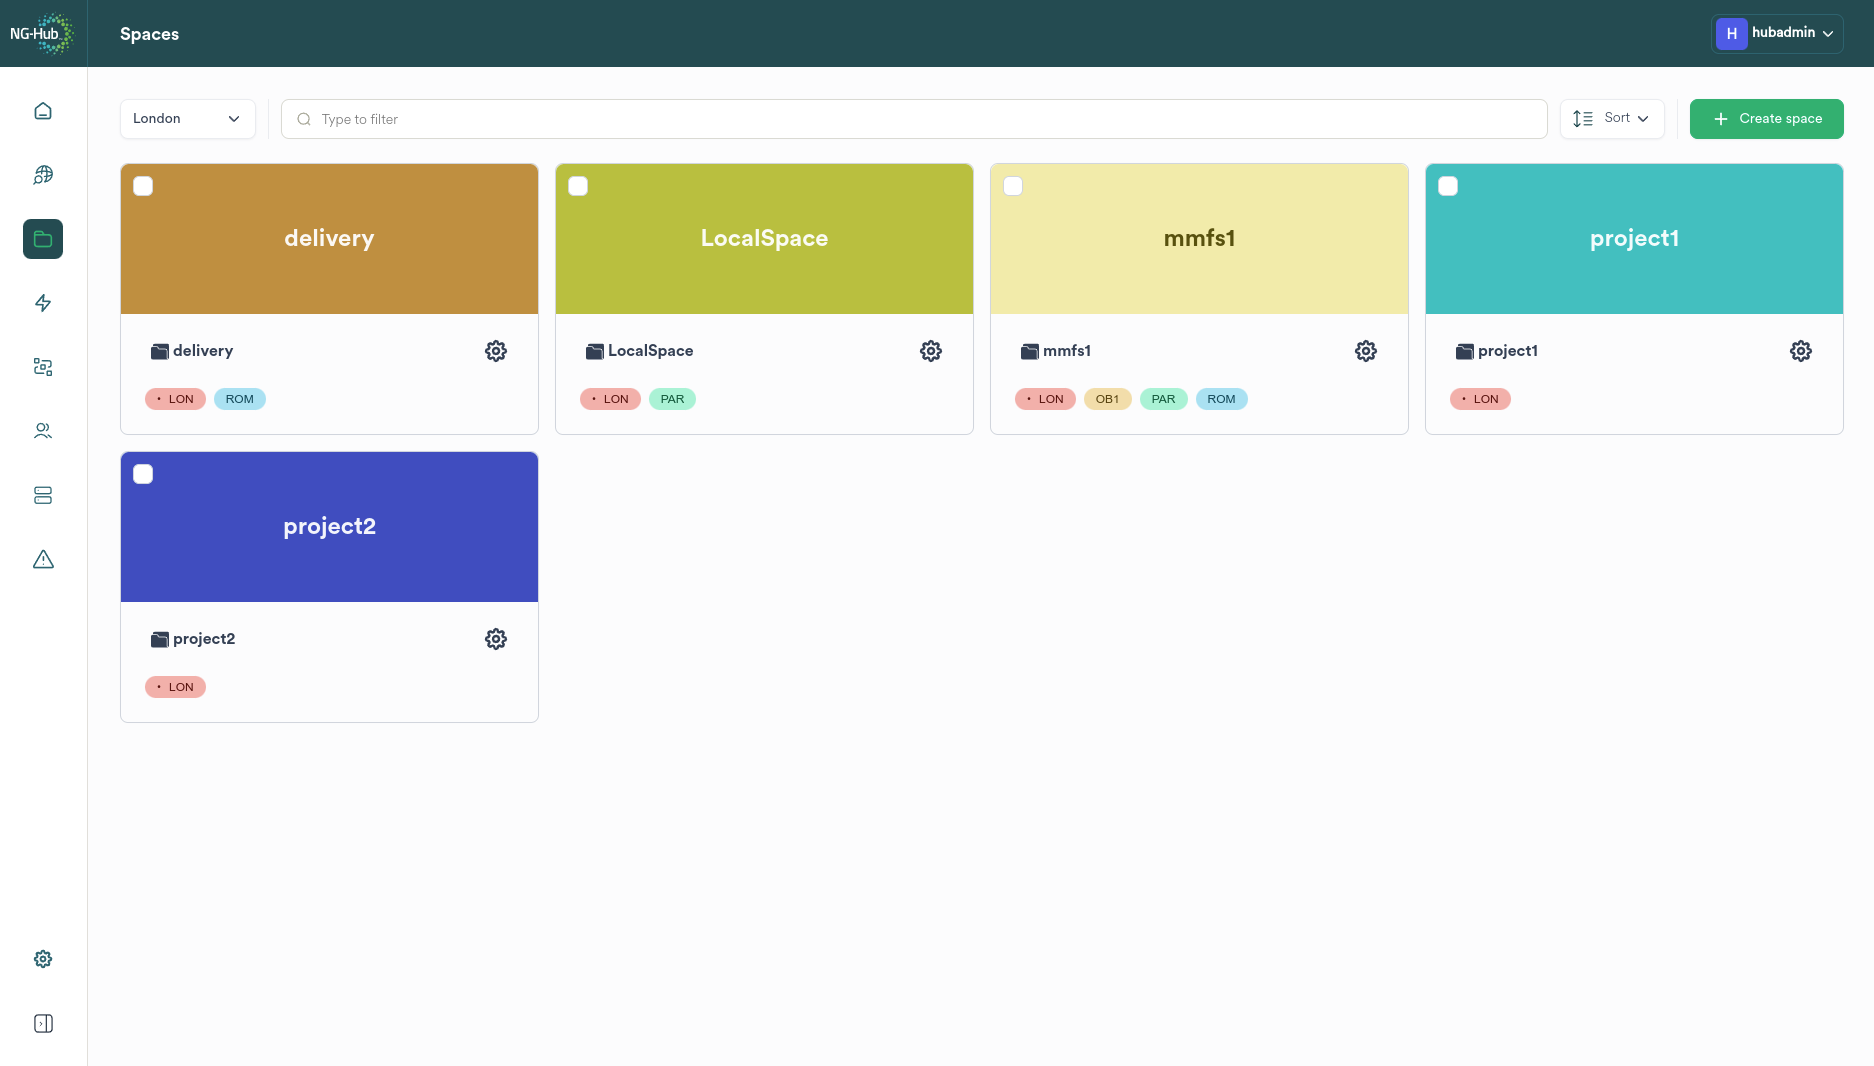
Local View
Local view displays the Spaces on a specific Site.
The example below displays less Spaces than Global as the site is participating in fewer Spaces.
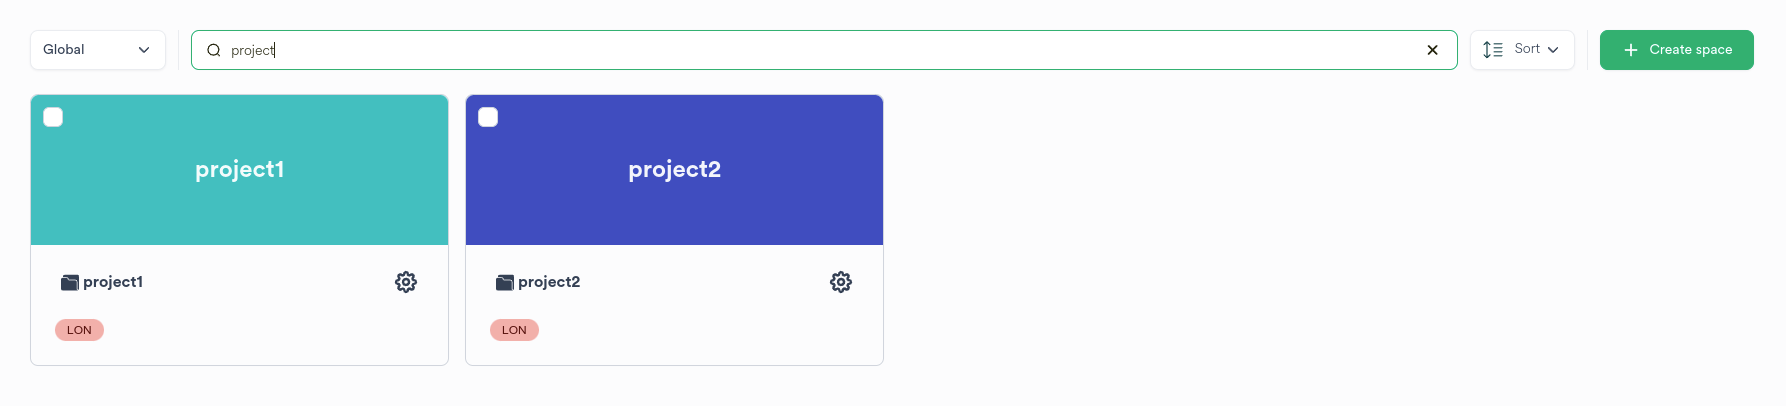
Filtering the Space View
To display Spaces matching keywords, enter the keywords in the filter bar.
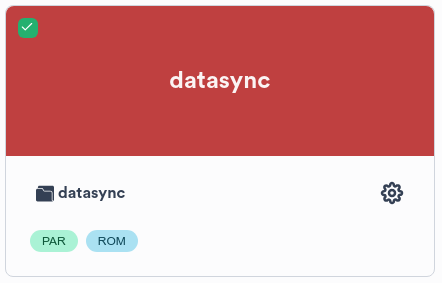
The Space Card
A Space is displayed as a card in the Space view.
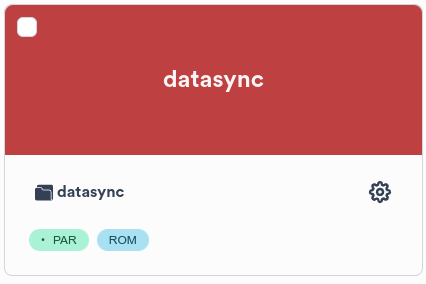
A Space Card comprises:

Space Card Header
|
|
Denotes the name of the Space. |
Click the Header to view the Space File Browser. |
Space Name

|
Denotes the name of the Space. |
Click the Space Name to view the Space File Browser. |
Space Site Chips
Site Chips denote the sites on which a Space is present.
Click a Site Chip to change the view to the Local View of the Space File Browser for a specific Site.

|
In Global view all sites are listed in alphabetical order. |
In Local View, the selected site is identified with a dot.

|
All other sites are listed in alphabetical order after the local site. |
Space Selector Checkbox

|
Selecting the Space Selector Checkbox raises the Job Creator Panel to perform data operations on the entire Space. |
Tip
To perform more granular operations on data inside the Space, refer to Selecting files and folders
The Job Creator Panel allows data operations on the Space as a whole.

For further information refer to Using the Job Creator Panel.
Space Settings

|
Clicking the Settings button on the Space card raises the Settings dialog for the Space. |
Important
Adding or Configuring a Space can only be performed by a Hub Administrator or User with Space Administration rights granted through group management.
Browsing Spaces
The Spaces File Browser displays the file and folder contents of a Space across multiple or specific sites including additional contextual information such as file counts, size, metadata and status.
The Space File Browser provides two views of Spaces file and folder content - Global and Local.
Global displays the file and folder content for a Space across all Spaces on all associated Sites
Local displays the file and folder content for a Space on a specific Site
The default view of the Spaces File Browser is Global.
|
|
To switch to a site-centric view, select the specific site from the Spaces drop-down menu. |
|
|
To switch to Global view, select Global from the Spaces drop-down menu. |
Spaces File Browser Global View
Global view displays the file and folder content for a Space across all Spaces on all associated Sites
The example below displays the file and folder content for the Spaces across all Sites.

Spaces File Browser Local View
Local view displays the file and folder content for a Space on a specific Site
The example below displays the file and folder content for a Spaces across all Sites with a site-centric view.
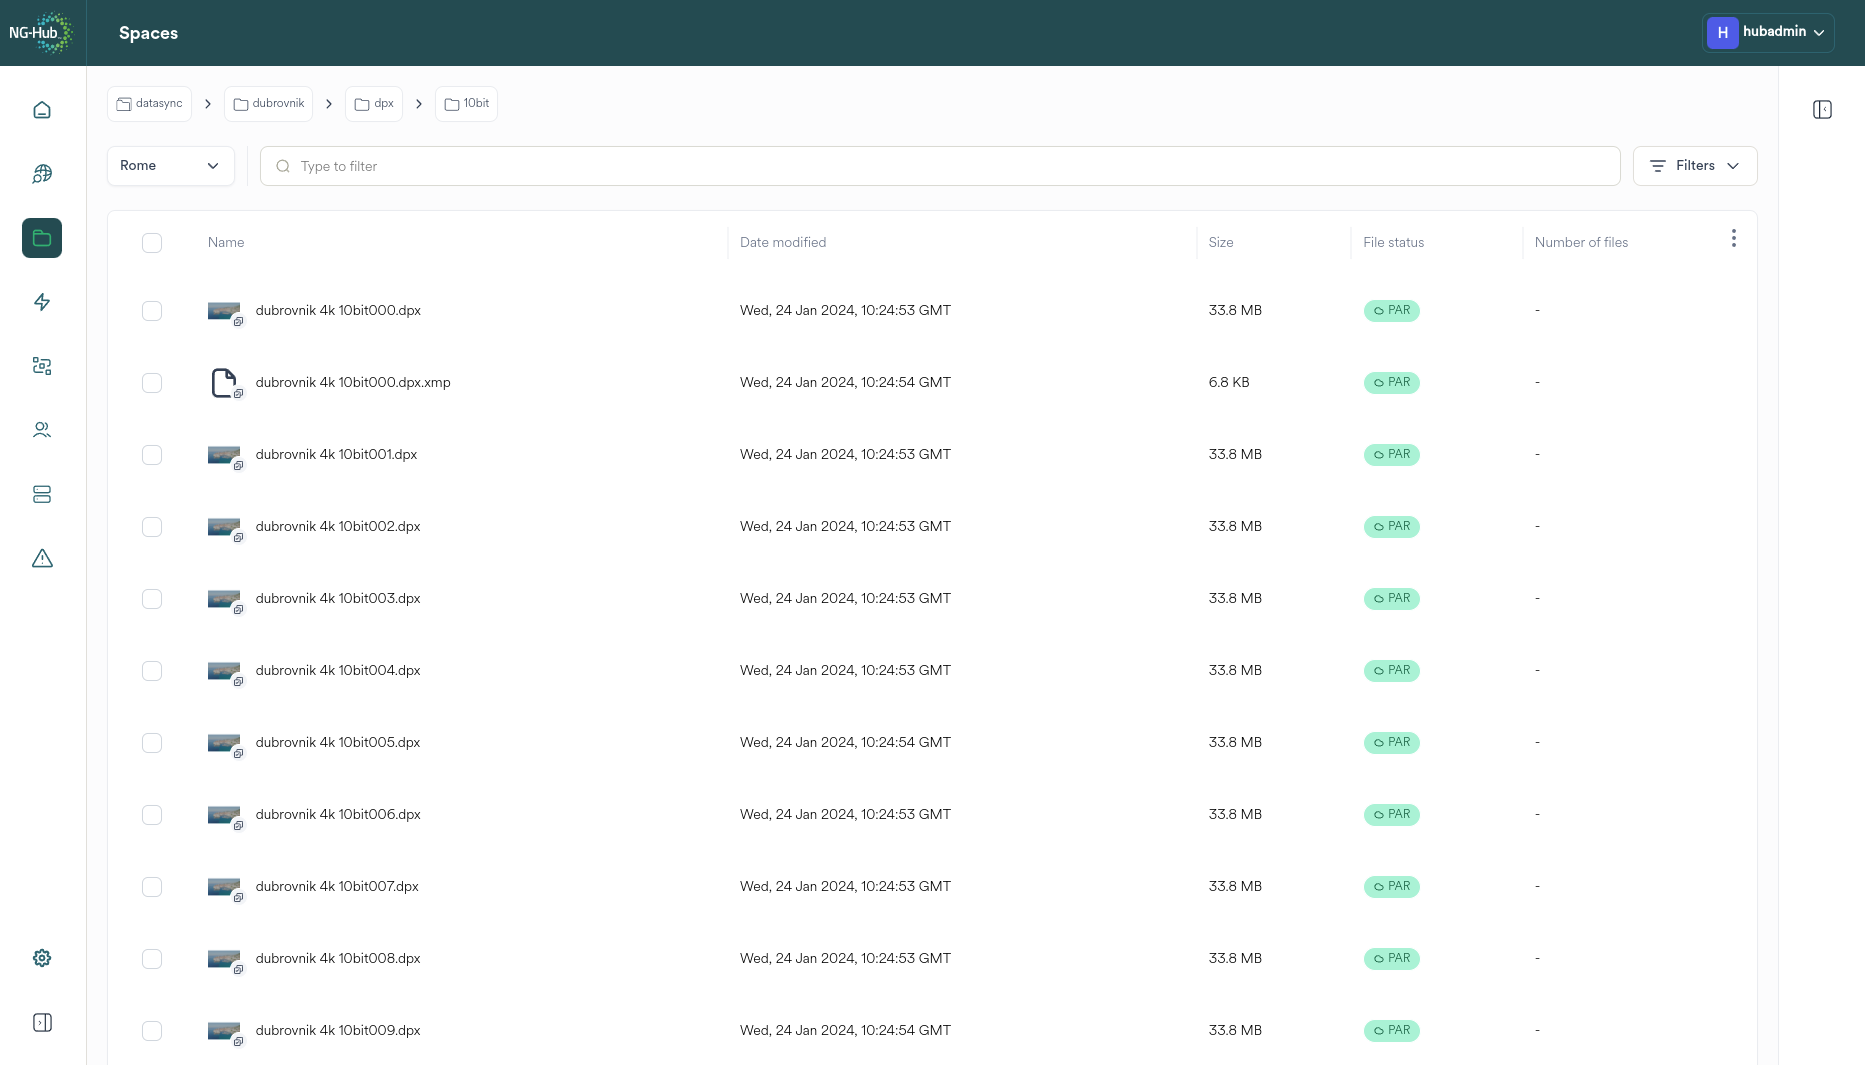
The Space File Browser Screen
The Spaces File Browser screen is comprised of several areas.
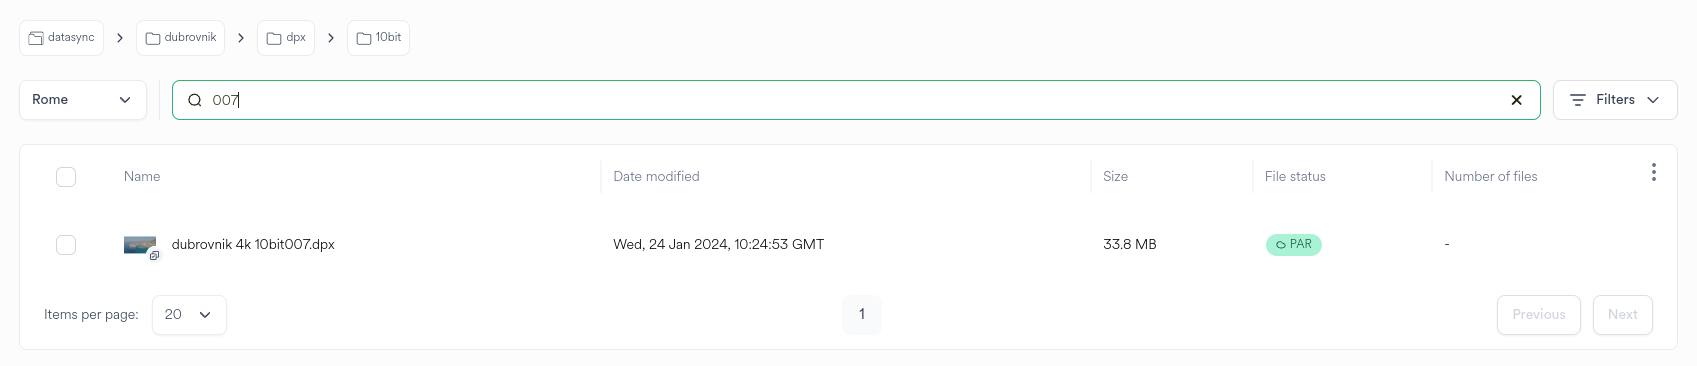
Filtering the Space File Browser
To display files or folders matching keywords, enter the keywords in the filter bar.
Space File Browser Icon Statuses
In Local View the Spaces File Browser displays additional information to designate the status of the file on the Site’s pixstor file system.

|
Spaces File Browser Local View displays the default file icon if the file or folder is unmanaged. An unmanaged file has not yet been processed by Ngenea operations. |

|
Spaces File Browser Local View displays the cloud icon if the file or folder is Pre-Staged. A pre-staged file is present on the Site’s pixstor file system and has an identical copy in the ngenea target (E.G. AWS cloud bucket). |
|
Spaces File Browser Local View displays the cloud icon if the file or folder is dehydrated. A dehydrated file has only metadata present on the Site’s pixstor file system and has a fully hydrated identical copy in the ngenea target (E.G. AWS cloud bucket). |
Space File Browser File Statuses
Site Chips denote the sites on which a Space file or folder is present and their status.
In Global view all sites are listed in alphabetical order.
In Local View, the selected site is identified with a dot.
All other sites are listed in alphabetical order after the local site.
|
Spaces File Browser Local View displays the default file icon if the file or folder is unmanaged. An unmanaged file has not yet been processed by Ngenea operations. |
|
Spaces File Browser Local View displays the cloud icon if the file or folder is pre-staged. A pre-staged file is present on the Site’s pixstor file system and has an identical copy in the ngenea target (E.G. AWS cloud bucket). |
|
|
Spaces File Browser Local View displays the cloud icon if the file or folder is dehydrated. A dehydrated file has only metadata present on the Site’s pixstor file system and has a fully hydrated identical copy in the ngenea target (E.G. AWS cloud bucket). |

|
Spaces File Browser Local View the file or folder displays a greyed out site with a circled dash where the file is not present on the associated site. |
Space File Browser File Attributes
The Space File Browser displays information regarding the files and folders within the Space, globally on all Sites or local to a Site.
Option |
Description |
|---|---|
Name |
The file or directory name |
Date Modified |
The date and time of last modification |
Size |
The size of the file on the pixstor file system |
File Status |
The file status per-site |
Number of Files |
If the item is a directory, displays the total file count within the directory tree thereunder |
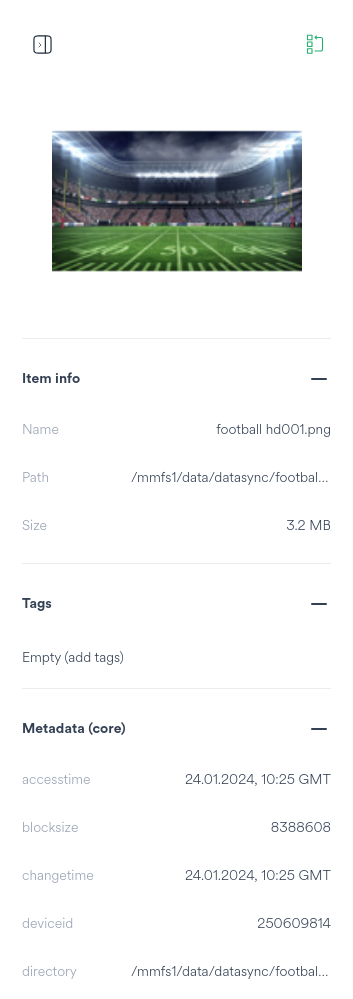
Viewing File or Folder Metadata
Metadata Panel
Click a file or directory name to view the associated metadata:

The metadata panel provides extended metadata, including a summary of the file status on each site participating within a Space.
Where an asset has been ingested via Search thumbnails are displayed for supported file types.
Using the Job Creator Panel
Explain panel areas, buttons and operations
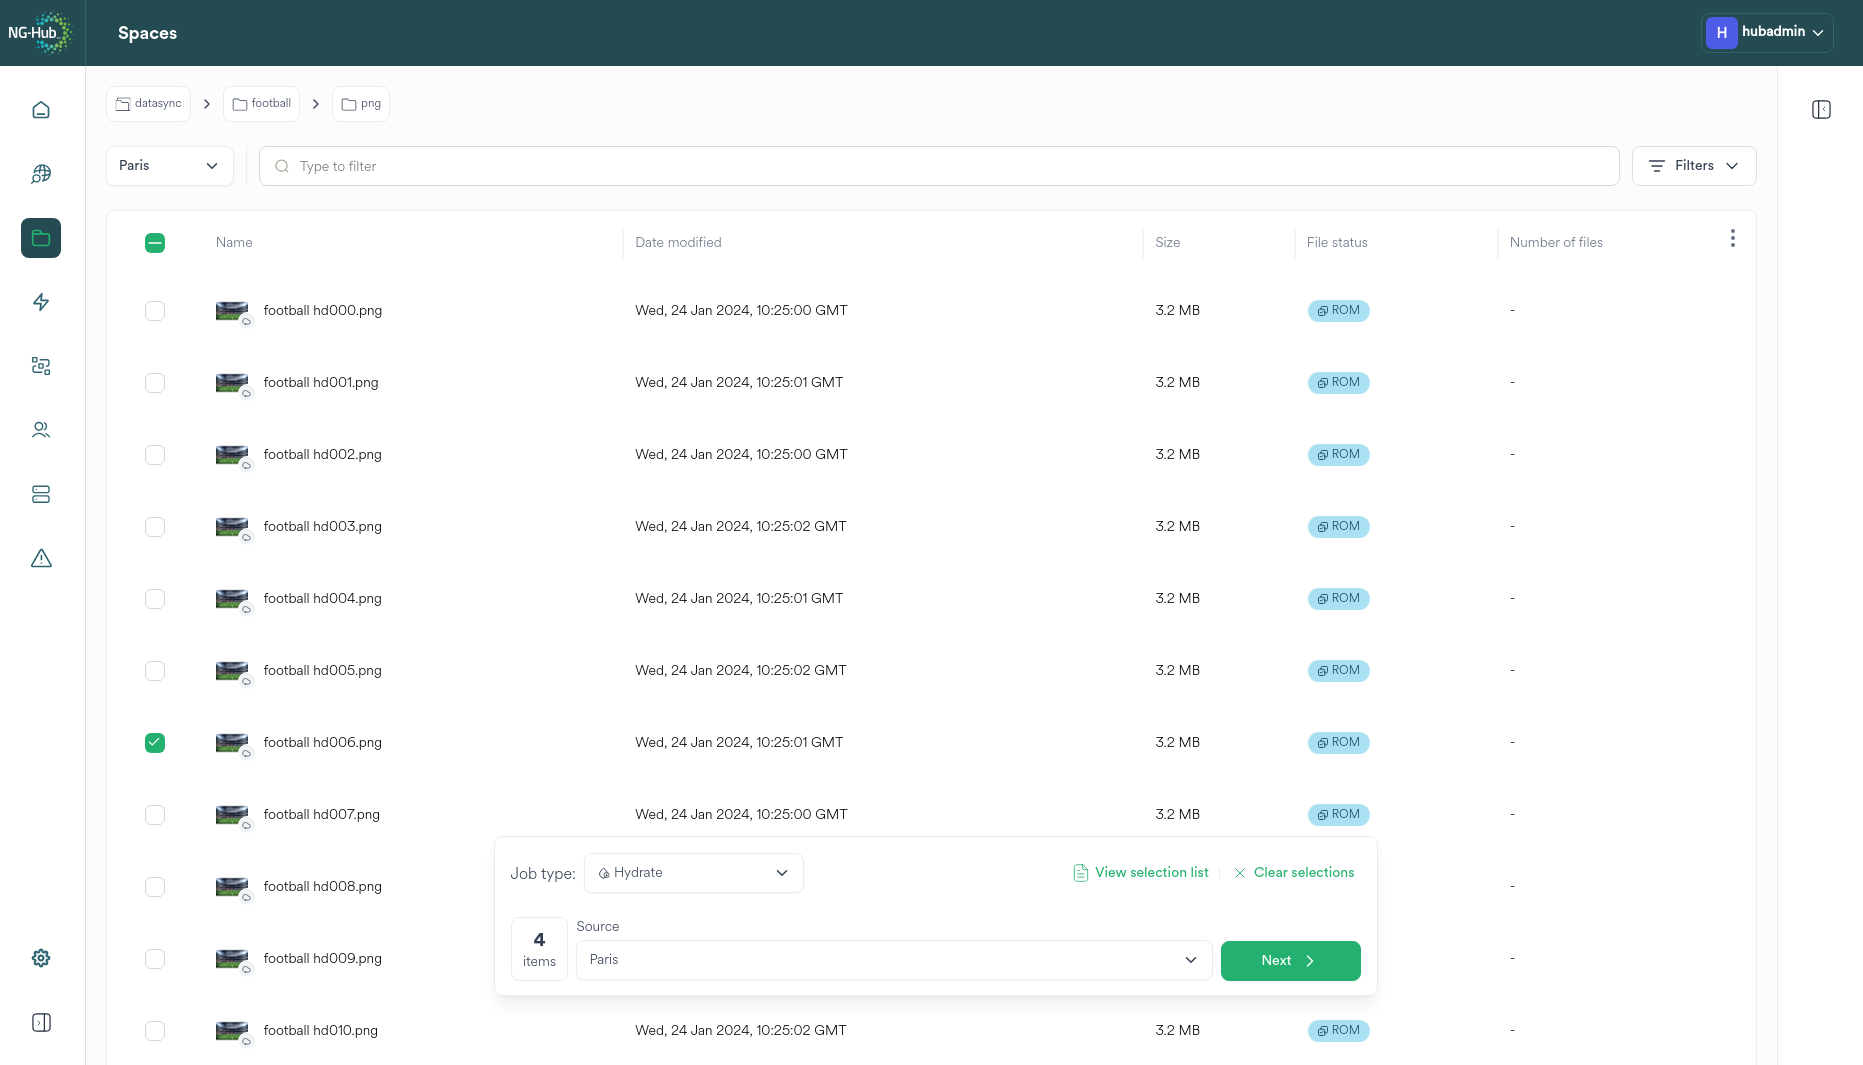
Selecting files and directories
Selecting an individual file or directory populates the selection list with the item.A Selecting a directory populates all items within the chosen directory tree.
Selections of the entire Space or a directory are each counted as 1 item.
Select the 'select all' checkbox next to the Name field in order to select the entire Space.
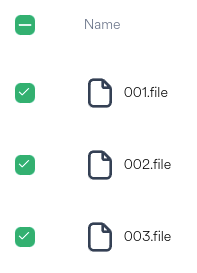
As selections are added or removed, the selected item count is updated:


|
Click the View Selection List button to show the files and directories selected to be processed by the chosen workflow |

|
Click the Clear selections to remove all files and directories currently selected from the selection list |

|
Click the Next button to enact the Job |
Jobs with Workflows which require additional user decisions prior to enacting the Job raise the Configure workflow fields dialog:
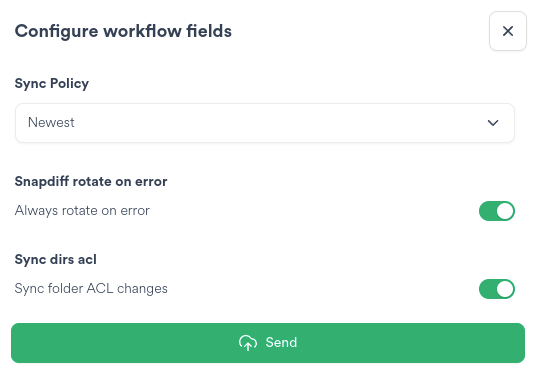
After entering the field information [if required], select the button at the bottom of the dialog to submit the Job.

|
Click the button at the bottom of the dialog to submit the Job. The button label is changed dependent on the workflow chosen. |
Job Types (Workflows)
Default Workflows
Dehydrate
The Dehydrate workflow transfers the file metadata and data to an Ngenea target (E.G. an AWS cloud bucket). After dehydration the file appears to be normally present alike any other file on the pixstor file system, but consumes no space. Reading the file automatically hydrates the file with data content allowing the user to read the file as normal.
Pre-Stage
The Pre-Stage workflow transfers the file metadata and data to an Ngenea target (E.G. an AWS cloud bucket). After migration the file on Ngenea target is an identical instance of the file on the pixstor file system. The file on the pixstor file system is not dehydrated. Reading the file allows the user to read the file as normal. Pre-Staging can reduce the total time to Dehydrate the same data in future.
Hydrate
The Hydrate workflow retrieves the file data from an Ngenea target (E.G. an AWS cloud bucket). After successful transfer the metadata and data content of the file is present on the destination site. Reading the file allows the user to read the file as normal.
Sync Space to Site
The Sync Space to Site uses file system snapshots to disover changes between the last file system snapshot and when the workflow was run. Changes are applied by sending newly created or recently modified files and directories, including deleting or moving files or directories in place on the target site as necessary to match the source site.
Send to Site (hydrated)
The Send to Site (hydrated) workflow transfers data from a source site to a destination site. After successful transfer the metadata and data content of the file is present on the destination site. Reading the file allows the user to read the file as normal.
Send to Site (dehydrated)
The Send to Site (dehydrated) workflow transfers data from a source site to a destination site. After successful transfer the metadata of the file is present on the destination site. To a user the file appears to be normally present alike any other file on the pixstor file system. Reading the file automatically hydrates the file with data content allowing the user to read the file as normal.
Additional Custom Workflows
Hub can support additional Custom Workflows providing custom operations to data through multiple task steps. Custom workflows are configured and provisioned by a Hub Administrator using the Hub CLI. When provisioned Hub Custom Workflows will appear in the list of workflows available for users to use with their data.
Adding a Space
Click the Create Space button to display a dialog to configure the selected site.

Important
This function can only be performed by a Hub Administrator
Create a Space Wizard
Navigating the Wizard

|
Click the close button to exit the wizard. Changes are not saved. |

|
Click the Next button to advance to the next page of the wizard. The Next button is disabled until all required page elements are completed. |

|
Click the Go Back button to return to the previous wizard page. |

|
Click the Finish & Create button to apply the changes displayed on the wizard summary page. |
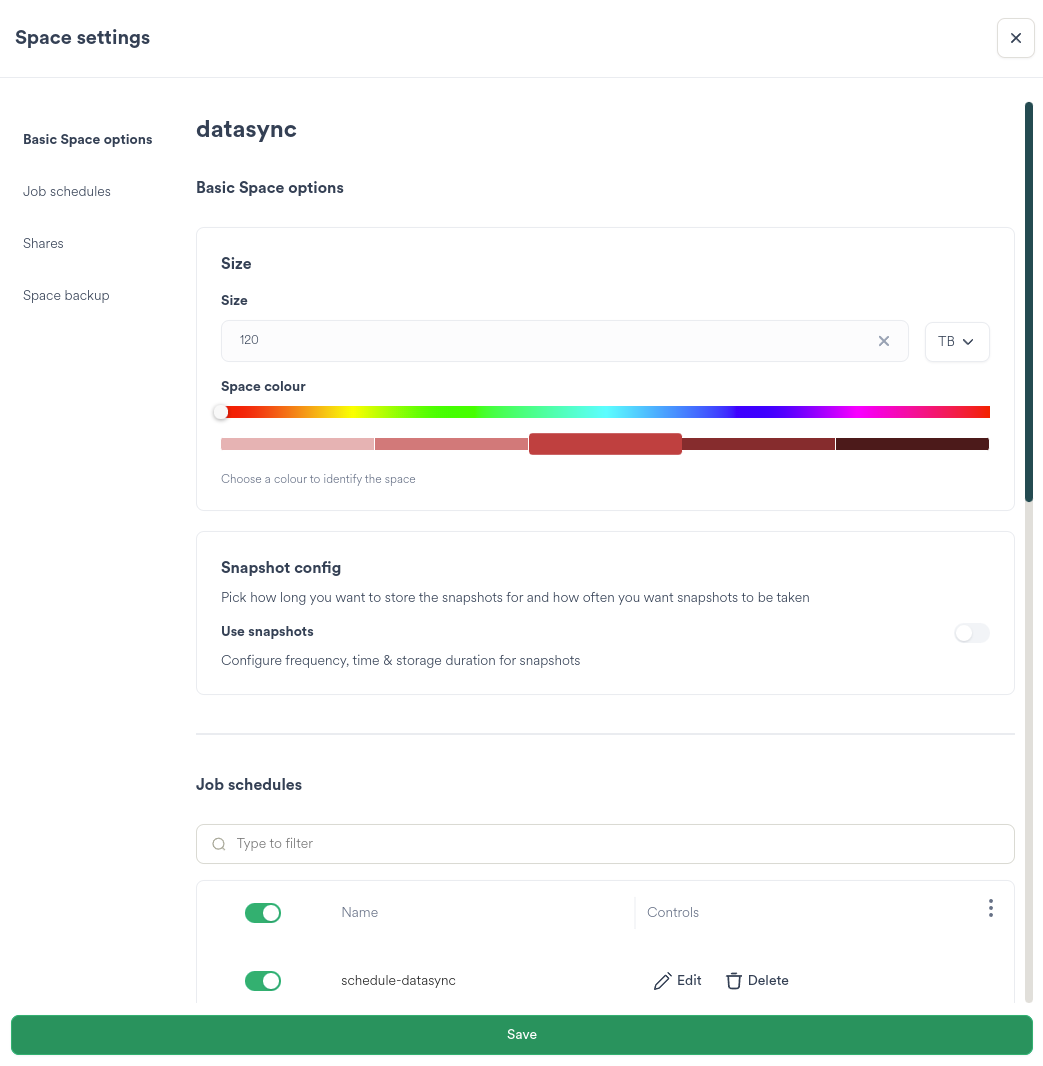
Basic Space Options
Spaces are created on pixstor file systems at /mmfs1/data/[Space] or at an alternative custom location.
Spaces can be restricted to a limited amount of data.
Spaces are defined to a specific file system.
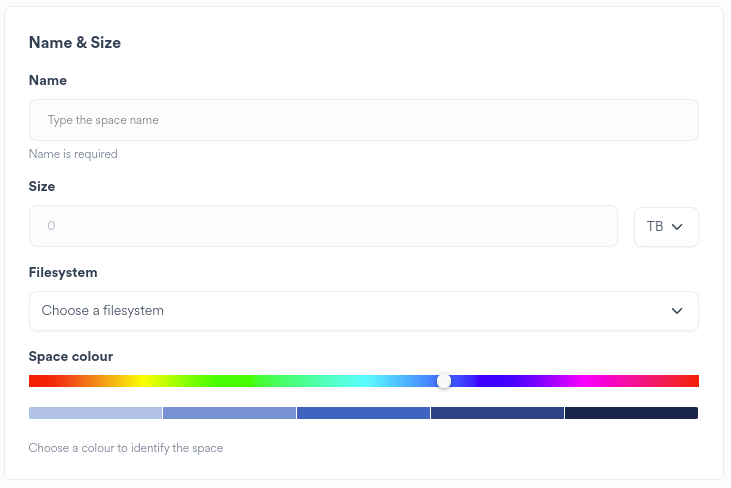
Enter a name of the Space. The name is case-sensitive.
Choose the data limit for the Space or unrestricted (Size = 0)
Select the file system the Space will reside on across all pixstors
Select a colour for the Space Card
Snapshots create safety copies of data on the pixstor file system.
Snapshots are not backups and should not be used as protection against media failures
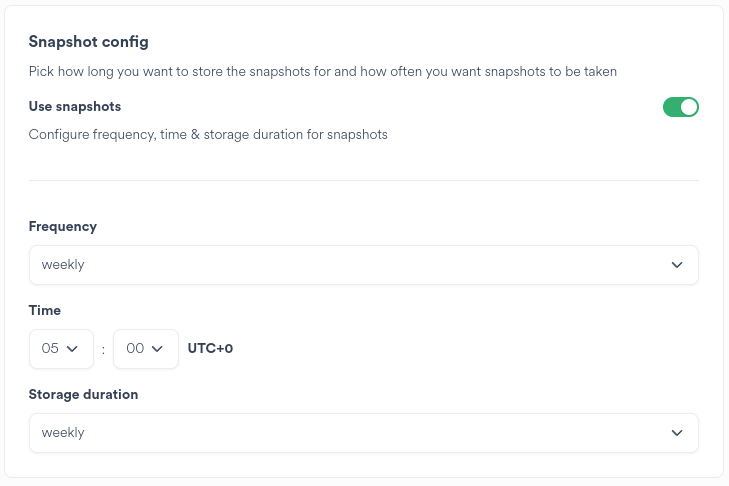
Choose whether snapshots are required for the Space
Choose the frequency of the snapshot
If the frequency is daily or longer, select the time of day in UTC+0 on the Site to snapshot the Space
Choose how long to retain the snapshots
Select the Sites to create this Space on
A Space can exist across multiple Sites.
By default data does not move across multiple Sites. Scheduled workflows must be set up to enable cross-site data movement.
Hub provides the ability to synchronise a Space with two Sites - a bi-directional sync.
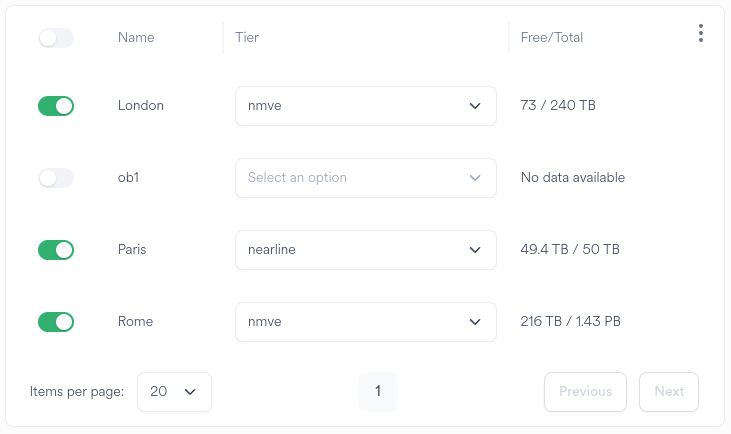
Select the Sites on which to create the Space
Select the pixstor file system tier on which to host the files for the Space. The tier is limited to those available for the file system selected in the prior wizard screen.
If two Sites are selected the Wizard will prompt to setup a bi-directional sync.
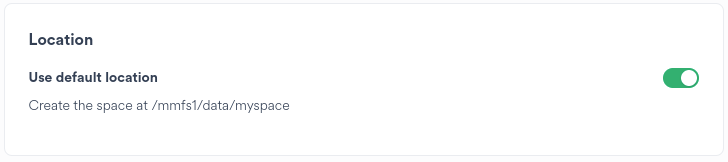
To select an alternative custom location, deactivate the Use default location slider

|
Click the Pick location on filesystem button to open the location selector |
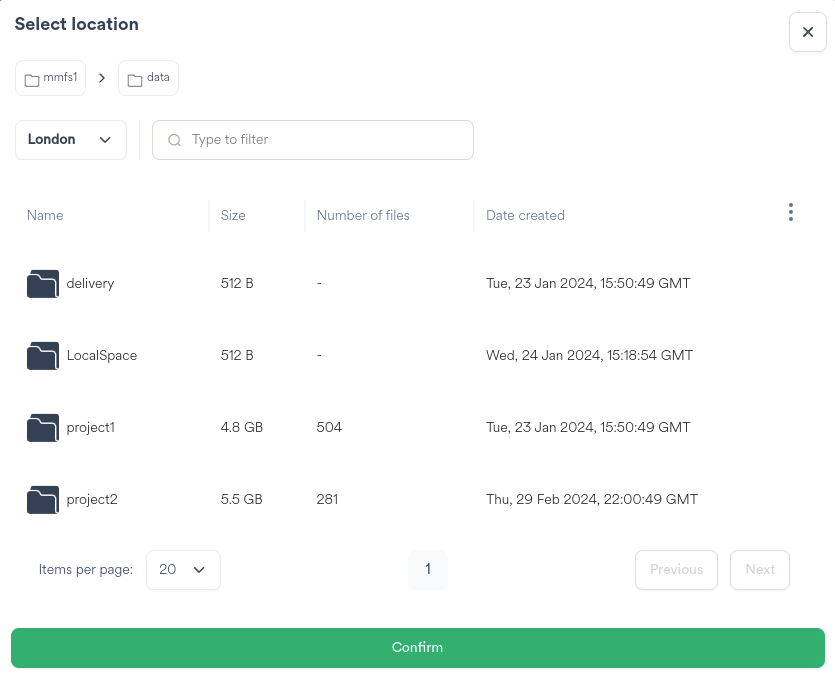
Select a Site to browse. Parent directories not present on another Site will be added when a Space is created.
Navigate to the directory under which to create the Space
Click the Confirm button to return to the Space creation wizard
The chosen location is displayed and will be used for all Sites on which the Space is created.
Set up bi-directional sync
If two Sites are selected on the prior wizard page, Hub prompts to setup a bi-directional sync.
Only one bi-directional sync can run at a time.
This page can be skipped if no synchronisation is required.

Select the source Site to launch the first sync from
Select the other Site as the destination site
Schedule
Determine the required frequency of the synchronisation.
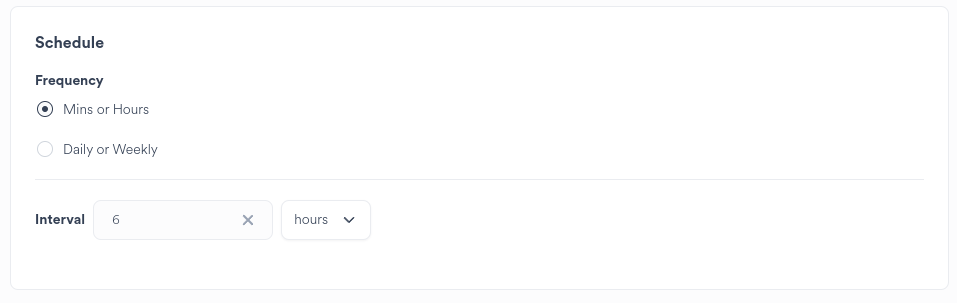
Choosing Mins or Hours will ensure that the schedule will run on the next interval set.
E.G: * 1 hour: The synchronisation will run on the next hour (12.00, 13.00) * 15 mins: The synchronisation will run on the next 15 minute interval past the hour (15, 30, 45, 00)
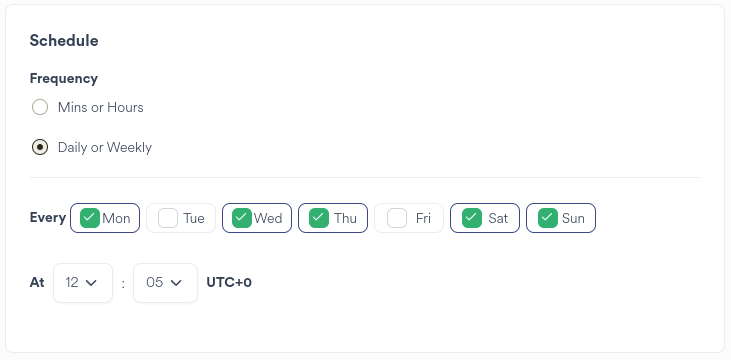
Choosing Daily or Weekly allows the synchronisation to be be scheduled once per chosen day at a specific time of day.
Hint
The schedule time is in UTC+0. You may need to account for any timezone offset of the site when scheduling.
Shares
Prior to Space creation Shares can be assigned.
Shares are created across all Sites where the Space is provisioned.
As the Space is not yet created any Share created is assigned to the whole Space. To create Shares within the Space, edit the Space after creation and add the required Shares.
|
|
To create shares for directories within a Space can be created via the Edit Space button after successful Space creation. Shares are created identically across all Sites participating in a Space. |
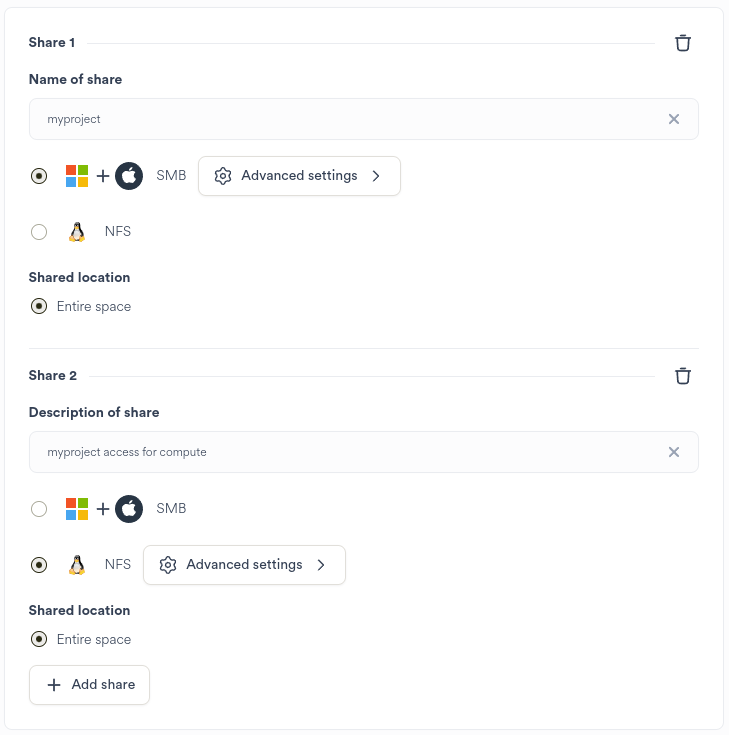
Select either protocol type to create a Share
SMB protocol creates a Share with the name provided.
NFS protocol creates a Share at the Space location on the pixstor file system. Set a suitable description of the share.
Optionally choose to modify the Share configuration in the Advanced settings.
SMB Advanced
Modifying the extended SMB options controls the Share capabilities:

Select the available extended SMB options as appropriate:
Option |
Description |
|---|---|
Read only |
If enabled then users of the Share may not create or modify files in the Space. |
Enable multi-threaded writes |
Enable asynchronous reads and writes |
Locking for root share |
Enforce file locking |
HSM support |
Support ngenea operations to data within the Space |
Guest OK |
Access will be permitted as the default guest user |
On occasion Administrators may find it necessary to further tailor SMB Shares in order to provide additional capabilities E.G. compatibility or performance tunings.
Pixstor supports additional SAMBA Custom Options per-share. Custom Options defined for a Space's Share are applied across all Sites where the Space is provisioned.
Important
SMB Custom Options are applied verbatium to the underlying SAMBA configuration. Incorrect entries can result in service outage.
Add a new Custom Option as follows:

|
Click the Add new key to define a new custom option |
|
Enter the name of the custom option setting in the Keyword field |
|
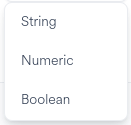
Select the type of custom option from the drop down menu. Choose or enter the value for the custom option. |
Example of added Custom Options:
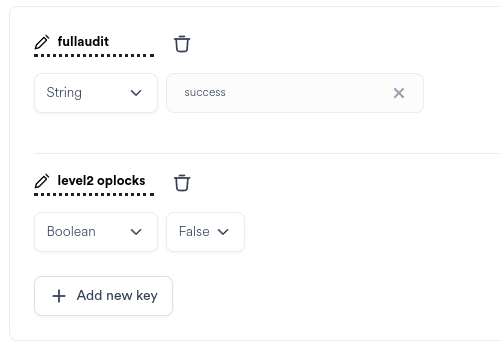
To modify an existing custom option change the keyword, type or values as appropriate.
To delete a custom option select the bin icon next to the item.

|
Click the delete button to remove a custom option |
Granted full permission to data in the Space to a specific set of users or groups:
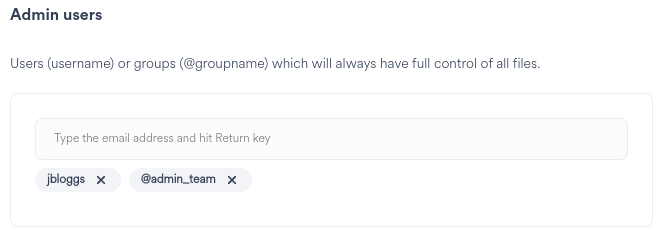
Add users by username
Add groups by prefixing the group name with an @ character
Hint
For users or groups containing spaces or symbols, etc. use quotes. E.G. @"Domain Admins"
Restrict the access to the share to a specific set of users or groups:
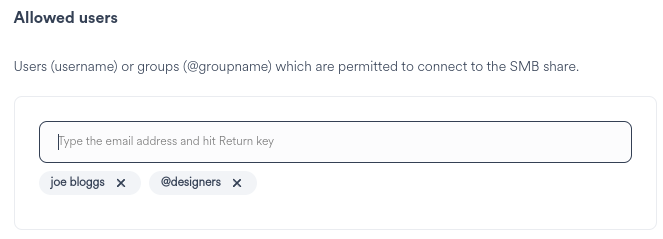
Add users by username
Add groups by prefixing the group name with an @ character
Hint
For users or groups containing spaces or symbols, etc. use quotes. E.G. @"Domain Admins"
In some scenarios it may be desirable to force the file and directory permissions to specific values in order to create a consistent known permission model. Typically this is observed where systems are not connected to Identity Management services such as Active Directory, LDAP or similar.
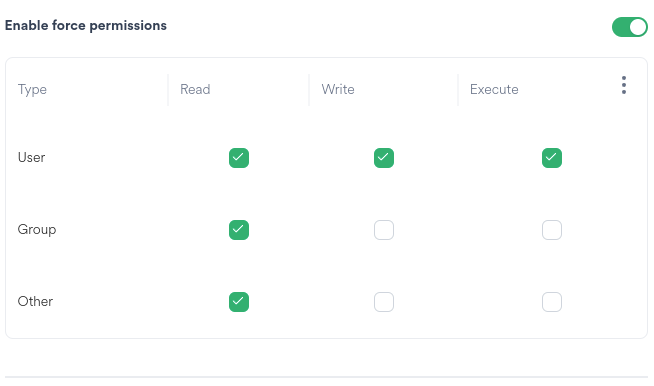
Set the permission overrides as required
pixstor provides the ability to limit connectivity to specific network clients.
If no allow or deny options are defined pixstor will allow connections from any system.
If only a hosts allow option is defined for a share, only the network clients listed will be allowed to use the share. All others will be denied.
If only a hosts deny option is defined for a share, any network client which is not listed will be able to use the share.
If both a hosts allow and hosts deny option are defined, a network client must appear in the hosts allow and not appear in the hosts deny to access the share.
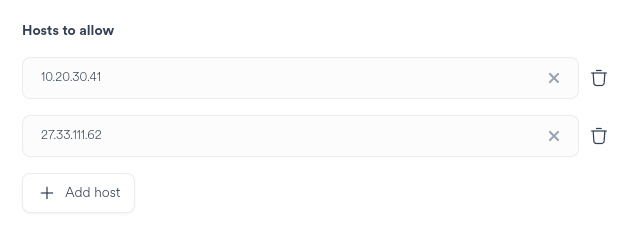
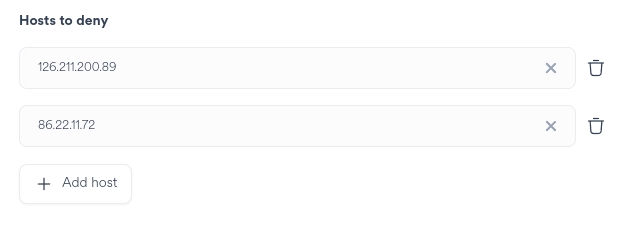
Add the required hosts by specifying the IP address
|
Click the Add host button to add additional hosts |
|
|
Click the delete button to remove a host |
Add the required hosts by specifying the IP address
|
|
Click the Add host button to add additional hosts |
|
|
Click the delete button to remove a host |
NFS Advanced
Modifying the extended NFS options controls the Share capabilities:
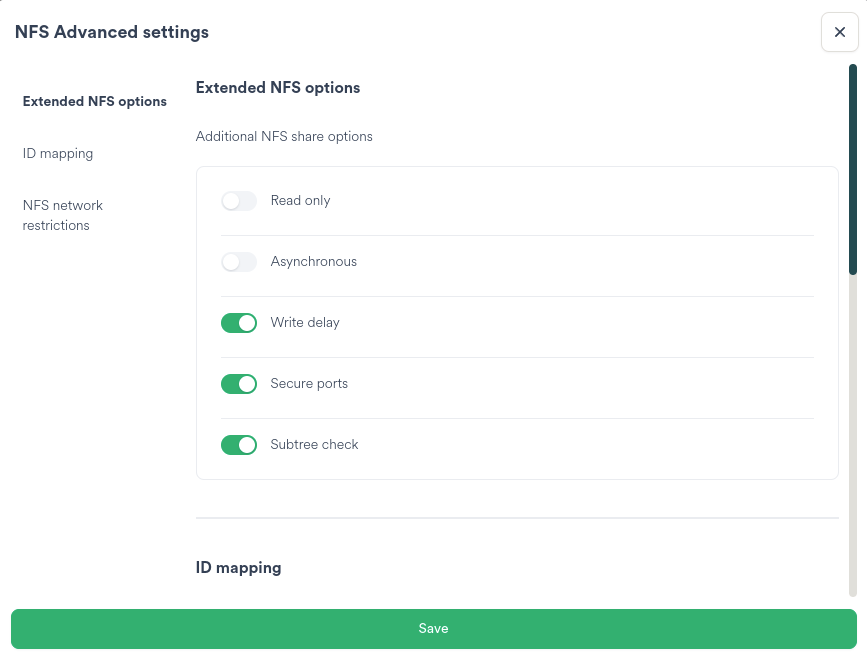
Select the available extended SMB options as appropriate:
Option |
Description |
|---|---|
Read only |
If enabled then users of the Share may not create or modify files in the Space. |
Asynchronous |
Enable asynchronous reads and writes |
Write delay |
Reply to I/O requests only after the changes have been committed to stable storage at a cost of performance reduction. |
Secure ports |
Requires that NFS requests originate from a TCP/IP port from 1-1024 |
Subtree check |
Check the accessed file is in the appropriate filesystem and also within the Share |
All Squash maps all User IDs (UIDs) and group IDs (GIDs) to the anonymous user. This is useful for NFS-exported public FTP directories, news spool directories
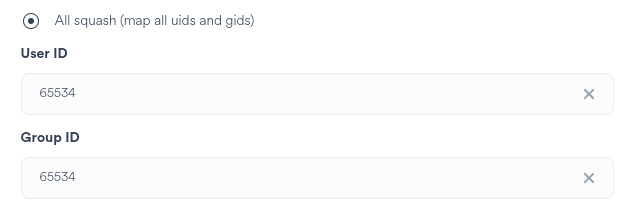
Root squash allows the root user on the client to both access and create files on the NFS server as root. This is conceptually equivalent to the Adminstrator in Windows.
Root Squash is needed if you are hosting root filesystems on the NFS server (E.G. for diskless clients). You should not use no_root_squash unless you are aware of the underlying implications.

No Squash allows the root user on the NFS client host to access the NFS-mounted directory with the same rights and privileges that the superuser would normally have.

pixstor provides the ability to limit connectivity to specific network clients.

Select the Available to all clients option for no restrictions
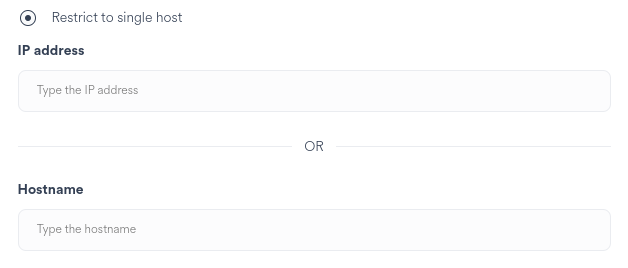
Add the required host to restrict by specifying the IP address or the FQDN hostname
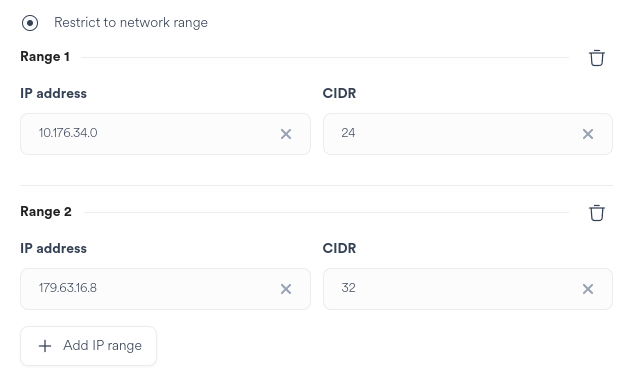
Add the required IP address or network range and specify a valid CIDR mask to apply the restriction
|
Click the Add IP range button to add additional restrictions |
|
|
Click the delete button to remove a host |
Spaces backup
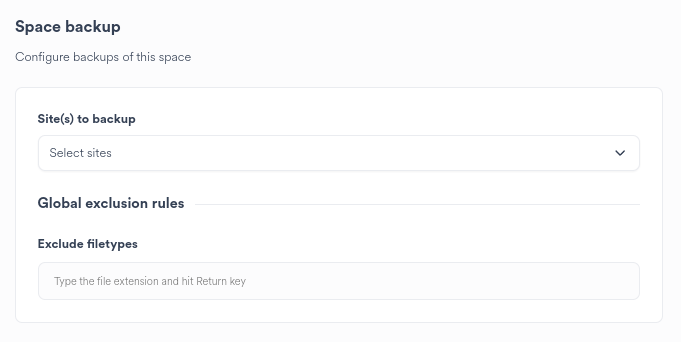
Select the Sites which will perform backups for this space
Define file extensions which must be excluded from backups across all Sites. E.G.
*.tmp
Choosing Site(s) to backup presents further backup options.
For more information refer to Backups.
Important
Multiple Sites are not permitted to backup to the same Ngenea Target.
Jobs
A job comprises one or more tasks, each of which perform an action.
Tasks can be data orientated (E.G. hydrate, dehydrate, SendToSite) or can be management or configuration tasks of pixstor sites and/or services.
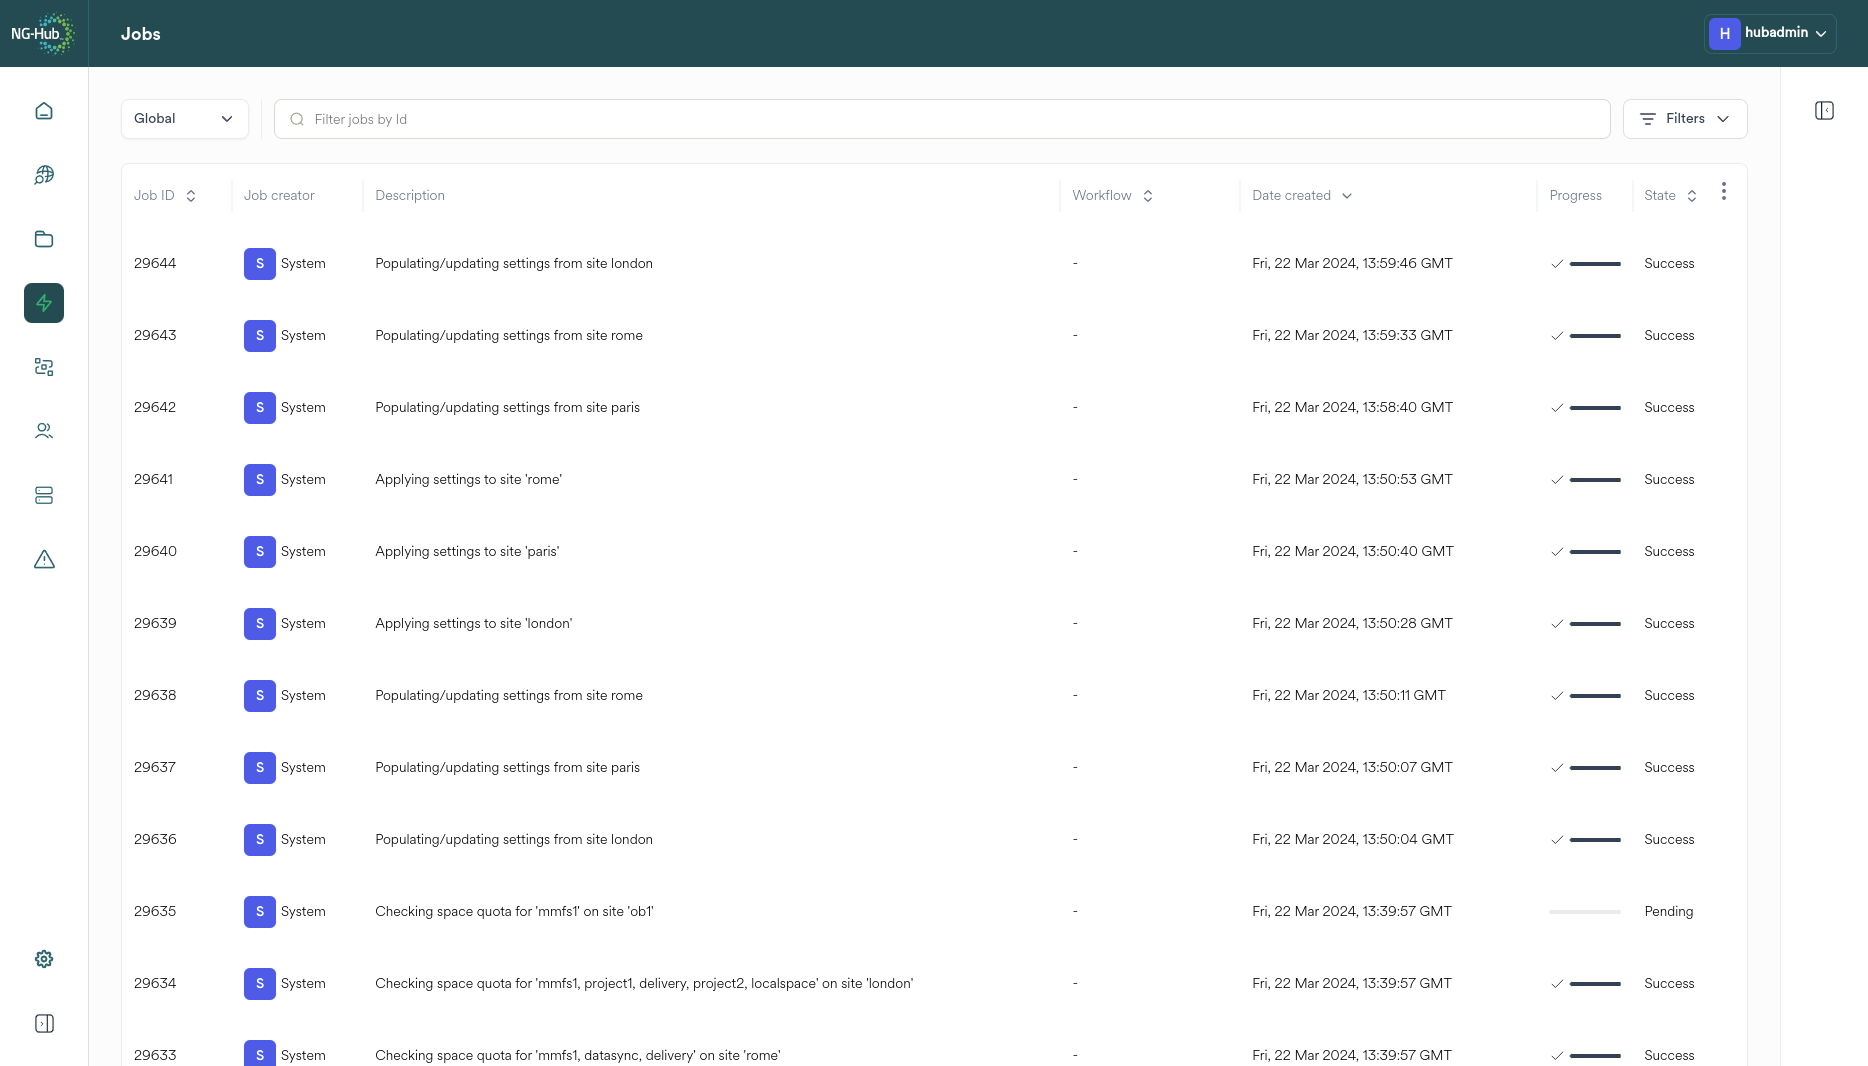
Viewing Jobs
To view Jobs executed on a specific Site, select the Site from the Sites drop down menu or choose Global to display all Jobs from all Sites.

|
Click and select the site to show the jobs from the selected site. |
After selection the Jobs from the selected Site are displayed including high level information for each Job.
Click a Job ID to view in depth information for the job.
Filtering the Jobs View
To display a specific Job ID, enter the ID in the filter bar.
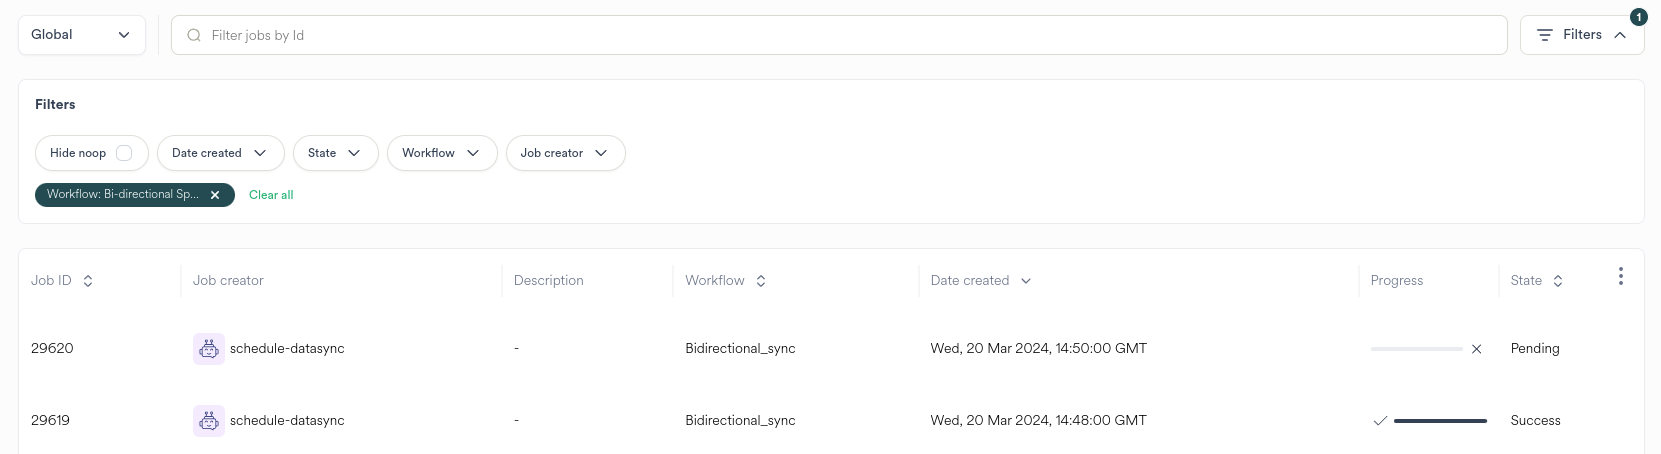
Jobs for a site can be additionally filtered through selection of various criteria.
|
Click the filter button to display the available filters. The number of applied filters is displayed on the Jobs filter button. |

|
Select the Hide noop filter option to hide any job which did not perform any action as the job determined that no actions were required. |

|
Click the Date Created button to filter for any job which was created between two date ranges. |
Clicking the Date Created button raises the date selection dialog. Choose the criteria required and click the Save button to apply the date range.


|
Click the Job State button to display jobs matching the status. Available statuses are: |
Status |
Description |
|---|---|
New |
A job has been created |
Pending |
The job is waiting to run |
Started |
The job is running |
Succeeded |
The job finished successfully |
Error |
The job finished with one or more error conditions |
Failure |
The job finished with one or more failure conditions |
Skipped |
The job was skipped as the work assigned to the job was not required to be undertaken - no change would have occurred if the job had run. |
Cancelled |
The job was cancelled |
Cancelling |
The job is in the process of cancelling |
Pausing |
The job is in the process of Pausing |
Unknown |
The job experienced a result which could not be matched to a Status |
|
Click the Workflow button to filter for jobs matching the Workflow. Available workflows are: |
Type |
Description |
|---|---|
Bi-Directional Sync |
Data synchronisation between two sites |
Delete File |
Deletion of a designated data |
Dehydrate |
Dehydration of data |
Pre-Stage |
Staging of data to an Ngenea target. Subsequent dehydrations save time as there is no requirement to stage data prior to dehydration. |
Hydrate |
Hydration of data |
Reverse Stub |
Creation of dehydrated files not prior existing which reference data in an Ngenea target |
Send |
Deliver data from a source to a destination site |
Send to Site (hydrated) |
Deliver data from a source to destination site as hydrated files |
Send to Site (dehydrated) |
Deliver data from a source to destination site asdehydrated files |
Sync Space to Site |
Synchronising data from a source to a destination site |
Transparent Recall |
User or application initiated hydration of data on reading |
|
Click the Job creator button and select the name of one or more creator(s) to view jobs by the selected creator(s) |
Viewing a Job
Clicking a Job ID in the main Job screen displays the in depth information for the job.
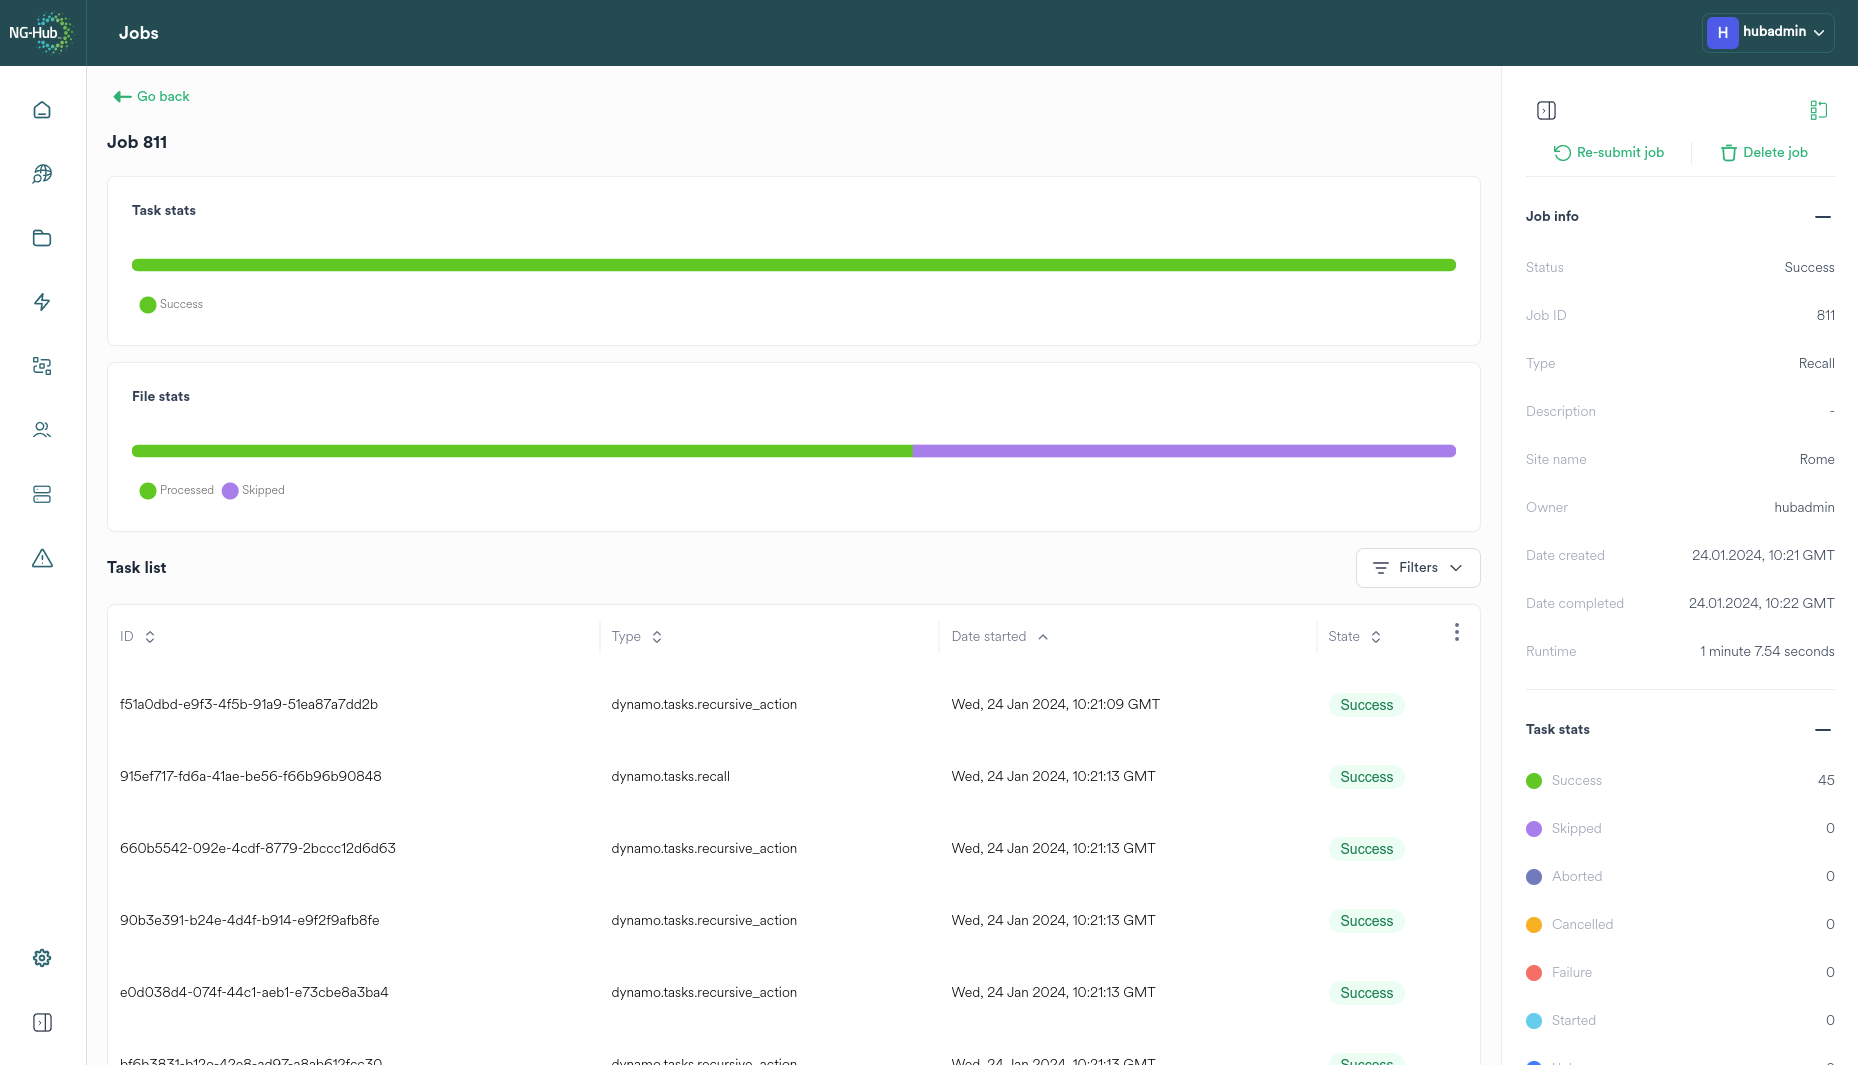
The Job View comprises:
Task stats
The total count of types operation result per task is represented by the horizontal bar segments.
Hovering over the bar provides the count of each task status for the tasks processed.

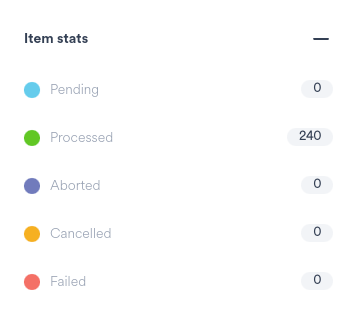
File/Item stats
The total count of types operation result per item is represented by the horizontal bar segments.
Items may be files, directories or Objects.

Hovering over the bar provides the count of each type processed.
Bi-Directional Sync and Site Sync workflows only provide File stats.

The Job Side bar
Enlarge/Reduce

|
Clicking the toggle displays the Job Side bar to show: |
|
Clicking the toggle button again hides the Job Side bar.
Reordering
Re-arrange items in top to bottom order by dragging vertically up or down.
Job Controls
Jobs provide the following controls where supported by the Workflow:

|
If supported by the Workflow, click the Pause job button to pause the Job. Tasks which are not running will be paused. |

|
If supported by the Workflow, click the Resume job button to resume a paused Job. |

|
Click the Cancel Job button to cancel any future tasks from running and no longer proceed with the Job |

|
Click the Re-submit job button to launch an identical Job on the Job queue |

|
Click the Delete Job button to remove the records of the Job and associated tasks from the Hub database |
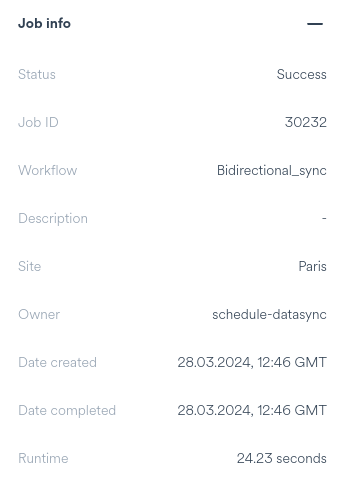
Job Info Summary
Provides an overview of high level information of the Job.
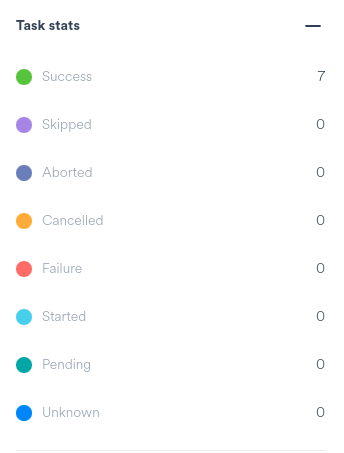
Job Info Task Stats
Jobs undertake tasks to process one or more actions, files, directories or objects as defined by the Workflow.
The Task stats displays the total count of types operation result per task.
Item stats
The total count of types operation result per item is represented by the horizontal bar segments.
Items may be files, directories or Objects.
Hovering over the bar provides the count of each operation type for the files processed.
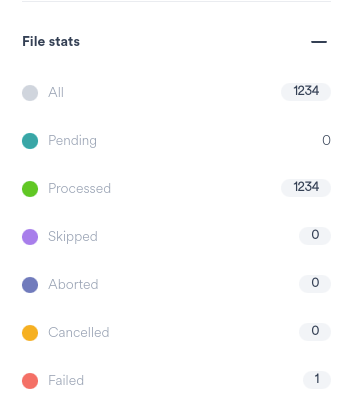
File stats
Bi-Directional Sync and Site Sync workflows only provide File stats.
The File stats displays the total count of types operation result per file or directory.
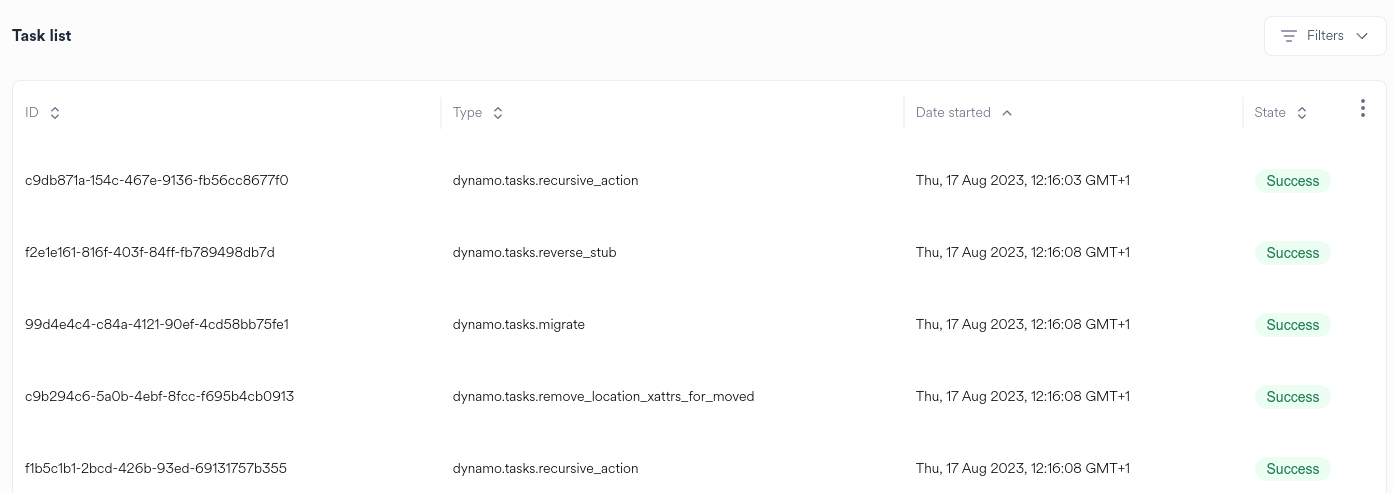
The Job Task List
The Task list displays all tasks comprising a job, their ID, type, start time and status.
Filtering the Job Task List
Tasks for a job can be additionally filtered through selection of various criteria.
|
|
Click the filter button to display the available filters. The number of applied filters is displayed on the Task list filter button. |
|
|
Click the State button to display jobs matching the status. Available statuses are: |
Status |
Description |
|---|---|
New |
A task has been created |
Pending |
The task is waiting to run |
Started |
The task is running |
Succeeded |
The task finished successfully |
Error |
The task finished with one or more error conditions |
Failure |
The task finished with one or more failure conditions |
Skipped |
The task was skipped as the work assigned to the job was not required to be undertaken - no change would have occurred if the job had run. |
Cancelled |
The task was cancelled |
Cancelling |
The task is in the process of cancelling |
Aborted |
Whilst running, the task was unable to proceed correctly and aborted the in progress action |
Paused |
The task is paused |
Pausing |
The task is in the process of pausing |
Unknown |
The task experienced a result which could not be matched to a Status |
|
Click the Task type button to filter for a specific task type which comprises the Job. The task types are dynamic therefore the displayed types may differ per job type. |
Task information Dialog
Clicking a task ID in the Job Task List displays the information for the chosen task.
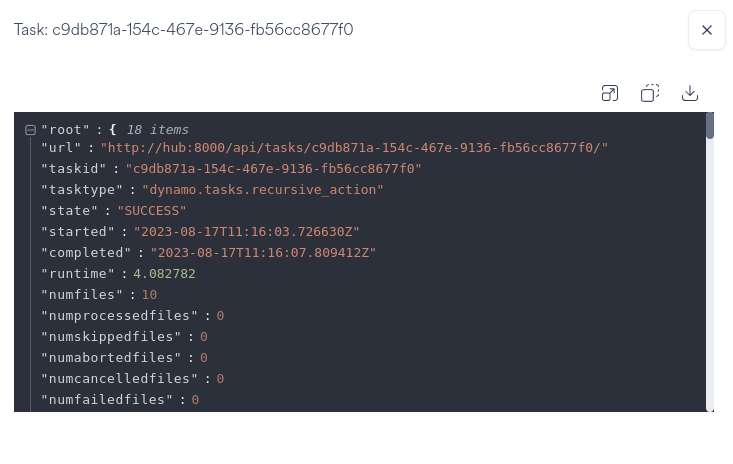
Dependent on the number of operations and the quantity of inputs to the task, the information displayed can range from short to extensive.
Optionally select an action button to more easily view the Task Information.

|
Click the Full Screen button to display the Task Information in a larger view |

|
Click the Copy button to copy the Task Information output to the clipboard. |

|
Click the Download button to download the Task Information locally |

|
Click the Close button to close the Task Information dialog |
Scheduling
Hub can regularly perform the same action to a Space via Job Schedules.
Spaces which are deployed with Bi-Directional Sync automatically have a Schedule added.
Schedules can be added to the entirety of a Space. It is not possible to schedule more granular activities within a Space (E.G. regular Hydration of an individual file or directory).
Adding a Schedule
To add a Schedule to a Space, select the Space checkbox at the top left of the Space Card.
Selecting the checkbox shows the Job Creator Panel.
For further information refer to Using the Job Creator Panel.
After selecting any chosen requirements for the Job Creator Panel, the Configure workflow fields panel is raised.
If the job is to be immediately run, click the larger titled button related to the chosen Workdlow (E.G. Hydrate). Alternately the Job can be Scheduled to run later.
To Schedule the Job to run later, click the Schedule button.

|
Click the Schedule button to Schedule the Job for later |
The Schedule button raises the Schedule Job dialog.
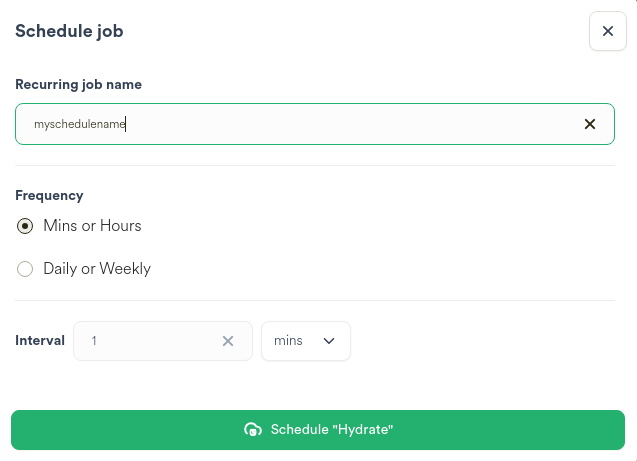
Enter the name of the Schedule
Select the desired Schedule settings
Click the Schedule button to create the Schedule
Editing Schedules
Schedule settings can be modified as required.
|
|
Clicking the Settings button on the Space card raises the Settings dialog for the Space. |
Important
Adding or Configuring a Space can only be performed by a Hub Administrator or User with Space Administration rights granted through group management.
Click the Job Schedules menu item on the Space settings dialog.
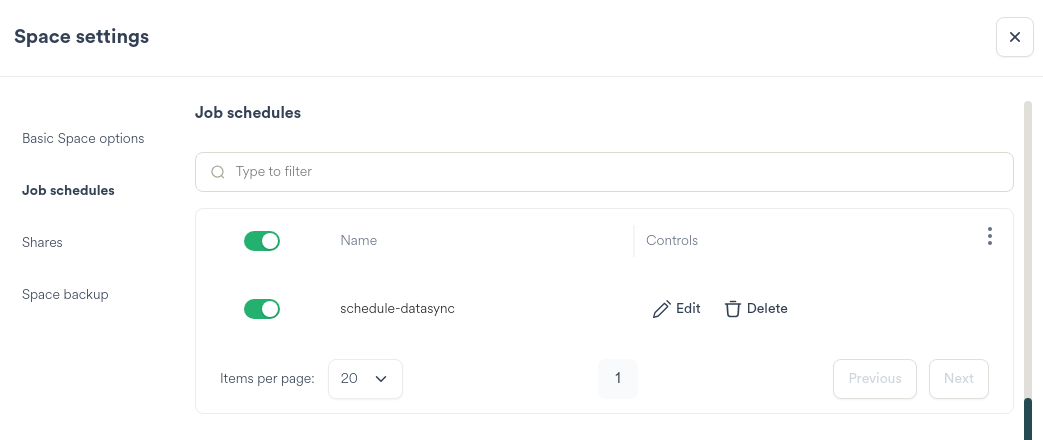
The Schedules for the Space are viewable.

|
Click the Edit button for the Schedule to be modified |
Clicking the Edit button raises the Update job schedule dialog.
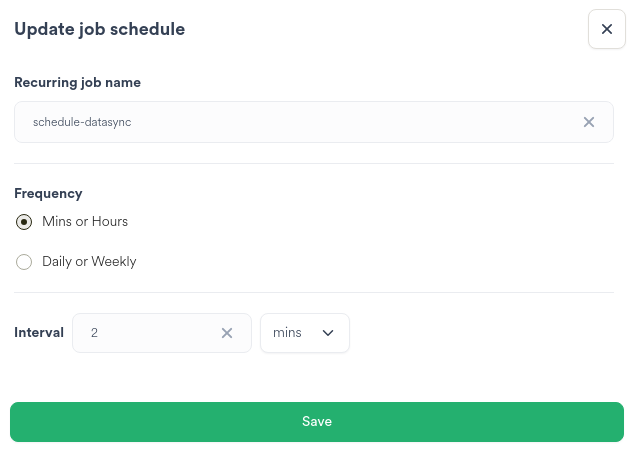
Modify the desired Schedule settings
Click the Save button to store the modified Schedule settings
Deleting Schedules
Schedules no longer required can be removed from Hub.
|
|
Clicking the Settings button on the Space card raises the Settings dialog for the Space. |
Important
Adding or Configuring a Space can only be performed by a Hub Administrator or User with Space Administration rights granted through group management.
Click the Job Schedules menu item on the Space settings dialog.
The Schedules for the Space are viewable.

|
Click the Delete button for the Schedule to be deleted |
Tip
Deleted Schedules are non-recoverable. If a Schedule has been inadvertently removed, do not press the Save button, instead click off the Space settings dialog to the main area of the screen.
Clicking the Save button at the bottom of the Space settings dialog saves any changes made.
Groups & Users
Hub provides management of Groups and Users internally.
Users may be authenticated by external directory services such as LDAP or Active Directory.
Two default groups are provided:
Members of Administrators can configure and manage all Sites and Spaces
Members of Users have read-only access to all Spaces
Additional groups can be deployed to provide restricted access for users to Sites and Spaces.
Viewing Groups
To view the available Groups managed in Hub, select the Group tab.
Important
Group management can only be performed by a Hub Administrator.
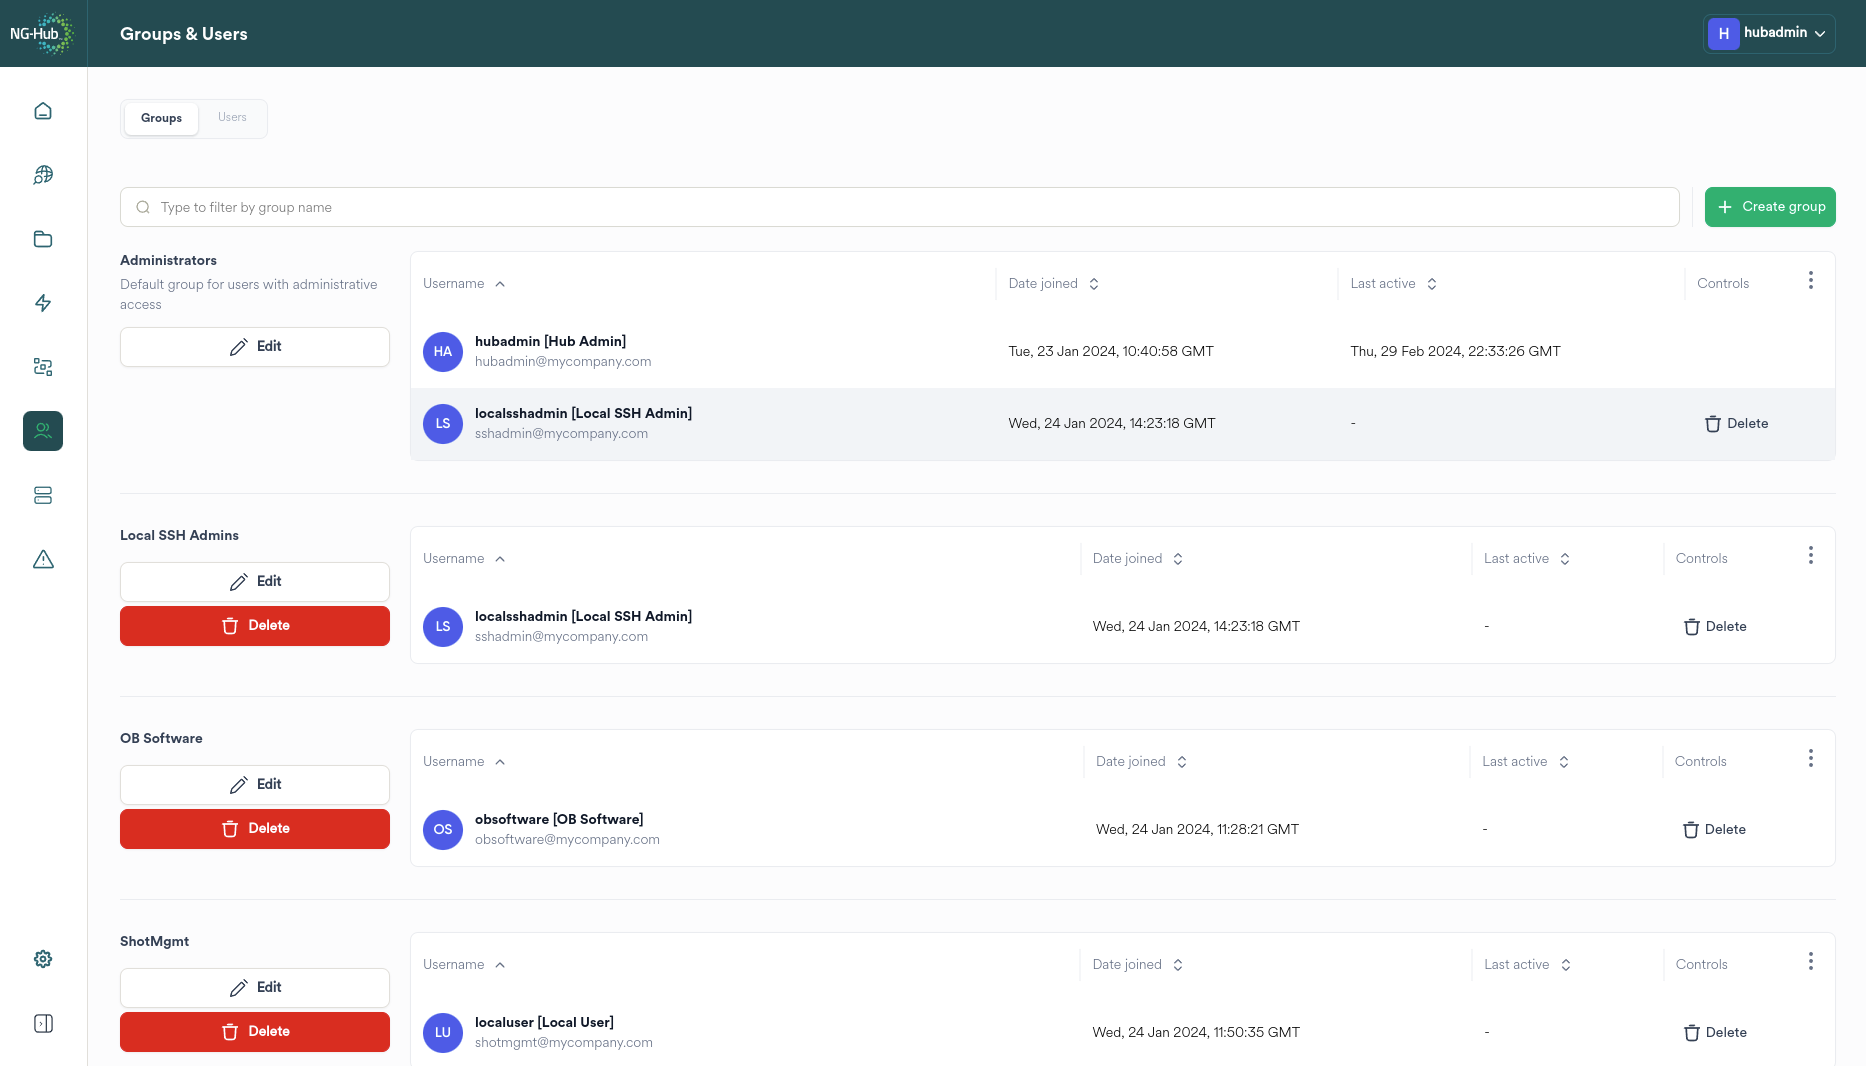
The Groups tab provides the following actions:
Group creation
Group deletion
Group member management

|
Click the View all members button to view all the members of the group |
Clicking the View all members button raises the Group Membership dialog.
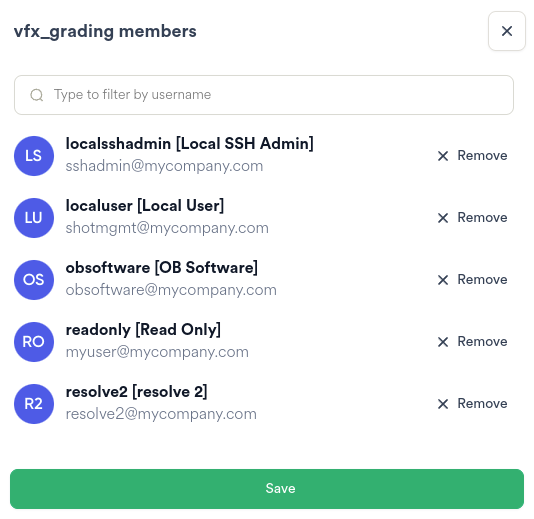
To filter for a User within the list of group members enter a keyword in the Filter for...

The displayed Users is limited to the sites which match the keyword(s).

|
Click the Remove button to remove a User from the Group |
Tip
If a User has been inadvertently removed, do not press the Save button, instead click off the Group members dialog to the main area of the screen.
Clicking the Save button at the bottom of the Group members dialog saves any changes made.
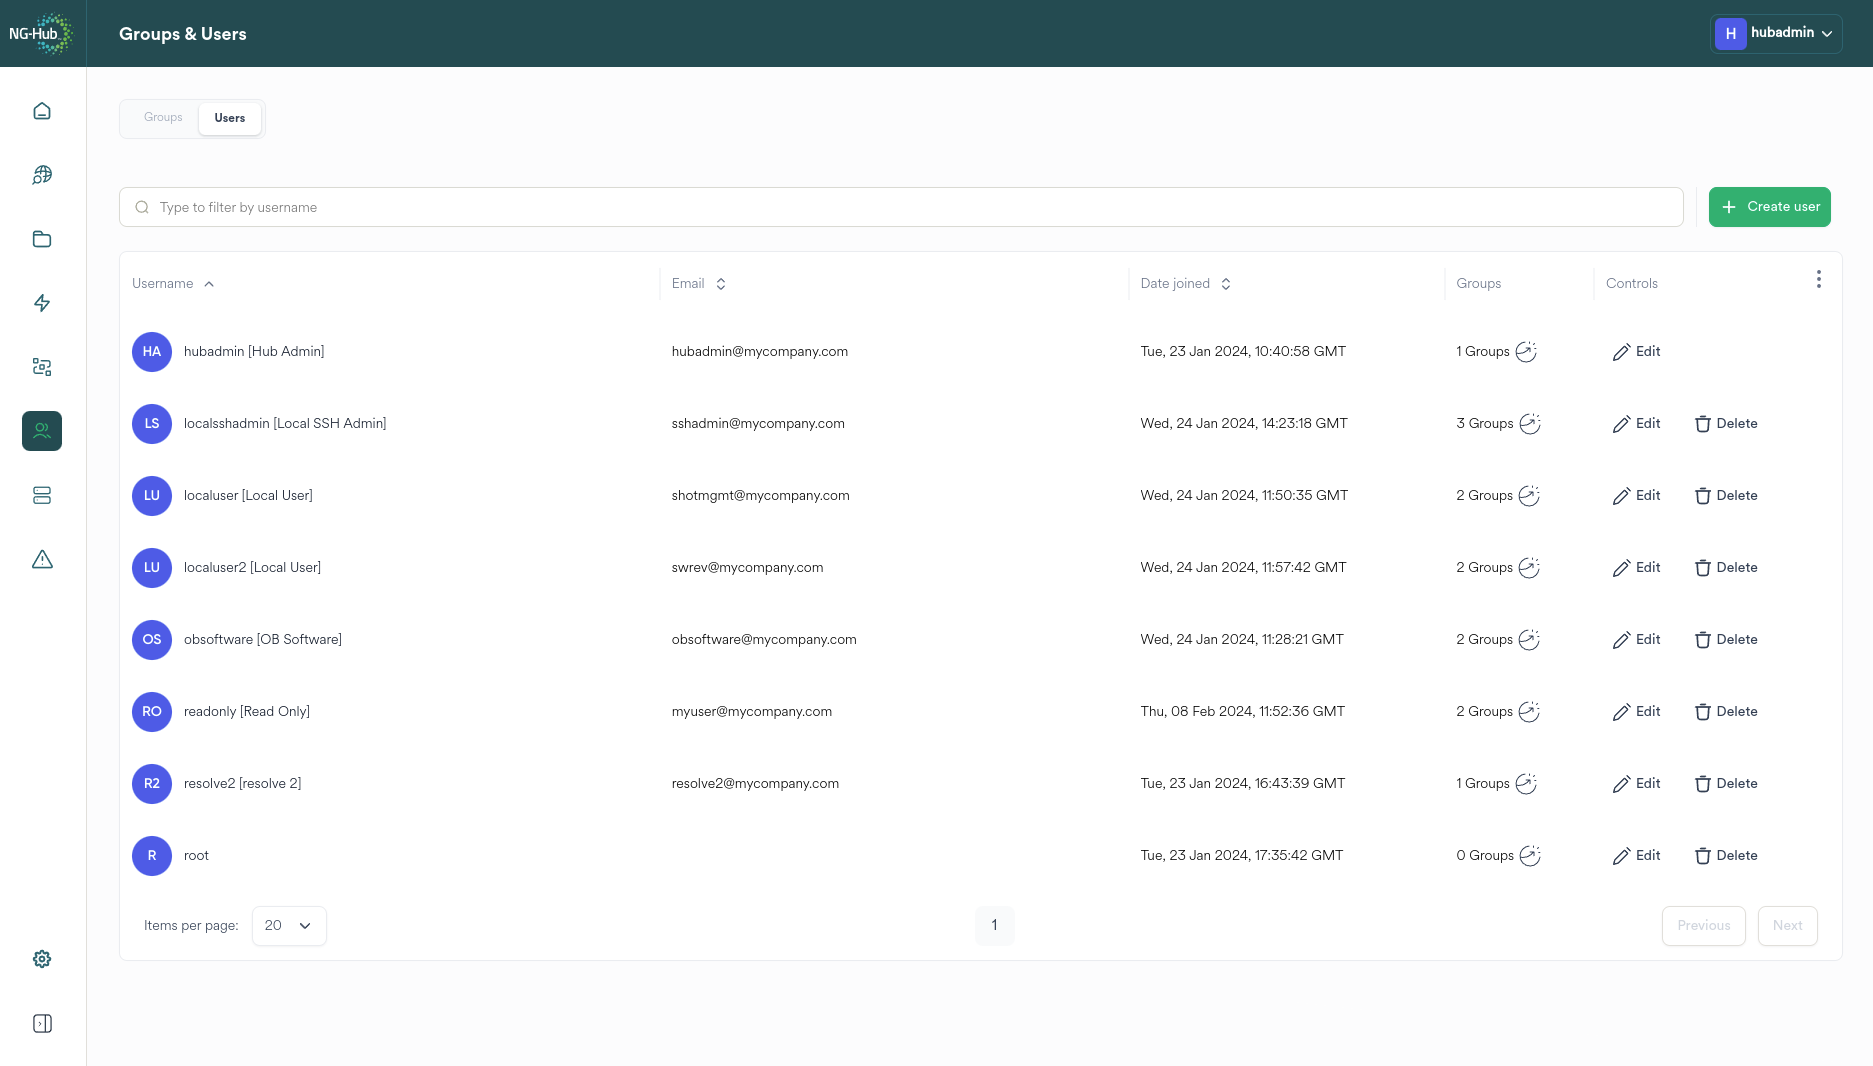
Viewing Users
To view the available Users managed in Hub, select the Users tab.
Important
User management can only be performed by a Hub Administrator.
Restricting Users from Spaces
All users in the group Users have read-only access to all Spaces.
Should it be required to restrict a user from accessing specific spaces Spaces this can be achieved by:
Creating a new user group
Ensuring that only the specific spaces are assigned to the group
Add specific users to the group
Ensure the specific users are removed from the group Users
Caution
Adding a Space to a group's Administered Spaces and Used spaces will allow assigned Users to change the settings for a Space. If administrative operations are not required, do not assign Spaces to Administered Spaces - create an additional group to allow specific users to administrate specific spaces.
Sites
A site is a physical or cloud based pixstor server managed by Hub.
Filtering Sites
To filter for a site within the list of sites enter a keyword in the Search for...
The displayed sites is limited to the sites which match the keyword(s).
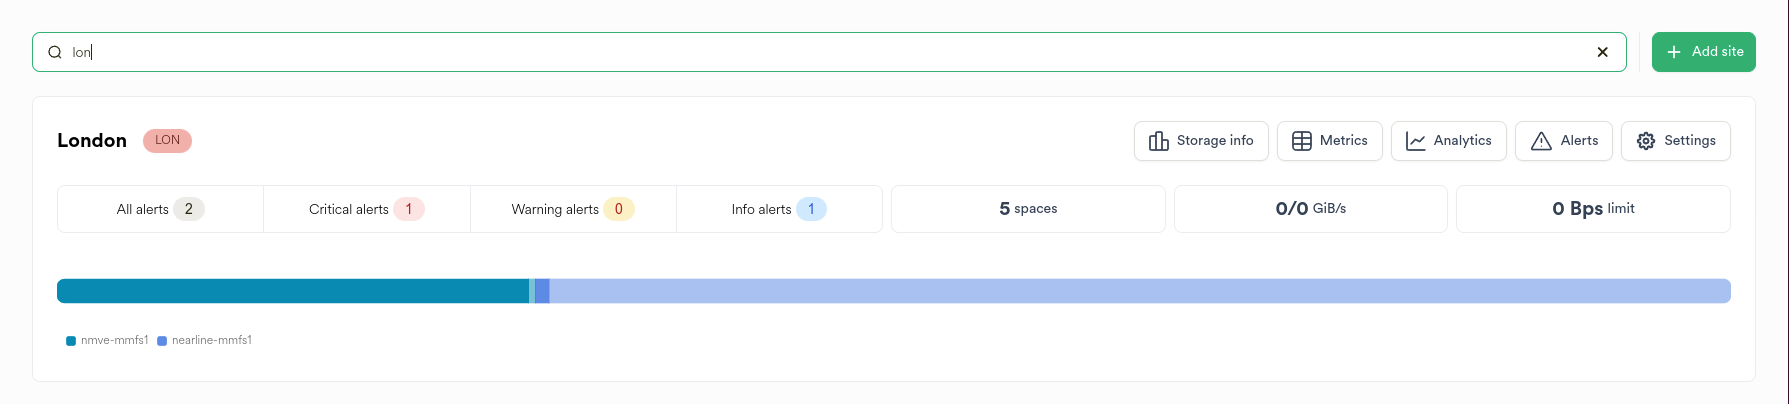
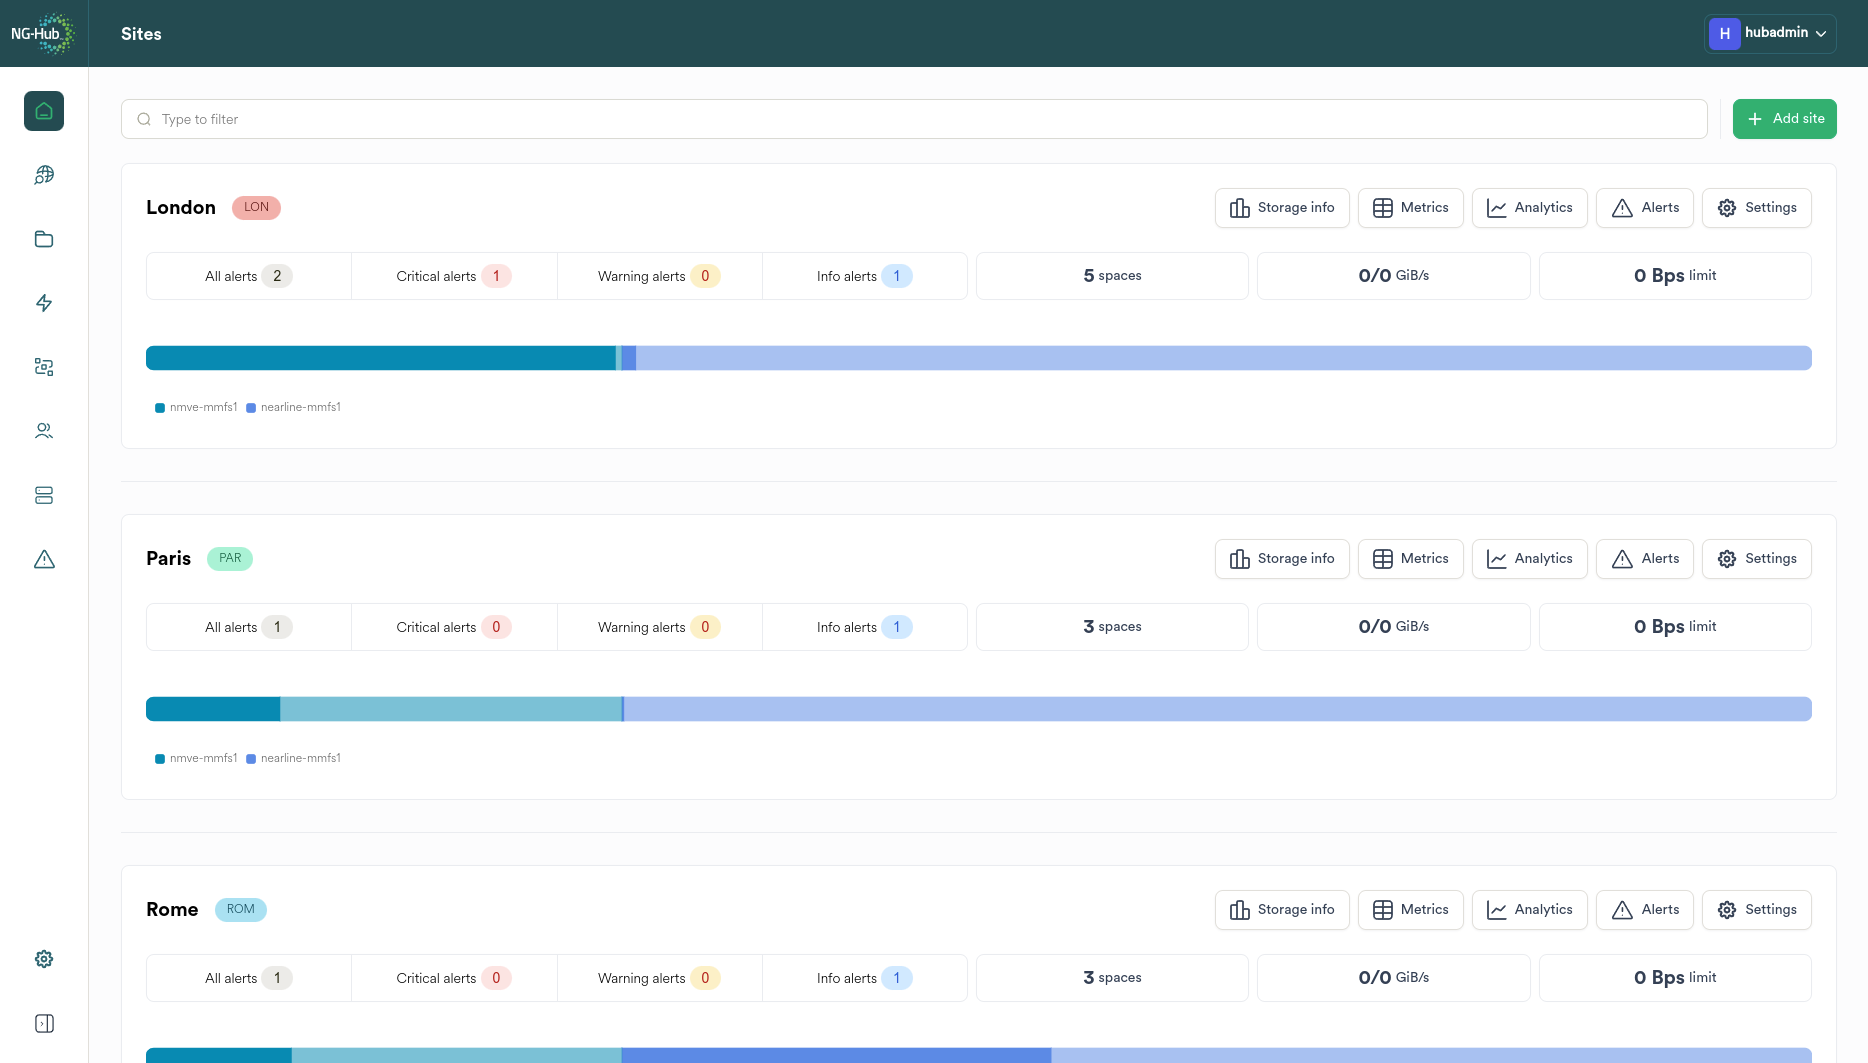
The Site Card
Each site is displayed as a site card.
A Site is displayed as a card in the Sites view.

A Site Card comprises:
Site Name

|
Displays the designated friendly name of the site with the ngenea site chip |
Site Summary
The site summary displays high level totals for the number of files and folders present, the ngenea hydrated and dehydrated states and the number of Spaces the site hosts.

Alert Types
Numbered filter buttons display the count of each type of Alert for the Site.
Select a button to open the Alerts for the Site, filtered for the specific Alert type.

|
Click the All alerts button to view all alerts |

|
Click the Critical alerts button to filter for all Critical alerts |
|
Click the Warning alerts button to filter for all Warning alerts |
|
Click the Info alerts button to filter for all Info alerts |
Storage Info
|
Click the Storage info button to open the Storage Info browser for the Site. |
Site Metrics
|
Click the Metrics button to open the pixstor nexus site metrics in a new browser tab. |
Site Analytics
|
Click the Analytics button to open the pixstor nexus site analytics in a new browser tab. |
Site Alerts
|
Click the Alerts button to open the Alerts for the Site. |
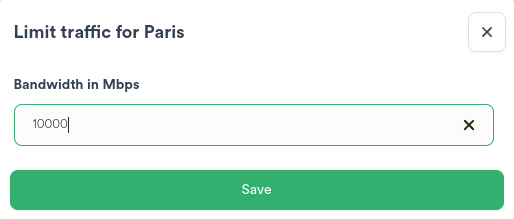
Bandwidth Control
If bandwidth control has been enabled by a Hub Administrator with CLI access, the bandwidth of a site can be limited to a defined value. The current value is observed on the bandwidth limit button.

|
Click the bandwidth limit button to display the bandwidth control dialog. |
The bandwidth control dialog allows limiting the bandwidth of a site to a defined value. Enter the limit in Megabits per second (Mbps) and press Save to apply the limit.
Hint
If the bandwith for a site has been inadvertently set do not press the Save button, instead click off the Bandwith limit dialog to the main area of the screen.
Important
This function can only be performed by a Hub Administrator.
Settings
Important
This function can only be performed by a Hub Administrator.
|
Click the site’s Settings button to display a dialog to configure the selected site. |
Modify the Site settings as required. Refer to Adding a Site for settings guidance.
Pool Space
One or more pixstor storage pools which comprise the pixstor file system are represented.
Hovering over the pool percentage bar provides the remaining capacity for the pool.

Adding a Site
Add Site Wizard
Hub allows remote configuration of all participating pixstor sites.
New sites are automatically joined to Hub awaiting optional configuration via the Site Wizard.
Navigating the Wizard
|
|
Click the close button to exit the wizard. Changes are not saved. |
|
|
Click the Next button to advance to the next page of the wizard. The Next button is disabled until all required page elements are completed. |
|
|
Click the Go Back button to return to the previous wizard page. |
|
|
Click the Finish & Create button to apply the changes displayed on the wizard summary page. |
Add Site

|
Click the Add site button to display a dialog to configure the selected site. |
Important
This function can only be performed by a Hub Administrator.
Pick site to configure
Sites which have been automatically registered to Hub but not yet configured are shown:
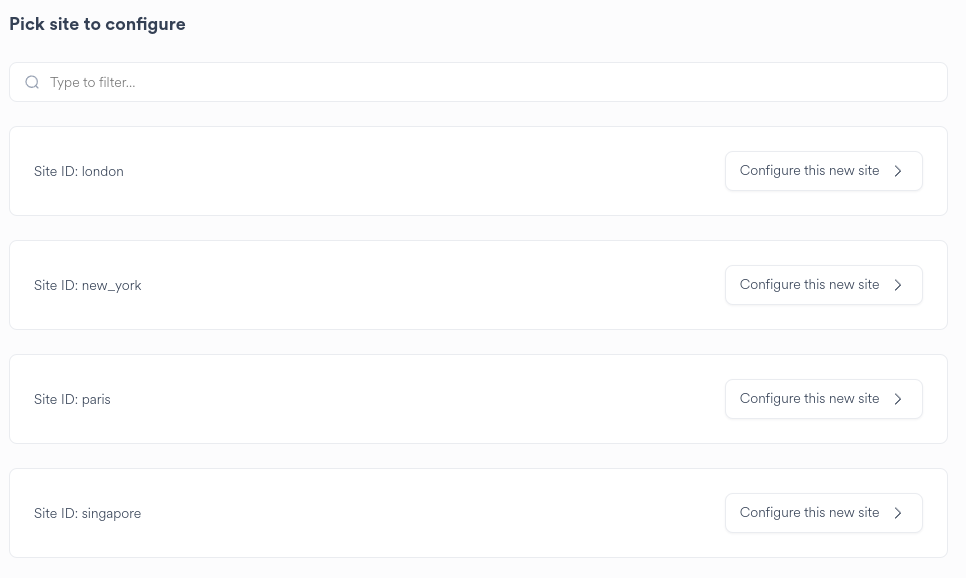
Select a site to configure
|
Click the Configure this new site button to proceed |
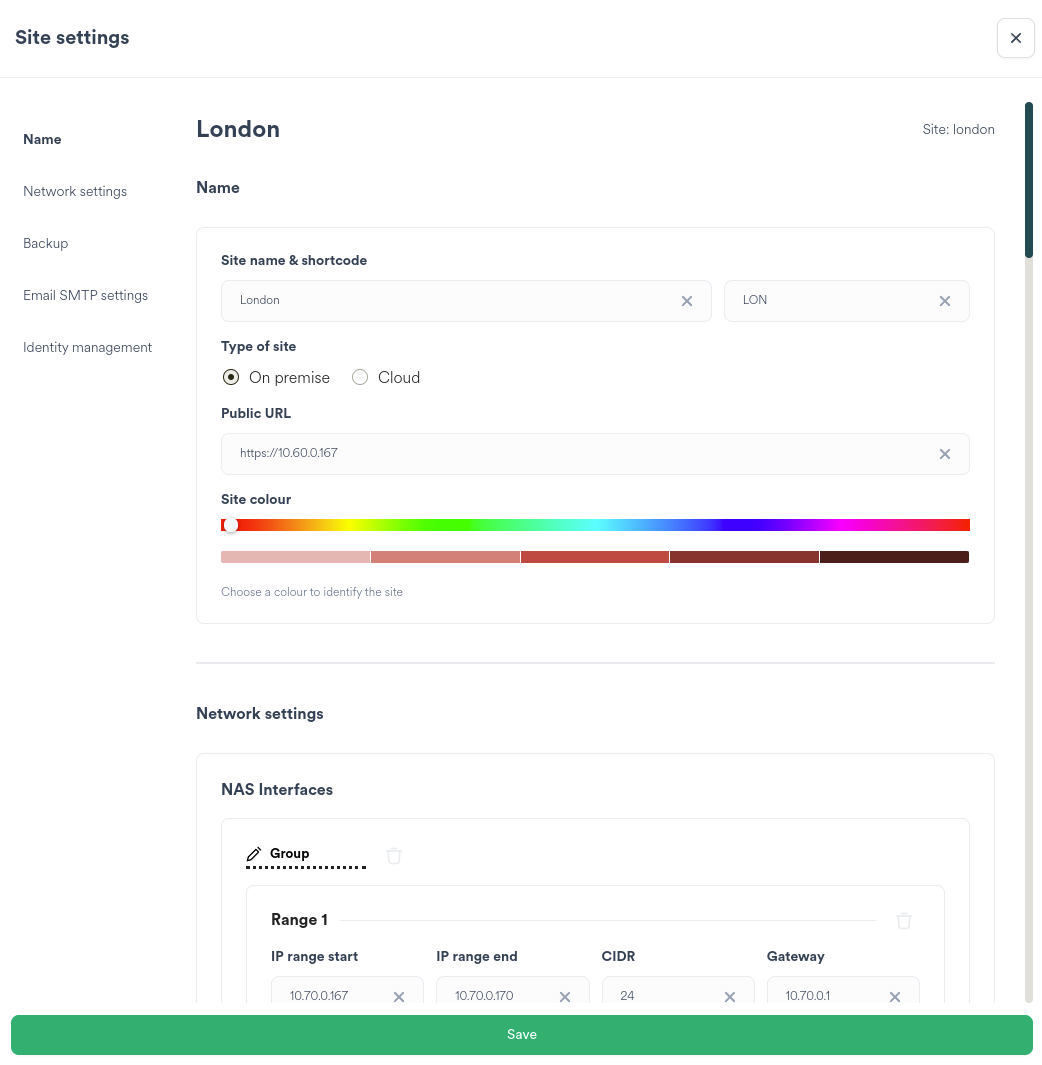
Site Name

Provide a friendly name for the Site
Provide a 3 character short code for the site. The shortcode is displayed as the label on the Site's chip. E.G. LDN for London
Specify whether the site is on-premise or a pixstor cloud deployment. Each site type provides different Network Setting options.
Provide the URL IP or FQDN which refers to the pixstor management node of the Site
Select a colour for the Site chip
Network Settings (On premise)
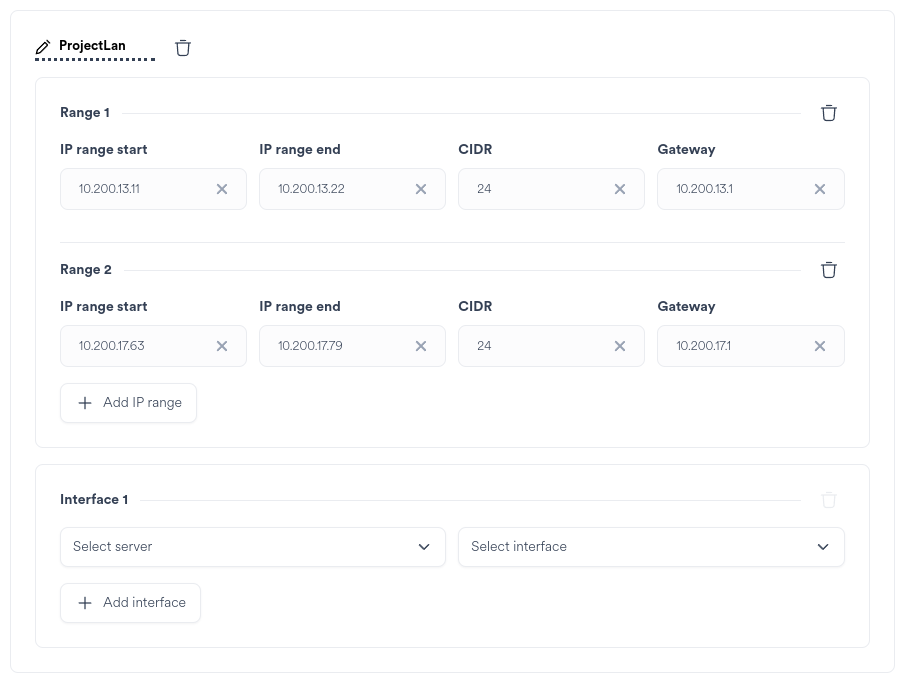
Add the required IP address or network range and specify a valid CIDR mask to apply the restriction
Specify a gateway, if required
Select the server(s) and interface(s) of the server where the IP range will be configured
|
|
Click the Add IP range button to add additional restrictions |
|
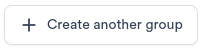
Click Create another group to add additional IP range to interface mapping groups |
|
|
Click the delete button to remove an IP range or Interface group |
Network Settings (Cloud & General)
pixstor cloud systems use predefined network architectures.
Unlike on-premise pixstor systems there is no requirement to create IP ranges or interface groups. IP addressing is externally managed by the cloud / virtual environment.
Both on-premise and cloud systems share common network configuration for DNS, Timezone and NTP.
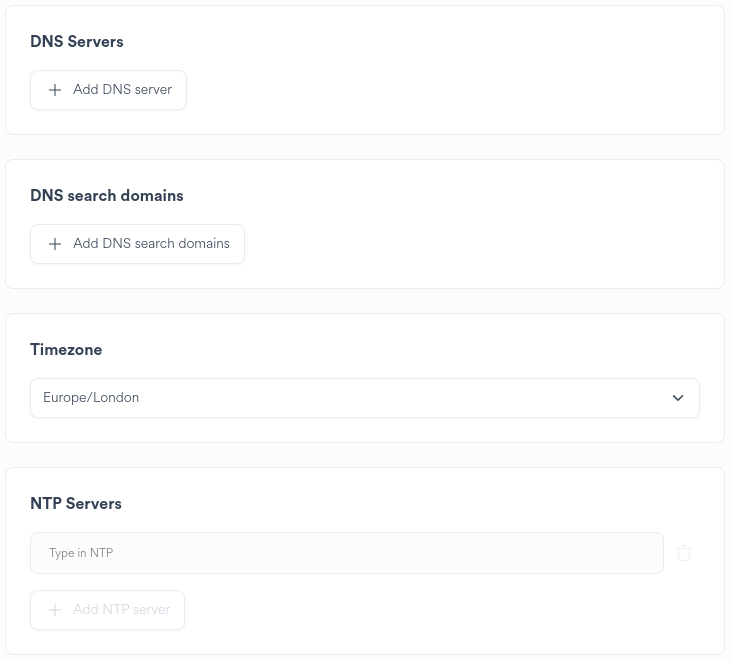
Specify the IP address or FQDN hostname of one or more DNS servers
Specify one or more DNS search domains
Specify the Timezone in which the server resides, or will participate in
Specify the IP address or FQDN hostname of one or more DNS servers
Hint
If the pixstor site will be joined to an external Identify Mapping service such as Active Directory or LDAP, best practice is to ensure that the DNS and NTP servers match those of the service, or point at the service hosted DNS and NTP if it provides such capabilities. Should the pixstor become out of time sync with the Identify Mapping service login failures can occur.
Backup
pixstor provides the capability to backup data within a Space on a per-Site basis to specific Ngenea Targets.
Hub enables configuration to be set for the Ngenea Backup service running on pixstor sites.
If the Site is enabled to participate in backups, each Space requires additional configuration to enable the per-Space backup.
For more information refer to Backups.

Determine the required frequency of the backup.
Choosing Mins or Hours will ensure that the schedule will run on the next interval set.
E.G: * 1 hour: The backup will run on the next hour (12.00, 13.00) * 15 mins: The backup will run on the next 15 minute interval past the hour (15, 30, 45, 00)
Choosing Daily or Weekly allows the backup to be scheduled once per chosen day at a specific time of day.
Hint
The schedule time is in UTC+0. You may need to account for any timezone offset of the site when scheduling.
Optional tuning can be set for the backup operation in the Advanced Configuration.
Refer to the Ngenea Backup documention prior to applying any parameters.

Email SMTP Settings
pixstor provides the capability to notify an inbox if service issues arise.
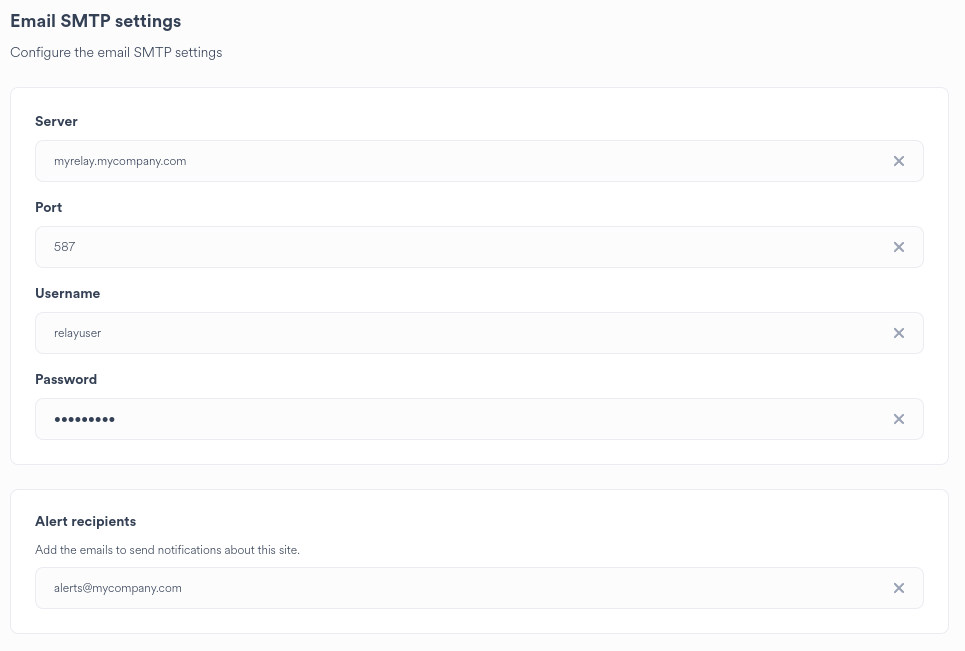
Specify the SMTP configuration of an email server to which to send notification emails
Specify one or more valid email addresses to receive the notification emails
Identity Management
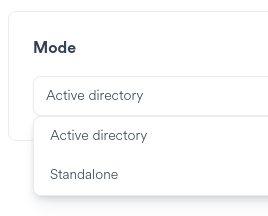
Specify the Identity Management mode as appropriate:
Mode |
Description |
|---|---|
Active Directory |
pixstor uses RFC2307 compliant identity mapping with Active Directory |
Standalone |
pixstor generates local UIDs and GIDs mapped to Active Directory SIDs |
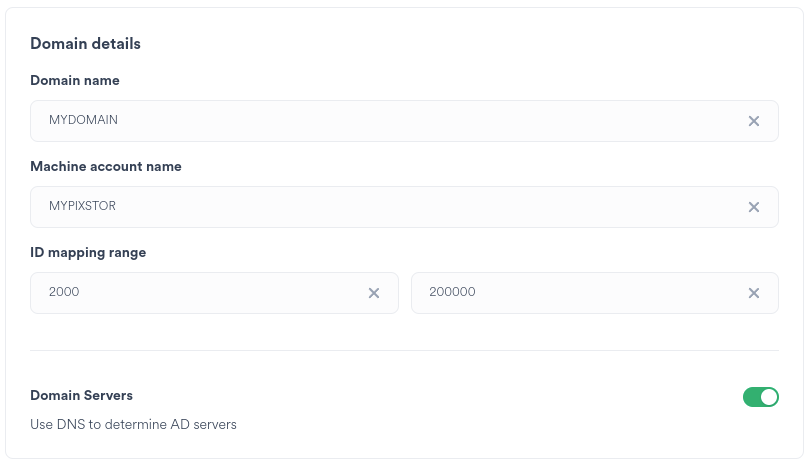
Specify the Domain to join
Specify the Machine account name
Specify the ID range to map to
Specify whether to use DNS to locate an Active Directory Domain Controller or alternatively specify an IP address or hostname
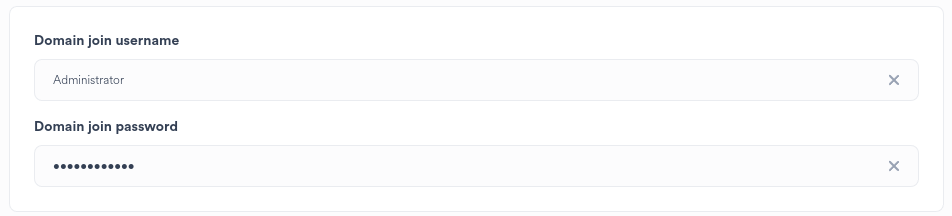
Specify a valid username and password with domain join capability
Summary
Upon completing the wizard steps a summary is presented:
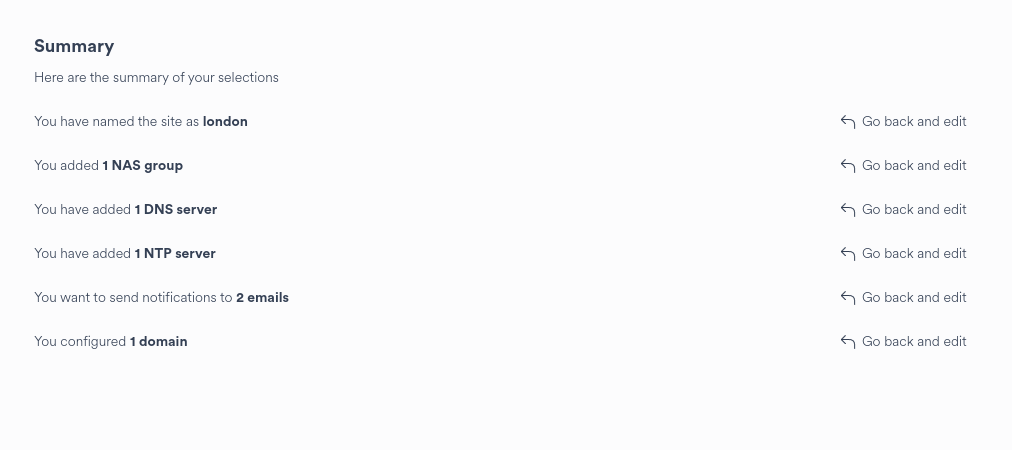
|
|
Click the Finish & Create button to apply the changes displayed on the wizard summary page. |
Alternatively Go back and change the proposed configuration as required or close the wizard to cancel the creation of the ngenea target.
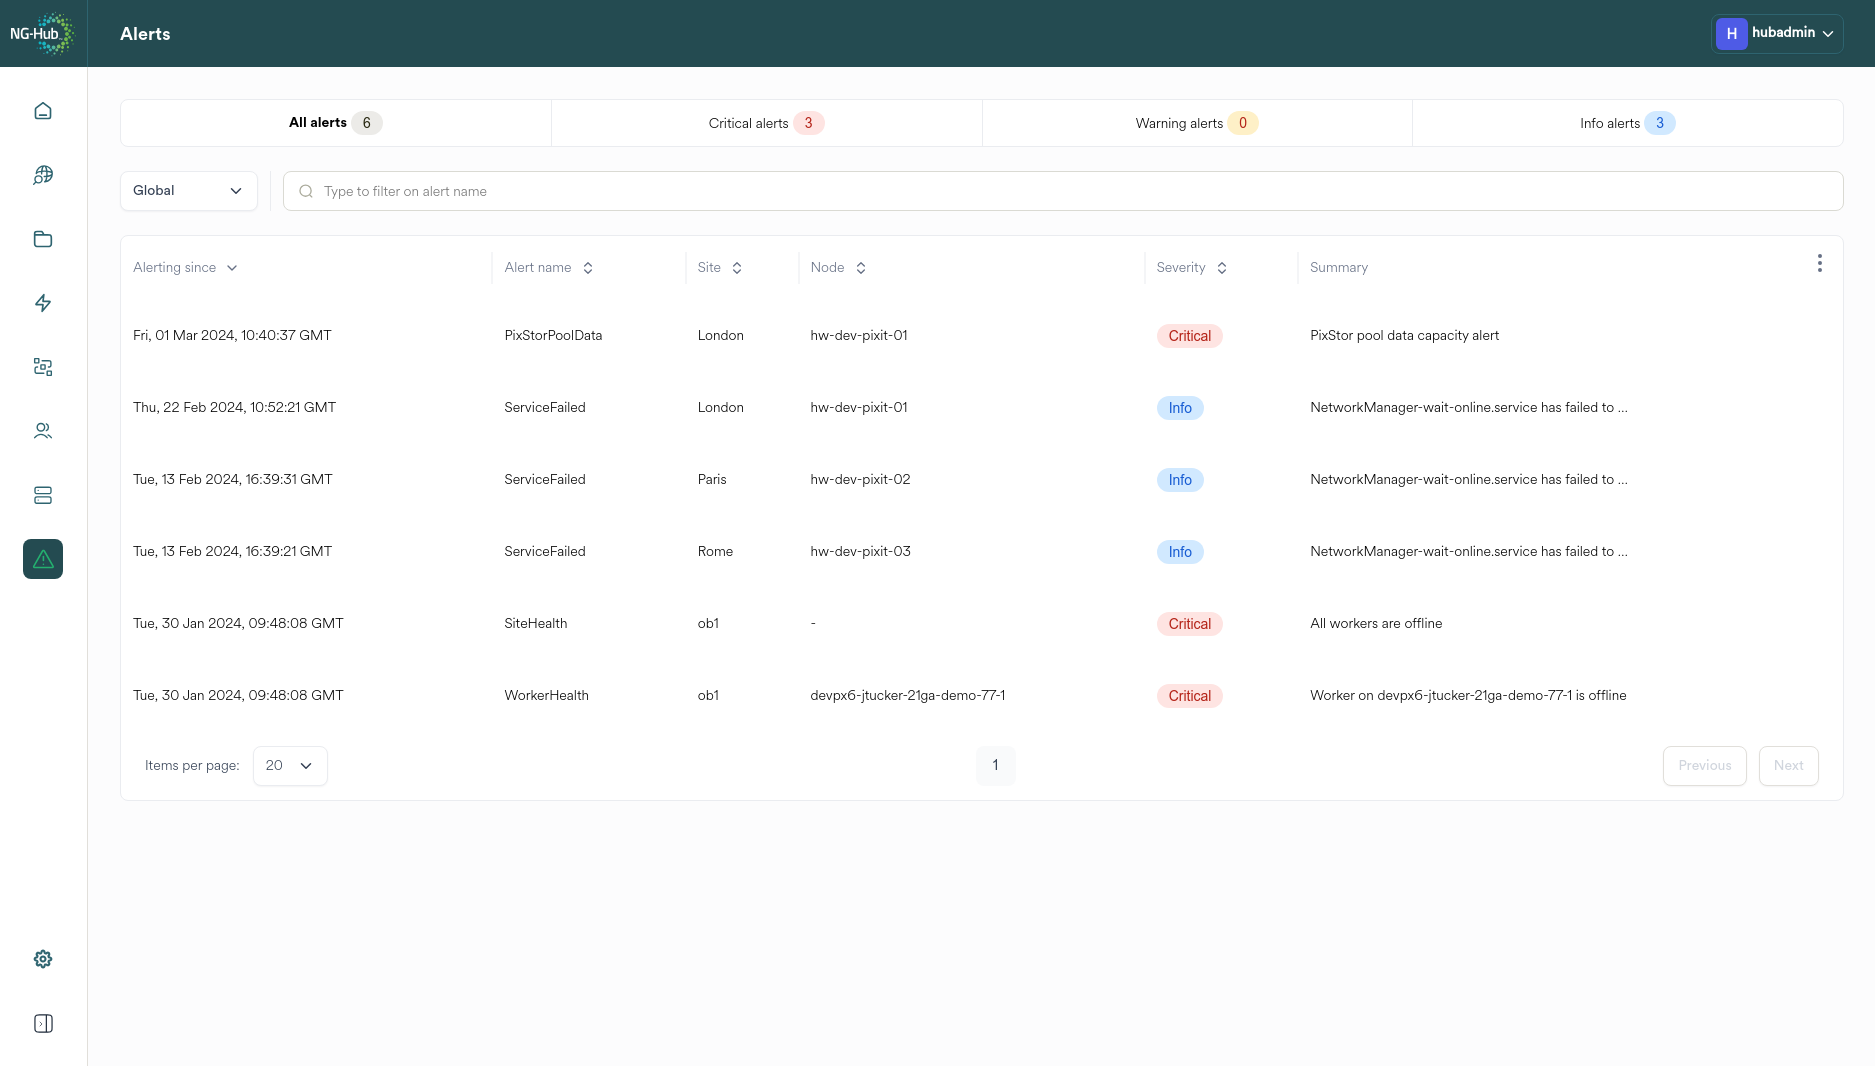
Alerts
Hub provides a view of alerts across all Sites.
Only active alerts are displayed
Muted alerts are not displayed
|
|
Click the alerts button to navigate to the Global Alerts screen |
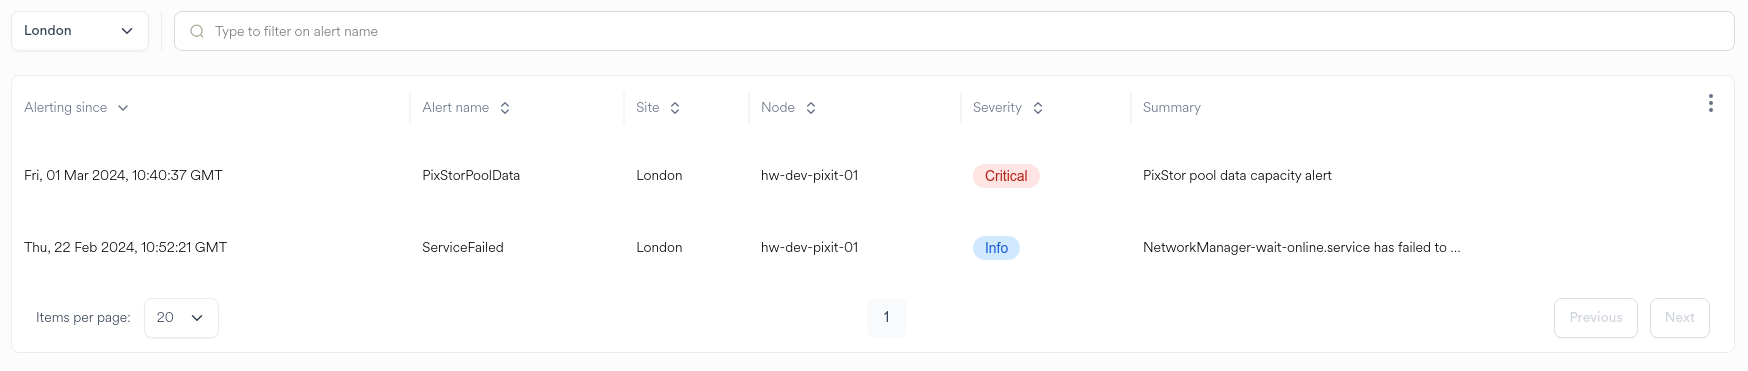
Hub provides two views of Alerts - Global and Local.
Global displays all Alerts on all Sites
Local displays the Alerts on a specific Site
The default view of Alerts is Global.
|
|
To switch to a site-centric view, select the specific site from the Alerts drop-down menu. |
|
|
To switch to Global view, select Global from the Alerts drop-down menu. |
Choosing a specific Site displays Alerts only from the chosen Site:
Alert Types
Above the Alert table, numbered filter buttons display the count of each type of Alert.
Select a button to filter for the specific Alert type.
|
|
Click the All alerts button to view all alerts |
|
|
Click the Critical alerts button to filter for all Critical alerts |
|
|
Click the Warning alerts button to filter for all Warning alerts |
|
|
Click the Info alerts button to filter for all Info alerts |
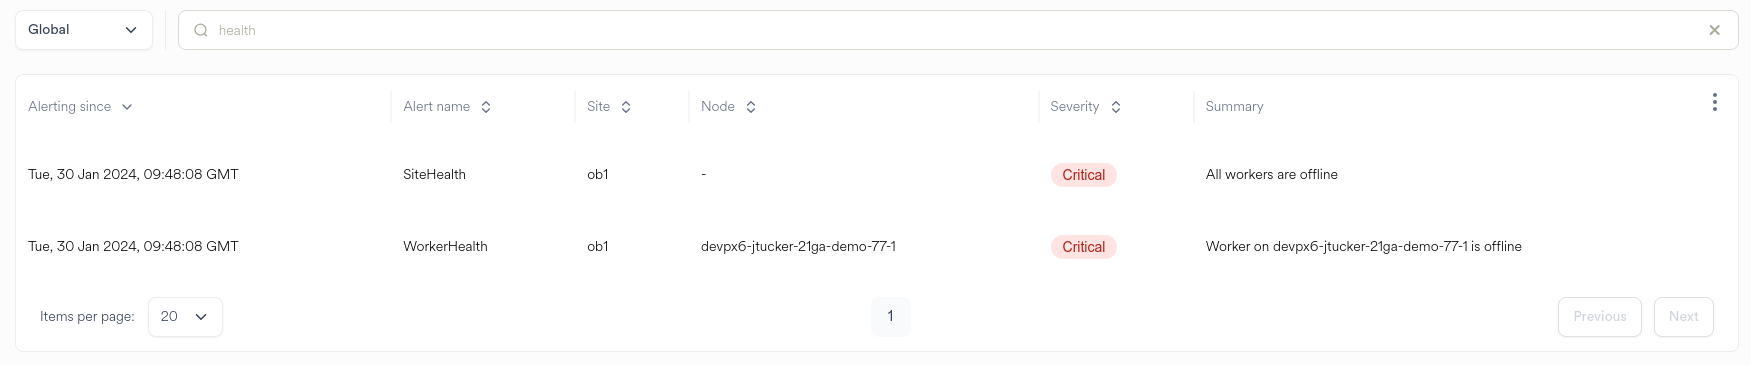
Categories
To filter for an Alert category, enter text into the filter bar.
Alerts are filtered where the Alert name matches the text in whole or part.
Reordering
The alerts table columns can be reorganised for user preference.
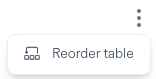
|
Click the vertical dots on the right hand side of the table and select the Reorder table button to open the table organizer |
Re-arrange items in top to bottom order by dragging vertically up or down.
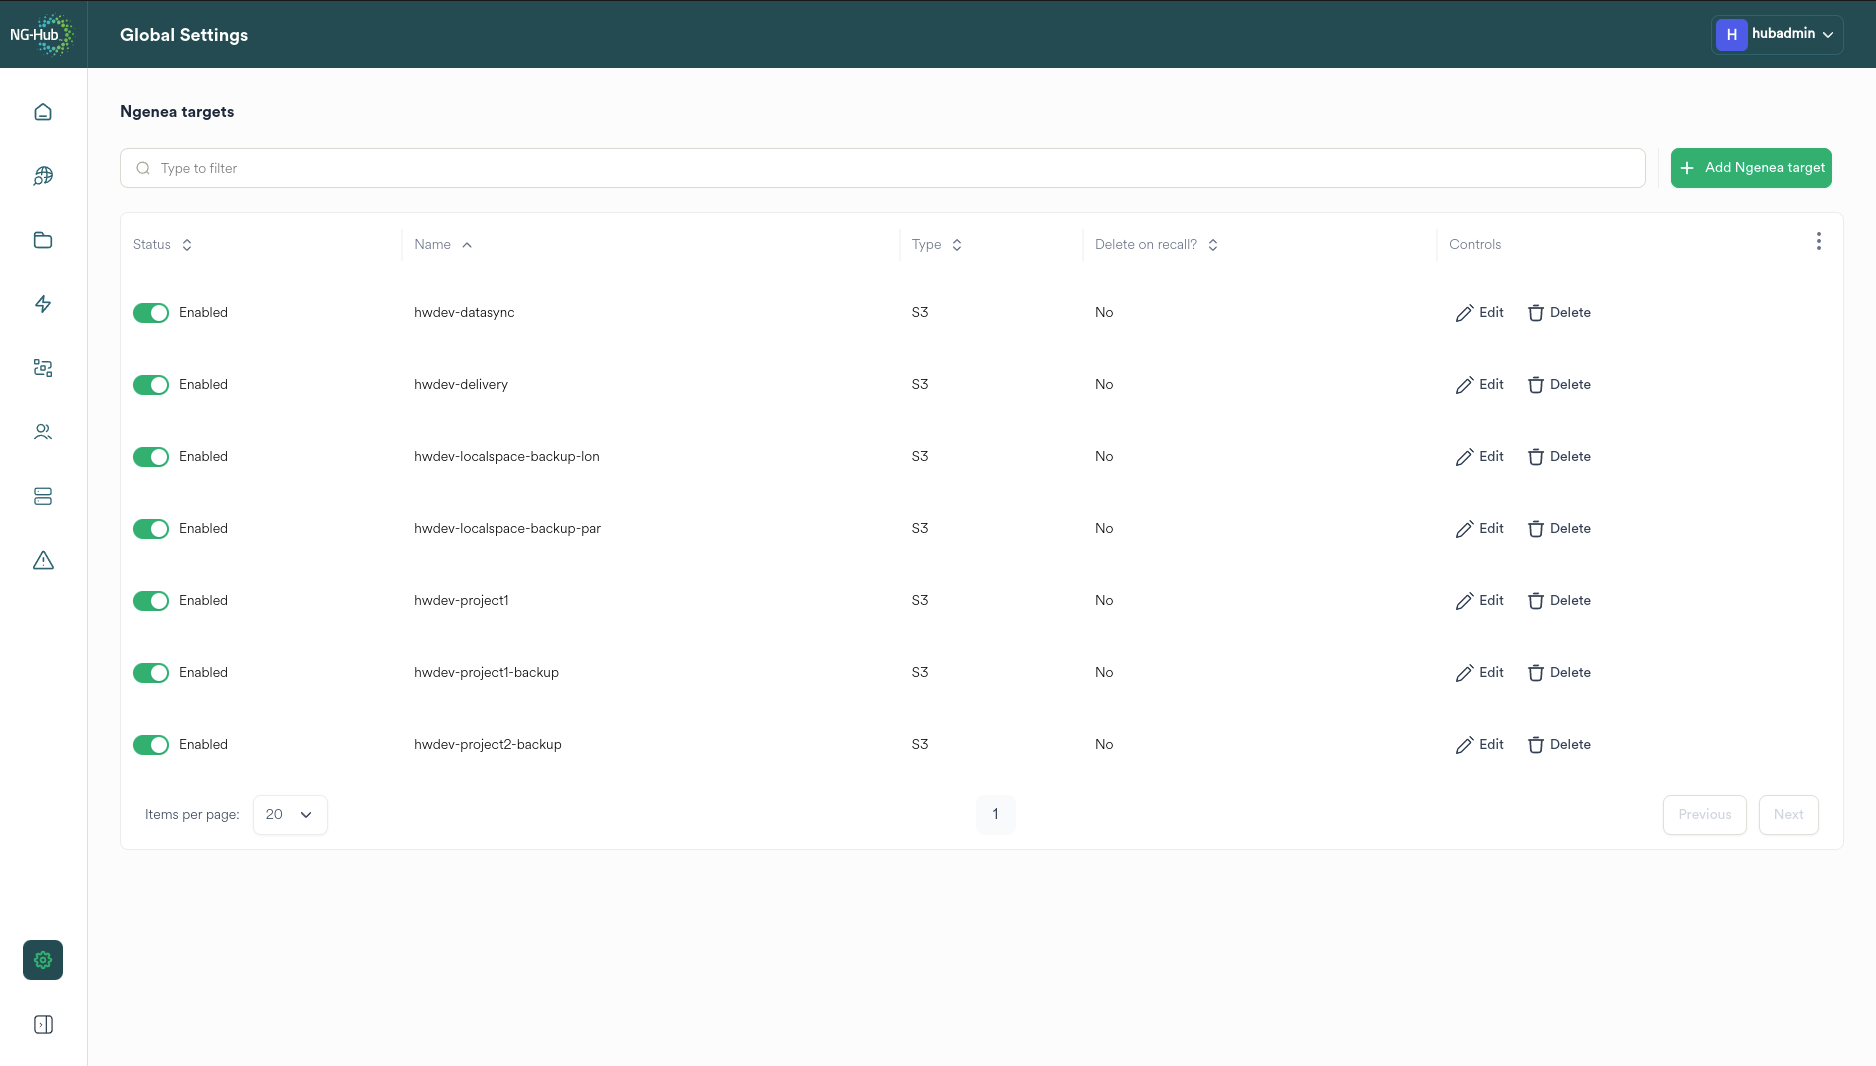
Global Settings
The global settings page controls settings which are applied across all pixstor sites participating in hub management.
|
|
Click the settings button to navigate to the Global Settings screen |
Ngenea Targets
ngenea provides the capability to off-site data or send data between pixstor sites. The destination for the data is known as a target.
ngenea targets provide the association between the pixstor file system and the target.
Typically a target is mapped to the location of a Space on the pixstor file system.
Viewing Ngenea Targets
Clicking the global settings button in the main menu bar displays the list of ngenea targets:
Filtering Ngenea Targets
|
To filter the list of ngenea targets, type the target or part of a target name in the filter bar. |
Ngenea Target Wizard
Navigating the Wizard
|
|
Click the close button to exit the wizard. Changes are not saved. |
|
|
Click the Next button to advance to the next page of the wizard. The Next button is disabled until all required page elements are completed. |
|
|
Click the Go Back button to return to the previous wizard page. |
|
|
Click the Finish & Create button to apply the changes displayed on the wizard summary page. |
Adding a Ngenea Target
Important
This function can only be performed by a Hub Administrator.

|
Click the Add Ngenea target button to start the Ngenea Target Wizard |
Ngenea supports the following storage target types:
Storage Target Type |
Description |
|---|---|
S3 |
AWS S3 and S3 compatible targets |
Microsoft Azure |
Azure Blob Storage |
SpectraLogic BlackPearl |
Spectralogic DS3 targets |
Google Object Storage |
Google Cloud Storage |
Select the required target type from the drop down menu.
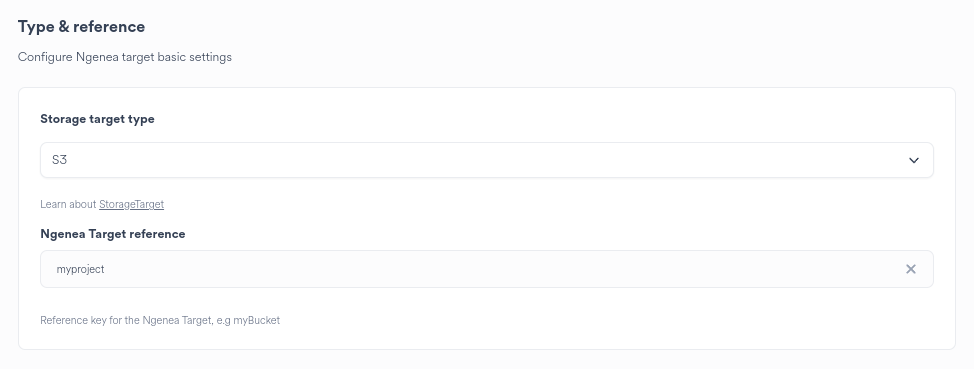
Enter a 'friendly name' for the ngenea target reference.
E.G.:
myproject (such as ‘deepspace’)
mydepartment (such as ‘graphics’)
a descriptive phrase (such as ‘referencematerial’)
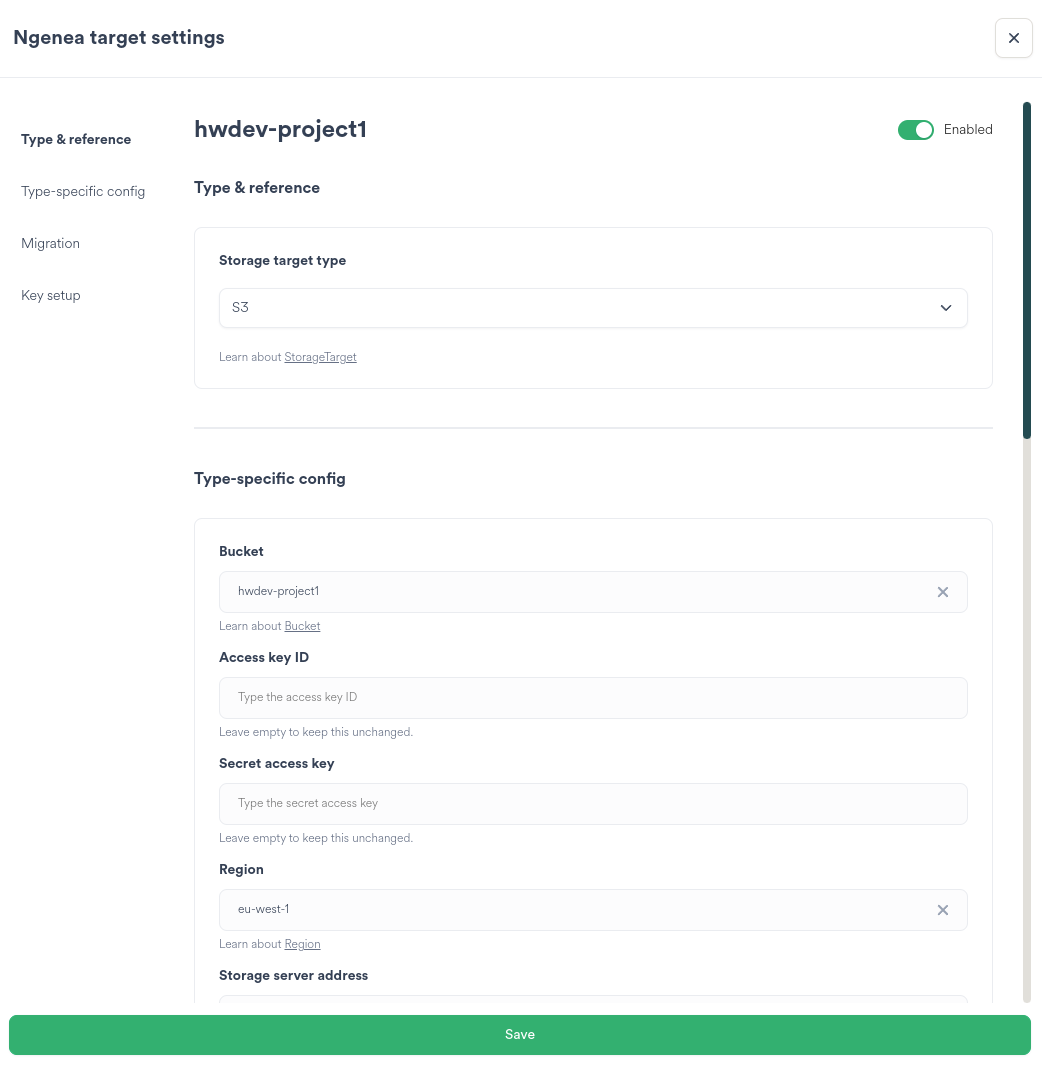
Depending on the Storage target type selected a Type-specific configu
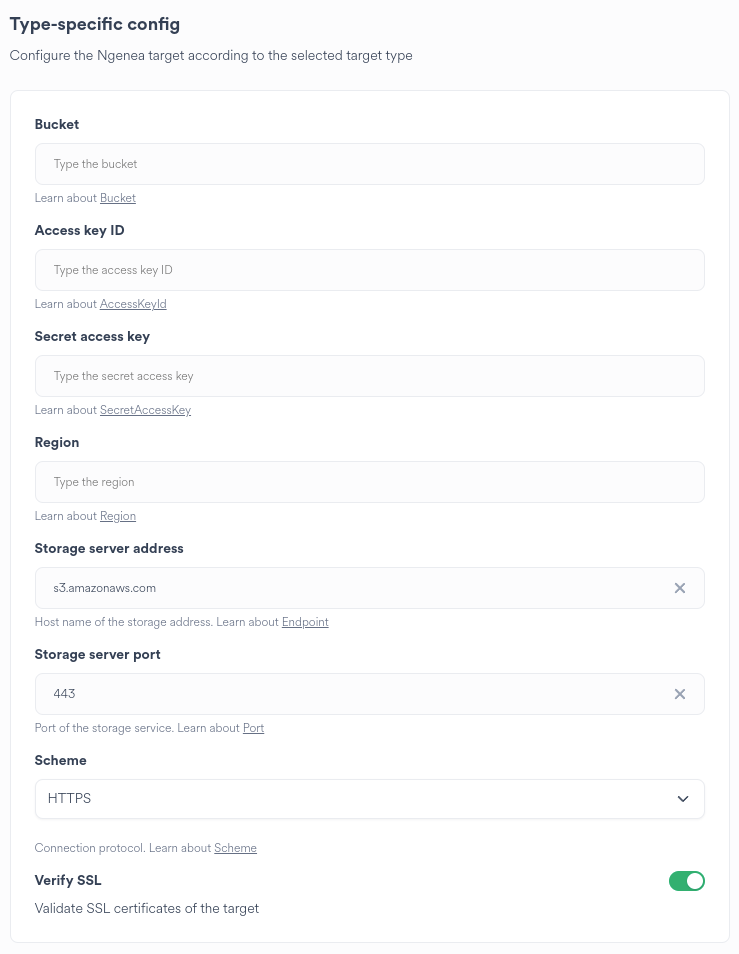
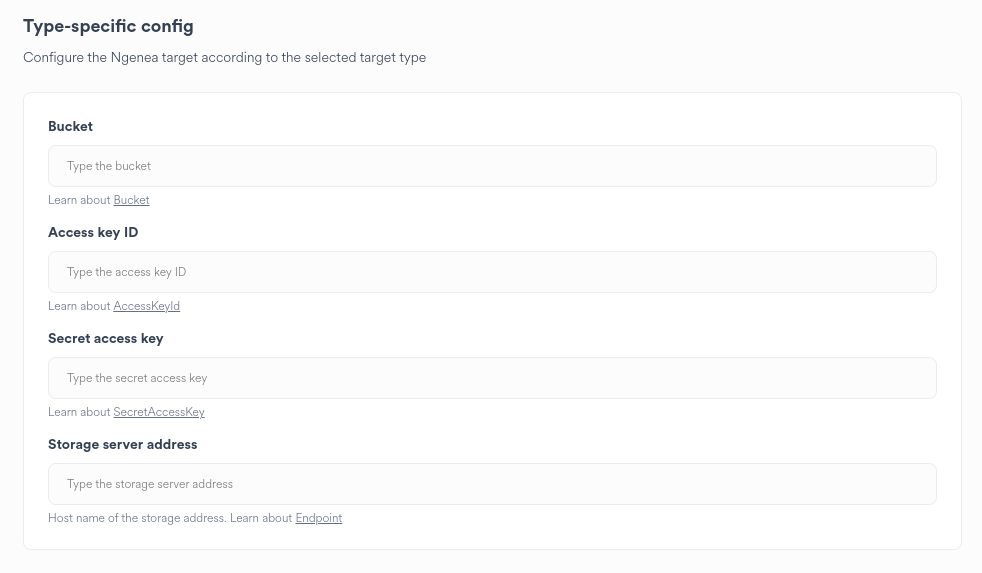
Enter the settings as required, which must match those set in the S3 object storage provider:
Setting |
Description |
|---|---|
Bucket |
The name of the storage bucket as specified at the object storage service. |
Access key ID |
The unique access key for the AWS user account performing data transfers. |
Secret access key |
The unique security key for the AWS user account performing data transfers. |
Region |
The AWS (or S3 compliant provider) region hosting the S3 Cloud Storage |
Storage server address |
Not used for Amazon S3 Cloud Storage. For services which reside at specific IPs, such as AWS Snowball, MinIO or LocalStack, specific the host or IP address to connect to. |
Storage server port |
The TCP/IP port used to communicate |
Scheme |
HTTP or HTTPS transfer. HTTPS is recommended. Data integrity cannot be guaranteed over HTTP transfer schemes. |
Verify SSL |
Whether to verify the SSL connection of the target. Disabling the SSL verification allows connections to storage targets which do not provide valid SSL certificates. Connecting to invalid SSL certificates is insecure. |
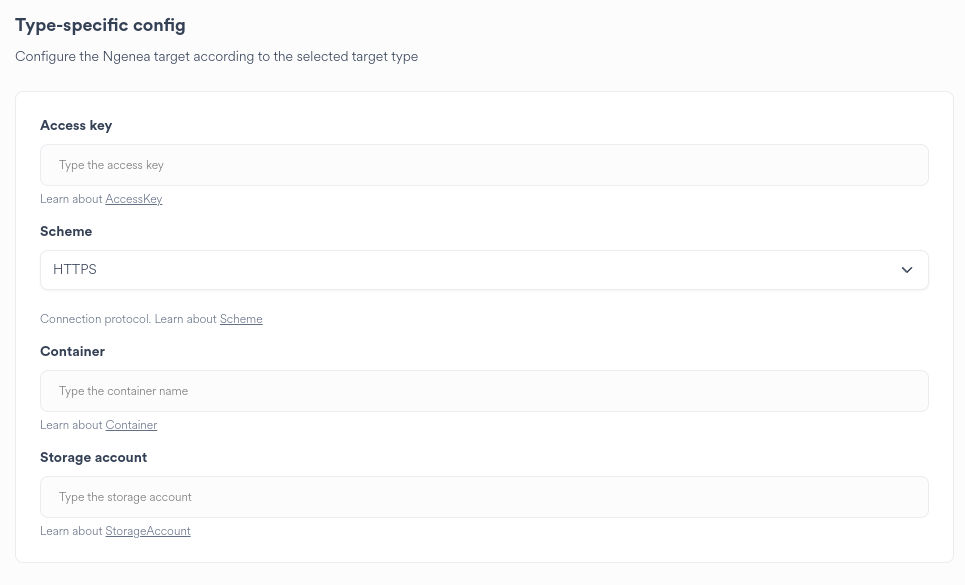
Enter the settings as required, which must match those set in the Azure object storage provider:
Setting |
Description |
|---|---|
Access key ID |
The unique access key for the Azure user account performing data transfers. |
Scheme |
HTTP or HTTPS transfer. HTTPS is recommended. Data integrity cannot be guaranteed over HTTP transfer schemes. |
Container |
The storage container for the blob data. |
Storage account. |
The Azure namespace containing the Container |
Enter the settings as required, which must match those set in the BlackPearl DS3 object storage provider:
Setting |
Description |
|---|---|
Bucket |
The name of the storage bucket as specified at the object storage service. |
Access key ID |
The unique access key for the BlackPearl user account performing data transfers. |
Secret access key |
The unique security key for the BlackPearl user account performing data transfers. |
Storage server address |
The FQDN hostname of the BlackPearl. |
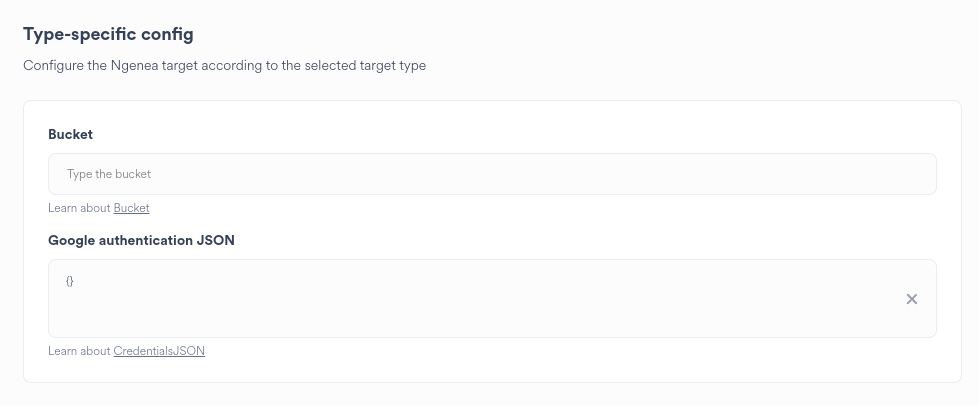
Enter the settings as required, which must match those set in the Google Cloud Storage object storage provider:
Setting |
Description |
|---|---|
Bucket |
The name of the storage bucket as specified at the object storage service. |
Access key ID |
Enter the contents of the JSON key for the user or service account granted permission to transfer data to Cloud Storage bucket. For more information refer to Google documentation |
Important
If the Ngenea Target is to be used as a backup only target, do not define JSON information in the
Google Authentication JSON. Instead define keyword CredentialsFile with the path to the file containing JSON credentials on pixstor.
For more information refer to Backup Only Ngenea Targets.
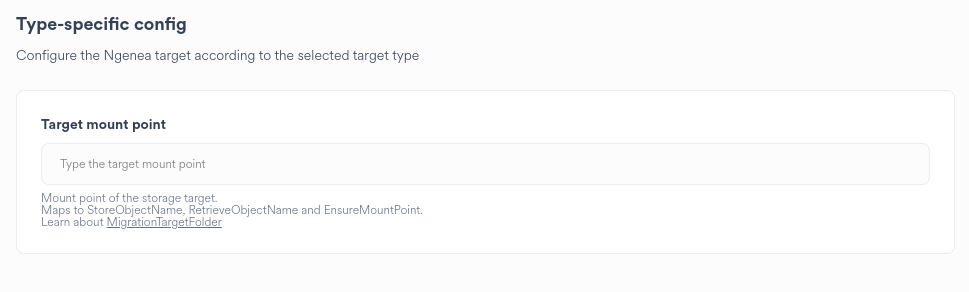
Enter the settings as required, which must match the location of the NAS mount point on the pixstor:
Important
Target mounts points are site-specific however Hub will create the target across all sites.
Setting |
Description |
|---|---|
Target mount point |
The location of the POSIX compliant mounted storage.
E.G. If the external POSIX storage is mounted on |
Configure the migration settings as required to handle data migration accordingly:
Setting |
Description |
|---|---|
File match |
Refer to the RegEx Filters example table below |
Delete on recall |
Determines whether to delete the recalled data from the external storage target after the data has been successfully recalled. |
Backup-only target |
Determines whether the target will be used to hold backup, not live data. Required to backup a Space. Refer to Backup Only Ngenea Targets |
Example regex filters where a space named myspace is present on the pixstor filesystem at location /mmfs1/data/myspace:
RegEx Filter Examples |
Outcome |
|---|---|
|
Data with the myspace folder is eligible for ngenea operations. Dehydrated files within the myspace folder are present at the root of the storage target. |
|
The myspace directory and data within is eligible for ngenea operations. The myspace folder is present at the root of the storage target. |
|
Data with the subdirectory of the myspace directory is eligible for ngenea operations. Dehydrated files within the subdirectory of the myspace directory are present at the root of the storage target. The myspace directory is not present. Data immediately within the myspace directory (other than that within the subdirectory) is not eligible for ngenea operations. |
|
The subdirectory of the myspace directory and data within is eligible for ngenea operations. The subdirectory of the myspace directory is present at the root of the storage target. The myspace directory is not present. Data immediately within the myspace directory (other than that within the subdirectory) is not eligible for ngenea operations. |

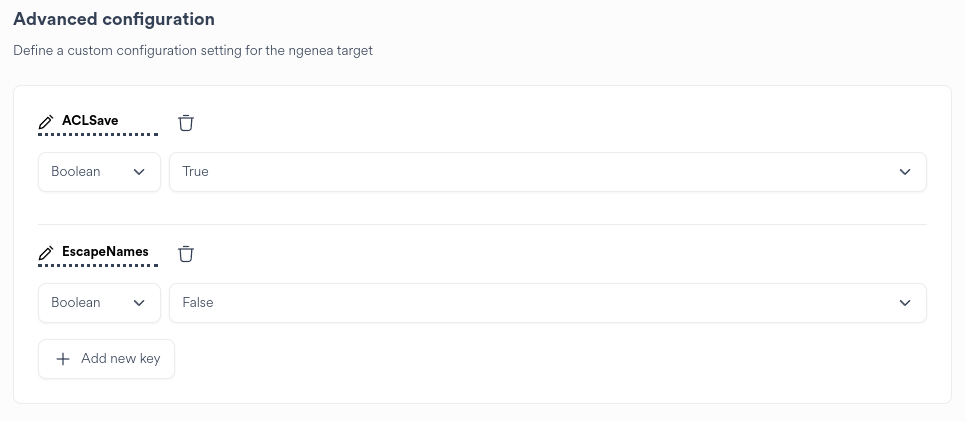
To add configuration settings to a target to control specific behaviour during ngenea data operations.
|
|
Click the Add new key to define a new configuration setting |
|
|
Enter the name of the configuration setting in the Keyword field |
|
|
Select the type of configuration setting from the drop down menu. Choose or enter the value for the configuration setting. |
Example of added Advanced configuration settings:
Upon completing the wizard steps a summary is presented:

|
|
Click the Finish & Create button to apply the changes displayed on the wizard summary page. |
Alternatively Go back and change the proposed configuration as required or close the wizard to cancel the creation of the ngenea target.
Editing an Ngenea Target
Important
This function can only be performed by a Hub Administrator.
Clicking the global settings button in the main menu bar displays the list of ngenea targets:

|
Click the edit icon on the required ngenea target row to edit the ngenea target |
Modify the ngenea target settings as required. Refer to Adding a Ngenea Target for settings guidance.
Deleting an Ngenea Target
Important
This function can only be performed by a Hub Administrator.
Clicking the global settings button in the main menu bar displays the list of ngenea targets:

|
Click the delete icon on the required ngenea target row to delete the ngenea target |
A confirmation dialog is raised:

Click Yes to delete the ngenea target. This action is irreversable.
Alternately click no, or close the confirmation dialog.
Backups
pixstor provides the capability to backup data within a Space on a per-Site basis to specific Ngenea Targets.
Hub enables configuration to be set for the Ngenea Backup service running on pixstor sites.
Important
Best practice is to treat backup data separately from live data. Hub will only configure a backup to an Ngenea target set as a backup-only target type.
Configuring Backups
To perform a backup for a Space on a Site, the following actions must be undertaken:
An Ngenea Target is provisioned with
Backup-OnlyenabledThe Site from which to backup is enabled to participate in backups
An appropriate backup schedule is set
The Space is enabled for backup, selecting the Site and the Ngenea Target
Backup Only Ngenea Targets
An Ngenea Target can be utilised for backups of a Space.
Where a Space exists across multiple Sites, optionally, each site can perform its own backup of the Space.
Multiple Sites are not permitted to backup to the same Ngenea Target.

|
To enable a target to be used for backup, enable the Backup-Only target slider in the Ngenea Target setting. |
Enabling Site for Backup
pixstor provides the capability to backup data within a Space on a per-Site basis to specific Ngenea Targets.
Hub enables configuration to be set for the Ngenea Backup service running on pixstor sites.
If the Site is enabled to participate in backups, each Space requires additional configuration to enable the per-Space backup.
Determine the required frequency of the backup.
Choosing Mins or Hours will ensure that the schedule will run on the next interval set.
E.G: * 1 hour: The backup will run on the next hour (12.00, 13.00) * 15 mins: The backup will run on the next 15 minute interval past the hour (15, 30, 45, 00)
Choosing Daily or Weekly allows the backup to be scheduled once per chosen day at a specific time of day.
Hint
The schedule time is in UTC+0. You may need to account for any timezone offset of the site when scheduling.
Optional tuning can be set for the backup operation in the Advanced Configuration.
Refer to the Ngenea Backup documention prior to applying any parameters.
Enabling Space Backup
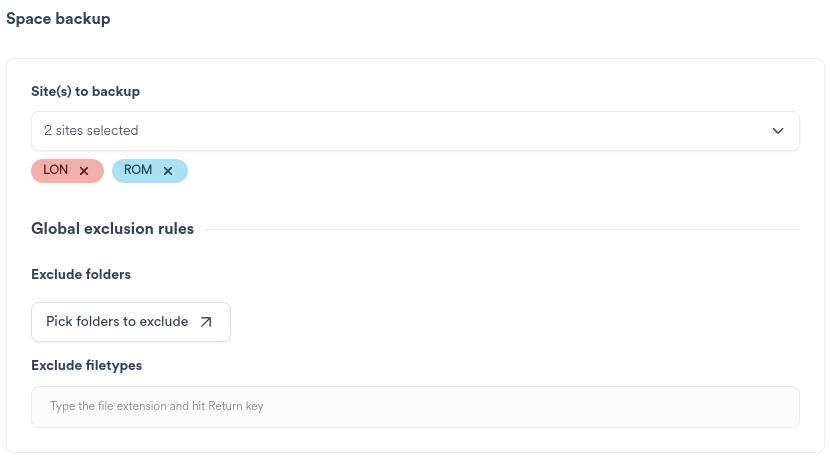
Select the Sites which will perform backups for this space
Define any Global Exclusions
Global Exclusion Rules
Global exclusions apply to all Site backup configurations for the Space unless overridden on a per-Site basis.

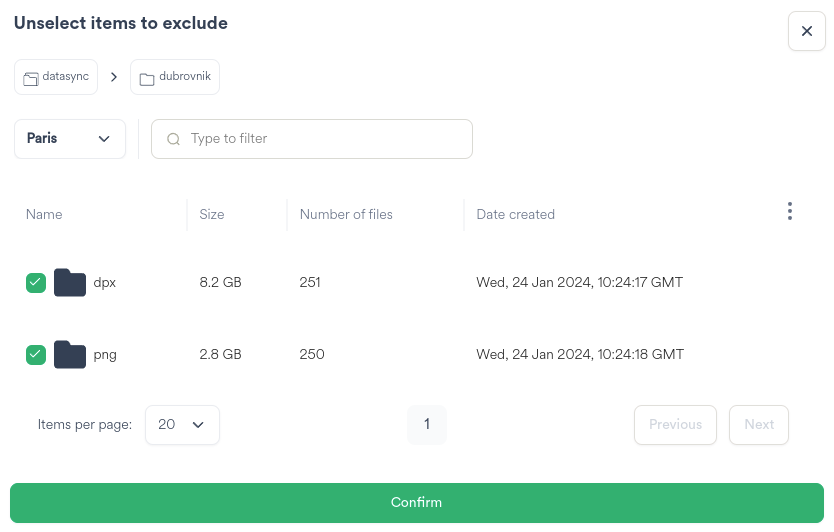
|
Click the Pick folders to exclude button to raise the folder browser dialog |
Use the folder browser to unselect items which will not be included (hence excluded) from backups.
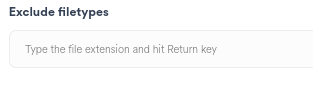
|
Define file extensions which must be excluded from backups across all Sites. E.G. *.tmp |
Hint
If multiple Sites are selected, backup configuration is presented per-Site. Optionally each site can specify its own settings.
For each Site participating in Space backup a configuration panel is displayed:
Review the backup settings for each site:
Setting |
Description |
|---|---|
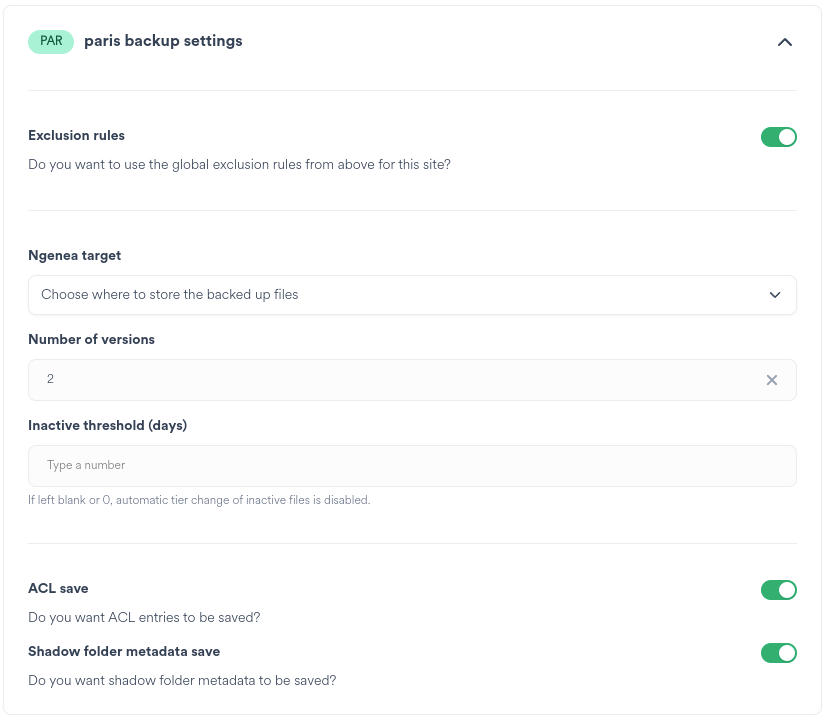
Exclusion Rules |
By default the Site inherits the Global exclusion rules. To override the rules, deselect the slider and define any exclusions using the same methods as described above. |
Ngenea Target |
Choose an available Ngenea Target. Only targets configured as Backup-Only target and not currently in use for other Sites are available for selection. |
Number of versions |
Defines the maximum number of all file versions within a remote storage location for the targeted Fileset before Ngenea Backup prunes excess versions. If the number of versions of a file has exceeds the defined threshold, the oldest version will be deleted. |
Inactive threshold(days) |
Defines the threshold of days for a defined CRITERIA (E.G.: modification) after which each file within the monitored Independent Fileset is validated when INACTIVE_THRESHOLD is enabled. Those files where their defined CRITERIA exceeds this value will be re-copied from the local PixStor filesystem to storage container into an in-active tier. All instances of the file in typical standard storage classes are transitioned to older file versions. |
ACL save |
If enabled, all of the related NSFv4 ACL entries for an ingested file will be included in the remote object’s metadata when a file is backed up. This allows Ngenea to apply those NSFv4 ACL entries when recalled or stubbed. |
Shadow folder metdata save |
If enabled, additional data objects will be created within the remote storage target as this data is stored as an object within the cloud provider. If enabled, all the directory modification, creation and deletion operations between subsequent backup runs will be stored in remote storage. This allows the restoration or ngrecall of directories with NFSv4 ACL and POSIX permission support. This data will also be version controlled similarly to files. This operation will occur if the permissions or ACL entries are edited on any directories meaning that each change to ACLs will be updated with regular runs of backup. |