5.2.1. GCP Cloud Function
Google Cloud Platform (GCP) is a set of cloud tools by Google. It helps you run apps, store data, and automate tasks without using your own servers. One of these tools is Cloud Functions. A Cloud Function runs code when something happens—like when a file is uploaded to storage.
In this section of the guide, you’ll create a function that runs when a file is added or changed in a Cloud Storage bucket. This is useful for things like data processing or connecting to other systems.
Before you start, here are some important things to know:
A Cloud Storage bucket is a place in the cloud to store your files.
The function will watch the bucket and run automatically when a file is added or changed.
A service account is needed so the function can access the bucket.
The service account needs the
storage.objectViewerrole to read files from the bucket.The function will use Python 3.9 as its programming language.
Your code will be uploaded to GCP as a ZIP file.
You’ll edit a file called
config.jsonto set specific settings for how the function works.If the function needs to talk to a private system (with no public IP), you may need a VPC Connector.
This guide will show you each step in order. You’ll learn how to create the function, set the right permissions, choose the correct settings, upload your code, and deploy it. When you’re done, your function will automatically run whenever a file is added or changed in your storage bucket. This introduction helps you understand the basics so you can follow the setup process more easily.
Step 1: Navigate to Cloud Functions in Google Cloud Console
Open the Google Cloud Console. This is where you manage all your cloud resources.
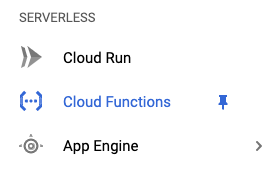
In the left-hand menu, under the Serverless section, click on Cloud Functions.
Step 2: Create a New Function
Click Create Function to start the process of setting up your Cloud Function.

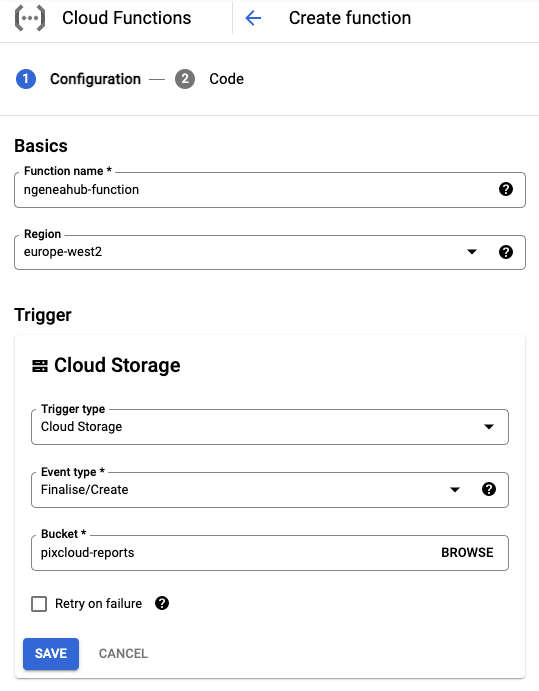
In the Configuration page, fill out the following details:
Function Name: Choose a unique name for your function (for example,
my-bucket-monitor).Region: Select a region for your function to run in. A region is a physical location where your cloud resources (like storage and compute instances) are hosted. It’s best to choose the same region as your Cloud Storage bucket to reduce latency (delay in data processing).
Trigger: Choose Cloud Storage as the trigger type. This means the function will be activated whenever something happens in your Cloud Storage bucket.
Event Type: Choose the event you want to monitor (such as Finalize/Create, which triggers when a new file is uploaded).
Bucket: Select the Cloud Storage bucket you want to monitor for events.
Once you’ve completed these steps, click Save to create the function.
Step 3: Set Up Service Account for Access
Cloud Functions often need permissions to interact with other Google Cloud services, like Cloud Storage. We’ll create a service account to grant these permissions.
What is a Service Account? A service account is like a virtual identity that a program or a service can use to interact with Google Cloud resources. It has specific permissions assigned to it.
To create a service account using the
gcloudcommand-line tool, run the following commands. ReplaceGCP-PROJECT-1with your actual project ID and ngeneahub-function with the name of your service account.Assigning the
storage.objectViewer role: This grants the service account the ability to view objects (files) in your Cloud Storage bucket.
PROJECT_ID='GCP-PROJECT-1'
SERVICE_ACCOUNT_ID='ngeneahub-function'
ROLE_NAME='roles/storage.objectViewer'

gcloud iam service-accounts create $SERVICE_ACCOUNT_ID \
    --description='A service account to give the {{ brand_name }} function read access to GCS buckets' \
    --display-name=$SERVICE_ACCOUNT_ID

gcloud projects add-iam-policy-binding $PROJECT_ID \
    --member="serviceAccount:$SERVICE_ACCOUNT_ID@$PROJECT_ID.iam.gserviceaccount.com" \
    --role=$ROLE_NAME
Step 4: Configure the Function Runtime and VPC Settings
What is a Runtime? A runtime is the environment in which your code will execute. It includes the programming language, libraries, and tools your code needs to run. In this case, you are using Python 3.9.
Steps to Configure:
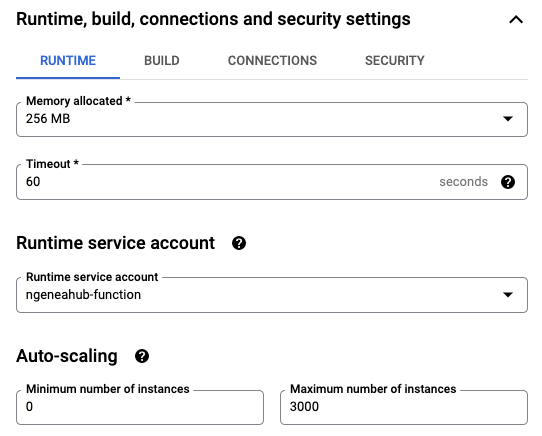
Open the Runtime, Build and Connections Settings section.
Go to the Runtime tab.
At the bottom of this tab, select a Runtime Service Account.
This account must have at least the
storage.objectViewerpermission.
You can use an existing service account or the one you created earlier (for example,
ngeneahub-function).Click Next to proceed to the next step.
Note: VPC Connector (Optional) – If your function needs to access a private network (such as a private IP address or a database), you’ll need to set up a VPC Connector. However, if your function doesn’t require a private connection, you can skip this part.
What is a VPC Connector? A VPC (Virtual Private Cloud) Connector enables your Cloud Function to access resources located in your Google Cloud private network. This is necessary if your function needs to communicate with services that do not have a public IP address, such as a private database or internal system like the Ngenea Hub.
When is it Needed? If the Ngenea Hub does not have an external (public) IP address, you will need to use a VPC Connector to allow the function to connect to it via its private IP.
Steps to Configure:
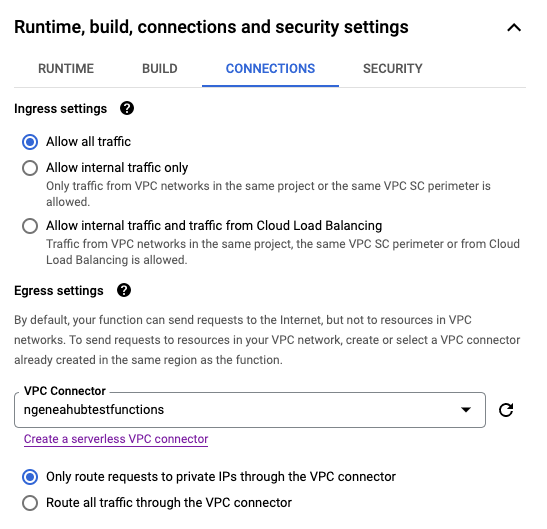
In the Runtime, Build and Connections Settings section, go to the Connections tab.
From the VPC Connector dropdown, select an existing VPC Connector.
Enable the option “Only route requests to private IPs through the VPC connector”.
Note: Creating a new VPC Connector is outside the scope of this documentation. Ensure that a connector is already set up if your function requires access to private network resources.
Step 5: Code Configuration for Cloud Function
In the Code section of the Cloud Function setup:
Set the Runtime to Python 3.9.
Set the Entry Point to
main(this should match the main function in your code).Under Source code, select ZIP upload.
Upload the ZIP file you previously downloaded from the
../../downloadpage.Choose a Stage Bucket for deployment. You can use the same bucket that the function is monitoring.
Click Next to proceed to build the function.
Step 6: Edit the config.json File
Once the Cloud Function is successfully built:
In the Cloud Console, go to the list of your Cloud Functions.
Click on the name of the function you just created.
Click the EDIT button at the top.
Click Next to navigate to the code editor.
In the file list, locate and select
config.json.
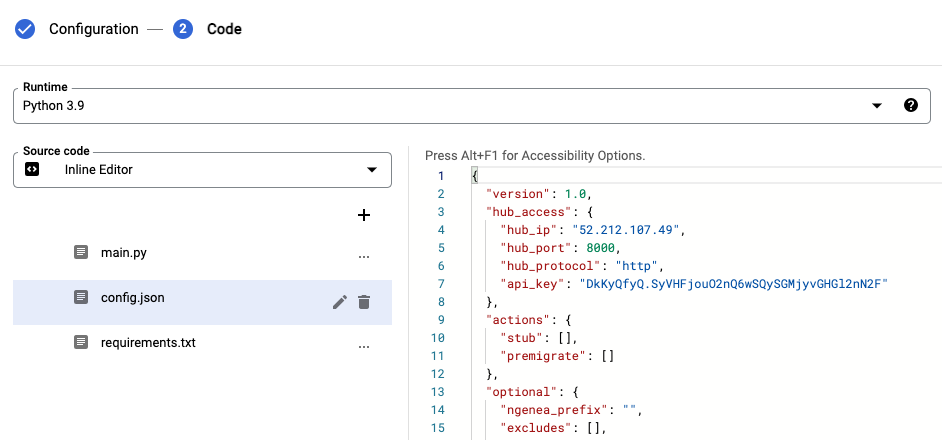
Update the contents of
config.jsonas instructed in your Cloud Functions documentation.
Note: Deployment may take 1–2 minutes to complete.