Groups & Users
Hub provides management of Groups and Users internally.
Users may be authenticated by external directory services such as LDAP or Active Directory.
Two default groups are provided:
Members of Administrators can configure and manage all Sites and Spaces
Members of Users have read-only access to all Spaces
Additional groups can be deployed to provide restricted access for users to Sites and Spaces.
Viewing Groups
To view the available Groups managed in Hub, select the Group tab.
Important
Group management can only be performed by a Hub Administrator.
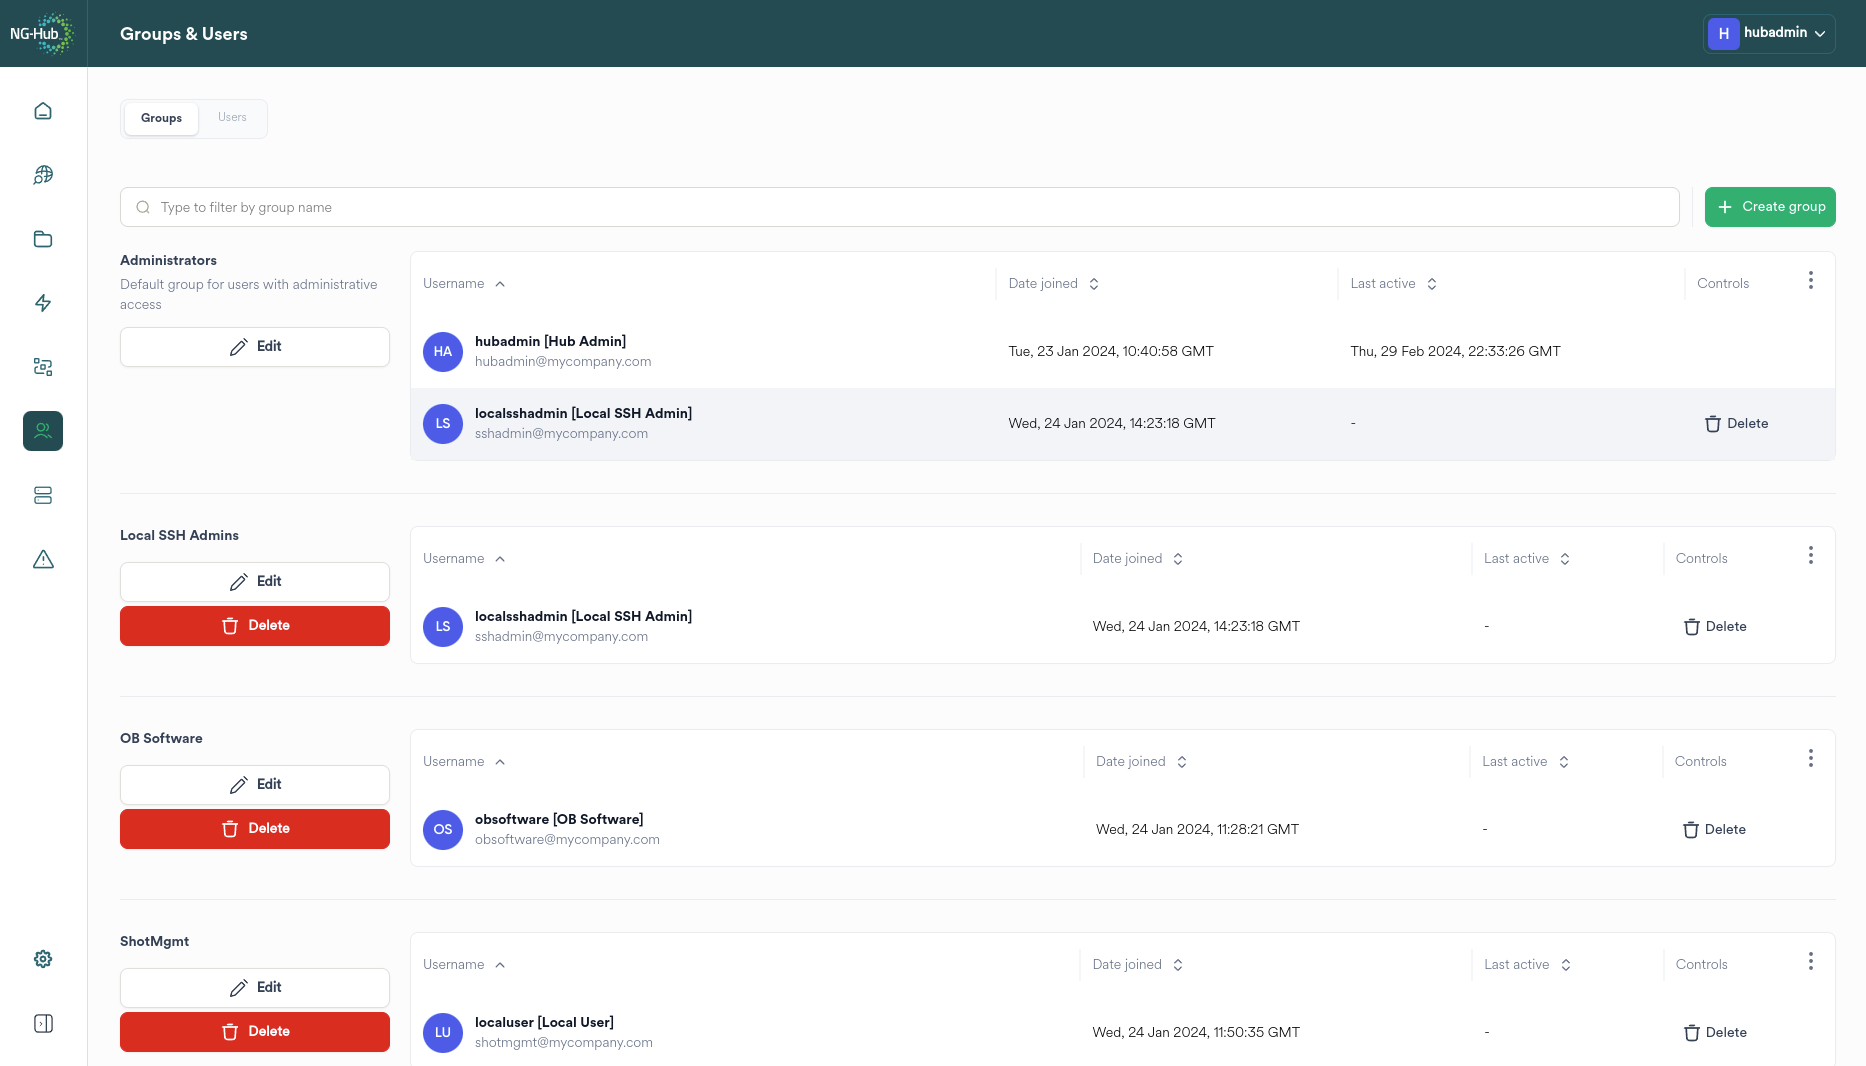
The Groups tab provides the following actions:
Group creation
Group deletion
Group member management
Filtering the Groups View
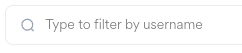
To display Groups matching keywords, enter the keywords in the filter bar.
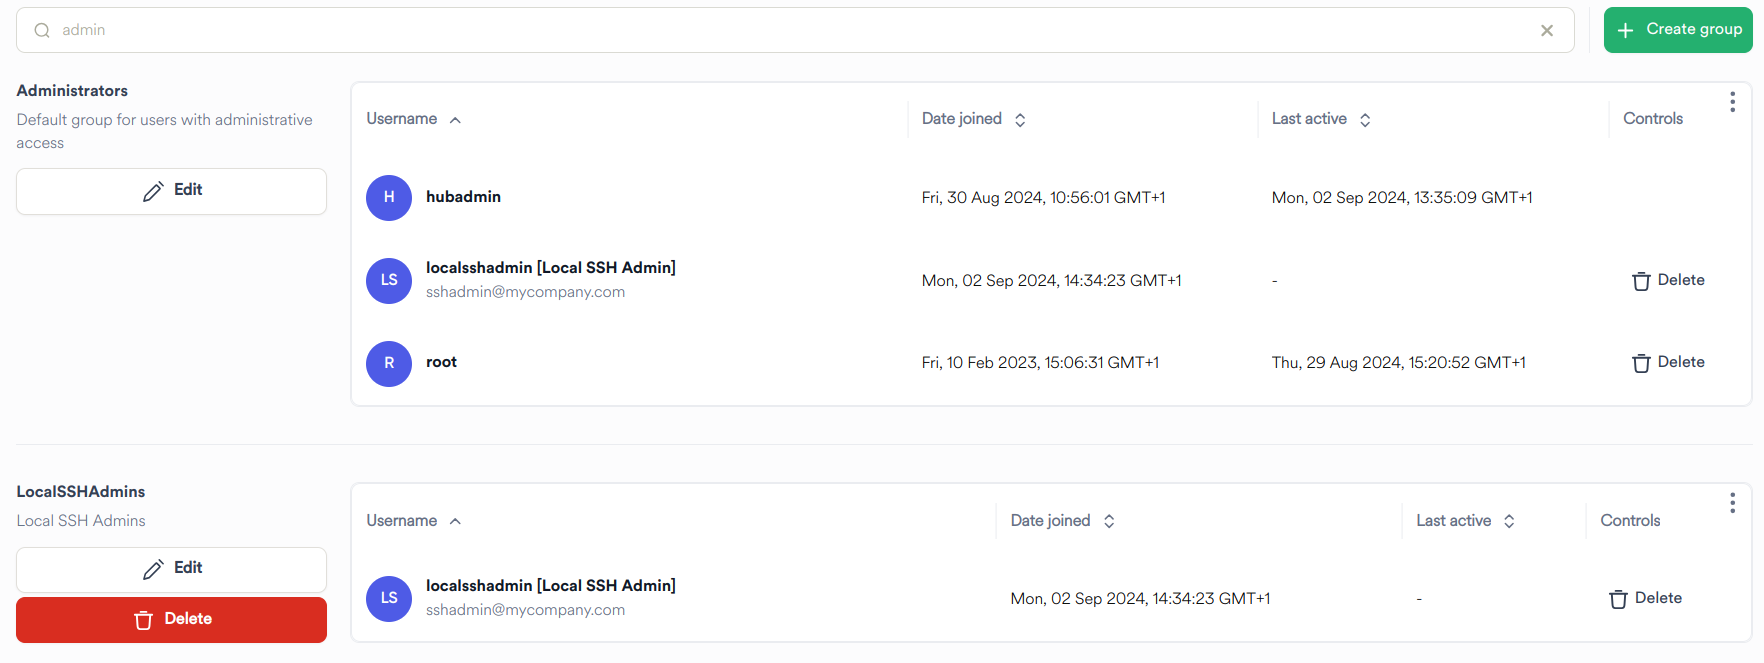
Group Members
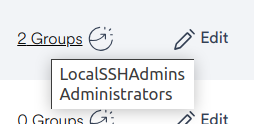
The Groups View will only display up to four members per group.

|
Click the View all members button to view all the members of the group |
Clicking the View all members button raises the Group Membership dialog.

To filter for a User within the list of group members enter a keyword in the Filter for...

|
Click the Remove button to remove a User from the Group |
Tip
If a User has been inadvertently removed, do not press the Save button, instead click off the Group members dialog to the main area of the screen.
Clicking the Save button at the bottom of the Group members dialog saves any changes made.
Creating Groups
Click the Create Group button to display a dialog to configure a new group.
Important
This function can only be performed by a Hub Administrator
Basic Group Options
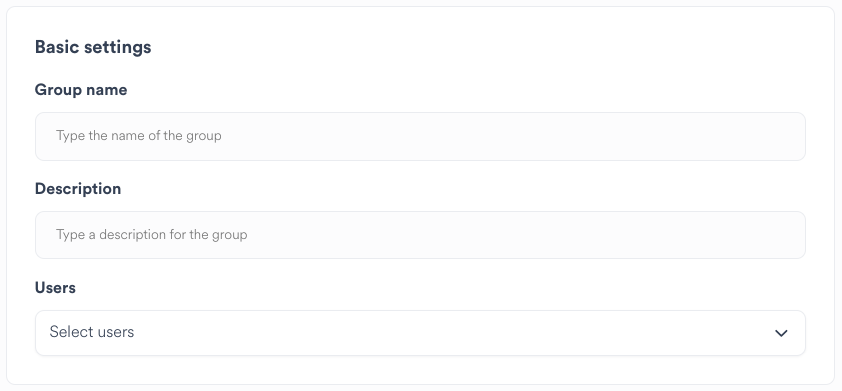
Enter a name for the group. The name is case-sensitive and may not contain whitespace
Enter a human-readable description for the group.
Select zero or more users to assign to the group
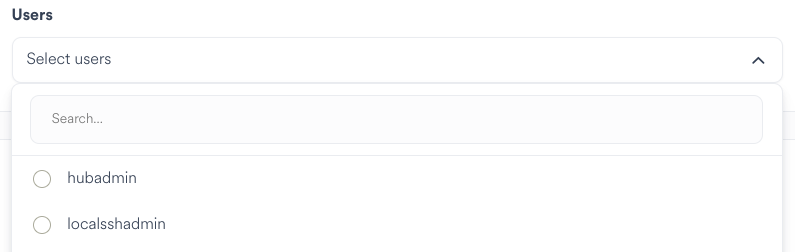
Click a username to select it
Click the username again to deselect it
Group Space Options
Select which Spaces can be viewed and administered by users in this group.
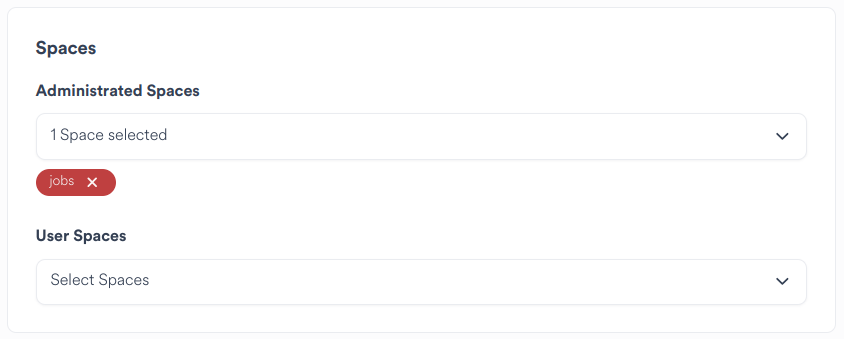
Administered Spaces can be viewed and browsed, and can have their settings changed
User Spaces can be viewed and browsed, but cannot have their settings changed
To filter for a Space within the list of spaces enter a keyword to filter for
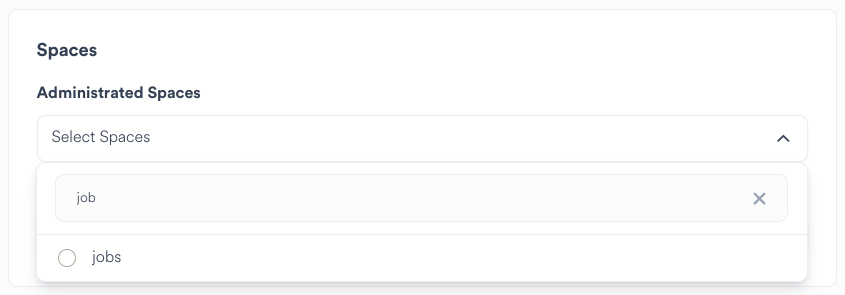
Selected spaces are shown as chips. Clicking the 'X' on a chip deselects the space.
Management Settings
Select whether users in the group have the right to administer Ngenea Hub
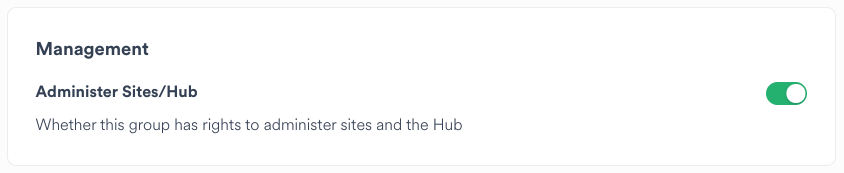
This includes the right to:
Configure site settings
Manage and run policies
Manage Groups and Users
View Alerts
Manage, browse, and import from Targets
Manage Global Settings
NAS Group Settings
Select whether the group should be created as a local NAS group.

This will create a unix group on PixStor for all sites.
Deleting Groups
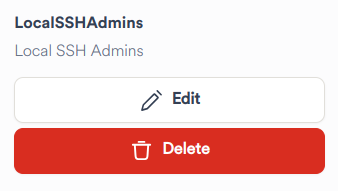
A confirmation dialog will be displayed
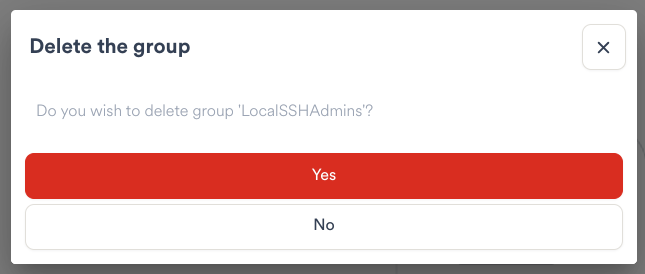
Click "No" to close the confirmation dialog. The group will not be deleted.
Click "Yes" to confirm and remove the group.
The default groups Administrators and Users cannot be deleted.
Viewing Users
To view the available Users managed in Hub, select the Users tab.
Important
User management can only be performed by a Hub Administrator.
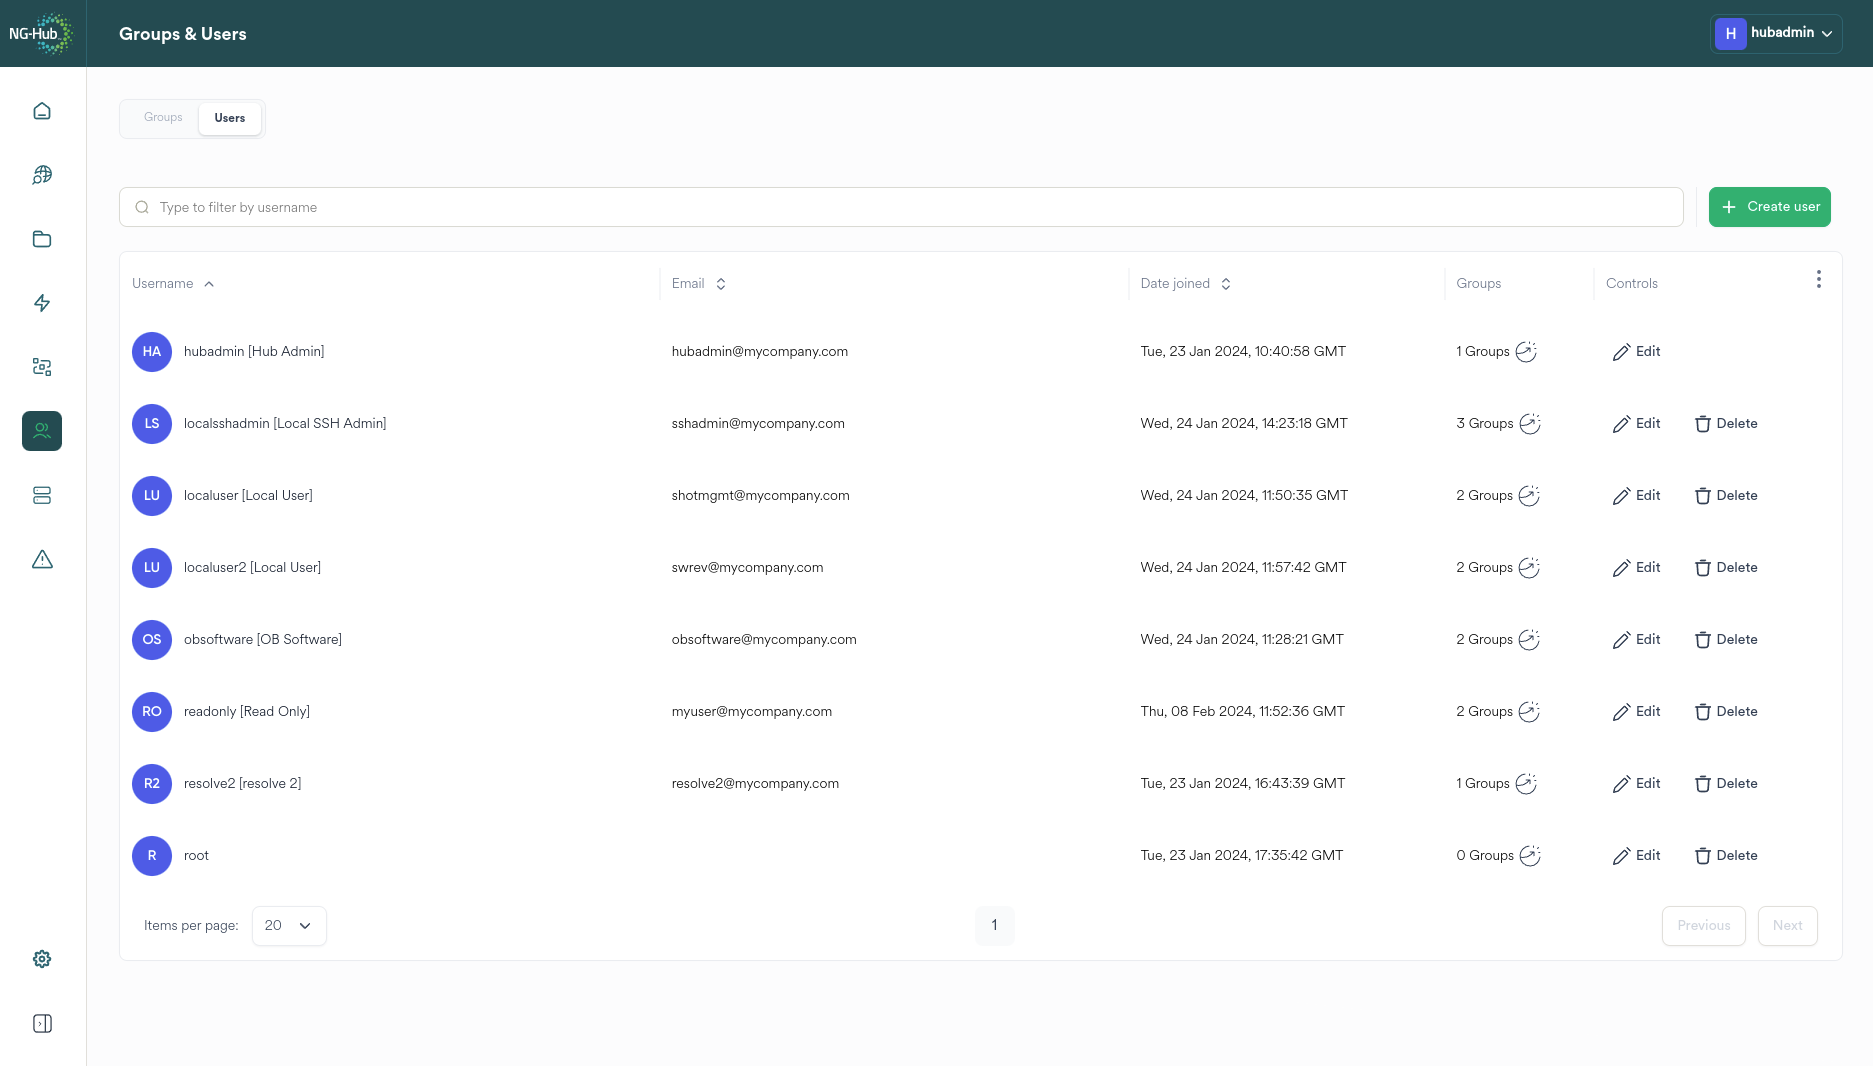
The Users tab provides the following actions:
User creation
User deletion
Group member management
|
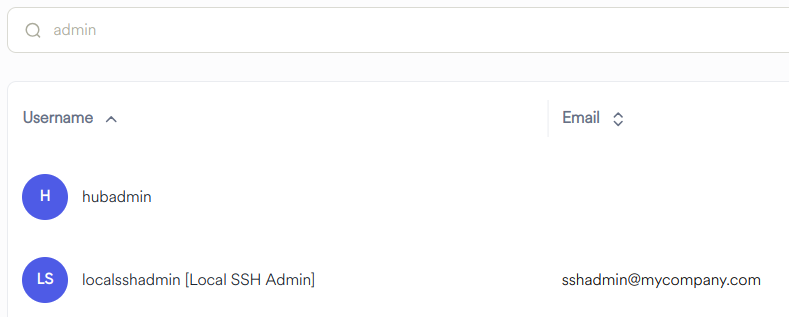
Hover over the Groups column to see what groups a user belongs to |
Filtering the Users View
To display Users matching keywords, enter the keywords in the filter bar.
Creating Users
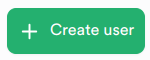
Click the Create User button to display a dialog to configure a new user.
Important
This function can only be performed by a Hub Administrator
Basic User Options

Enter a name for the user. The name is case-sensitive and may not contain whitespace
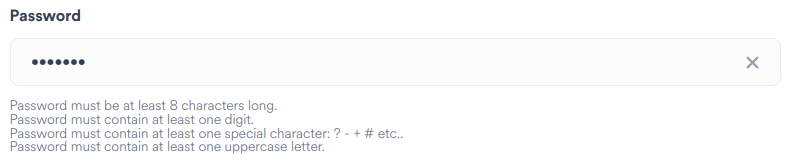
Enter a password
Enter First and Last name for the user
Enter an email address for the user
The password must meet all the requirements which are listed below the password box
Select zero or more groups to assign the user to
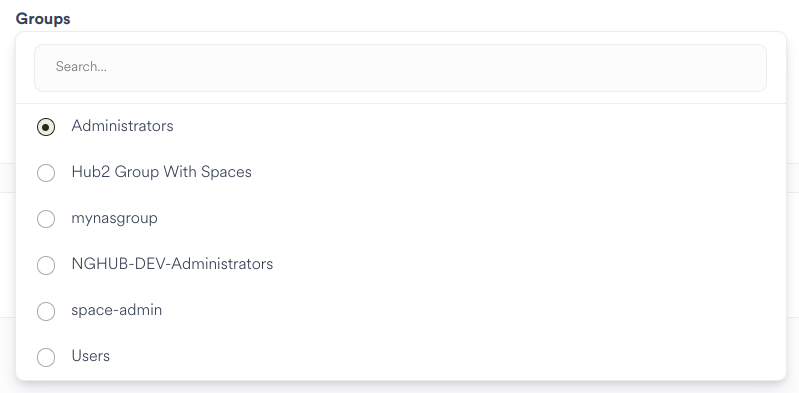
Click a group name to select it
Click the group name again to deselect it
NAS User Settings
Select whether the user should be created as a local NAS user.
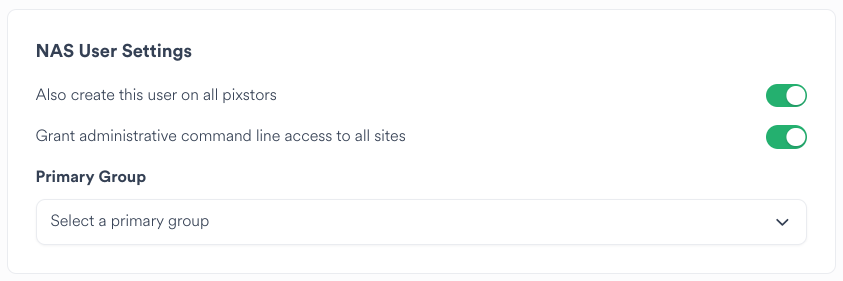
This will create a unix user on PixStor for all sites.
Select whether to grant command line access to the user. This means the user can connect to PixStor nodes via SSH.
Select the Primary Group for the user.
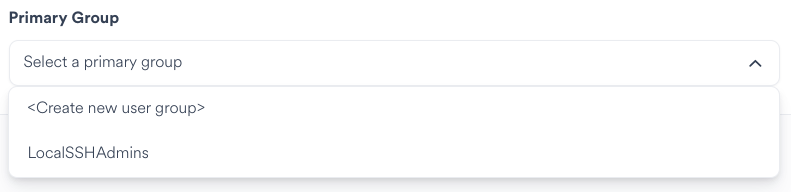
The dropdown will list any existing NAS groups. Alternatively, "Create a new user group" will create a new NAS-enabled Hub group with the same name as this user.
Deleting Users
To delete a user, click the delete "bin" icon in the row of that user.

A confirmation dialog will be displayed
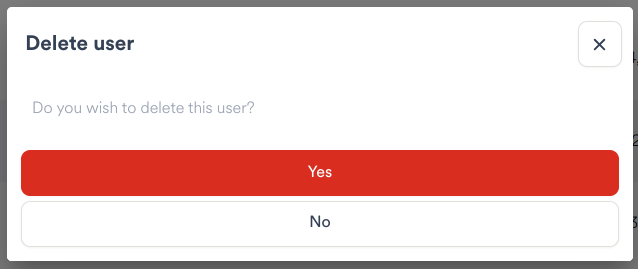
Click "No" to close the confirmation dialog. The user will not be deleted.
Click "Yes" to confirm and remove the user.
You cannot delete the user you are currently logged in with.
Restricting Users from Spaces
All users in the group Users have read-only access to all Spaces.
Should it be required to restrict a user from accessing specific spaces Spaces this can be achieved by:
Creating a new user group
Ensuring that only the specific spaces are assigned to the group
Add specific users to the group
Ensure the specific users are removed from the group Users
Caution
Adding a Space to a group's Administered Spaces and Used spaces will allow assigned Users to change the settings for a Space. If administrative operations are not required, do not assign Spaces to Administered Spaces - create an additional group to allow specific users to administrate specific spaces.