4.2.1. GCP Cloud Function
In the GCP console menu under Serverless, select Cloud Functions
Choose Create Function

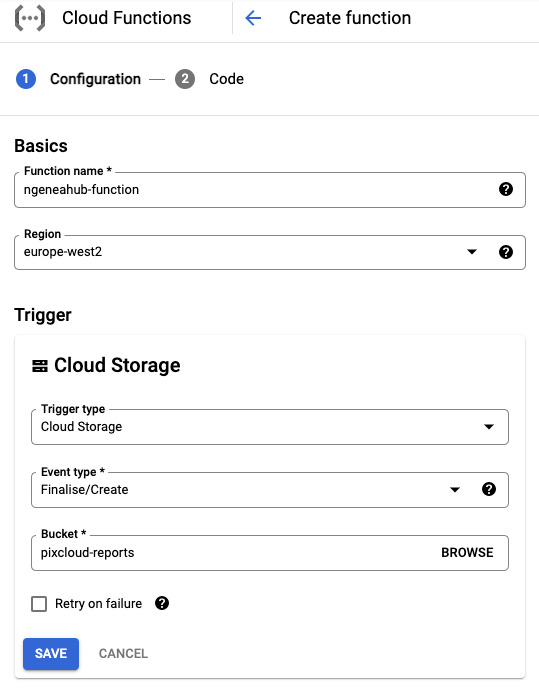
In the first Configuration page:
Give the function a name
Select a region to run from. Usually best to be in the same region as the bucket we’ll be using
Under trigger select Cloud Storage type
And Finalise/Create for the event type
Select the bucket to monitor
Then press Save
If you wish to create a new service account for this function, use the following gcloud command to create a new service account and assign it the role storage.objectViewer
PROJECT_ID='GCP-PROJECT-1'
SERVICE_ACCOUNT_ID='ngeneahub-function'
ROLE_NAME='roles/storage.objectViewer'

gcloud iam service-accounts create $SERVICE_ACCOUNT_ID \
    --description='A service account to give the {{ brand_name }} function read access to GCS buckets' \
    --display-name=$SERVICE_ACCOUNT_ID

gcloud projects add-iam-policy-binding $PROJECT_ID \
    --member="serviceAccount:$SERVICE_ACCOUNT_ID@$PROJECT_ID.iam.gserviceaccount.com" \
    --role=$ROLE_NAME
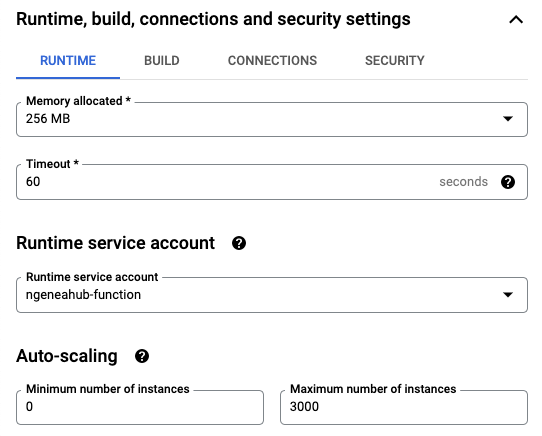
Open up the RUNTIME, BUILD AND CONNECTIONS SETTINGS section
Under the RUNTIME tab at the bottom, select a Runtime service account that has the following permissions as a minimum (or the newly created service account from above):
storage.objectViewer
Select Next to continue
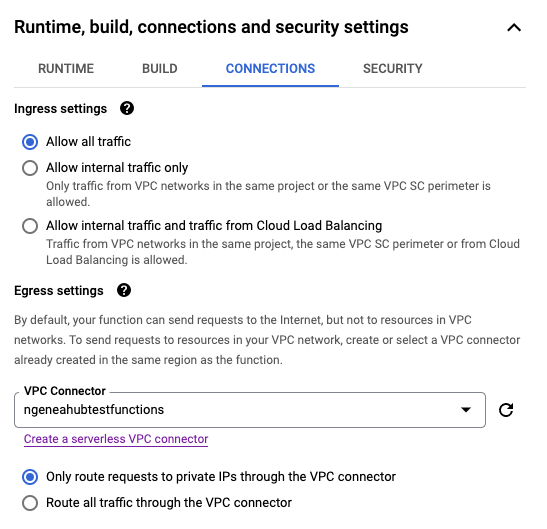
If the Ngenea Hub doesn’t have an external IP to connect to, you’ll need a VPC Connector for the function to be able to access the Ngenea Hub private IP.
The creation of the VPC Connector is out of scope of these docs.
To select an existing VPC Connector, under the RUNTIME, BUILD AND CONNECTIONS SETTINGS section, select Connections.
From the VPC Connector drop down menu, select an existing connector and check the Only route requests to private IPs through the VPC connector radiobox.
In the Code config section
Change the Runtime to Python 3.9
The Entry Point is main
Select ZIP upload in the Source code
Choose the GCP zip previously downloaded from the ../../download page
Select a Stage bucket for use while deploying. You can use the bucket we’ll be monitoring
Select Next to build the Cloud Function
Once built you need to edit the default config.json file
Choose your new function and click EDIT
Select Next to get to the code edit section
Select the config.json file to edit
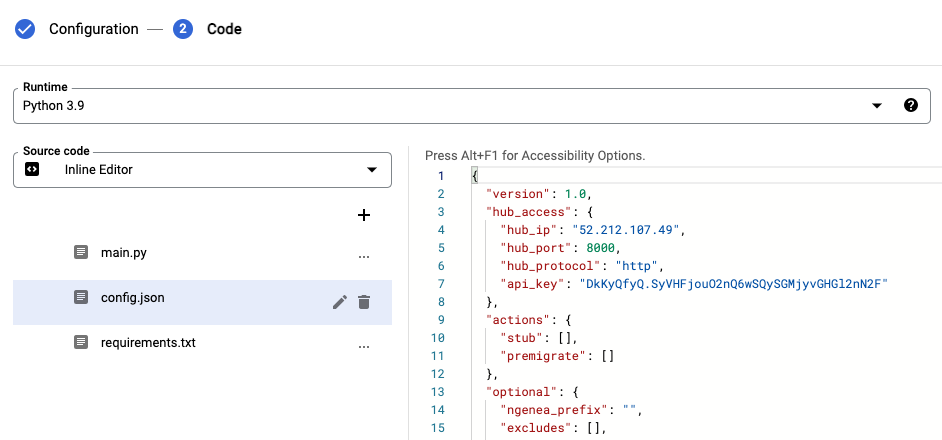
Edit the config file based on the docs from Cloud Functions
Select Deploy to save the changes. This can take 1-2 mins to update